Paddle
Paddle is a popular platform for selling software and other digital goods. Here's a step-by-step guide to help you integrate Paddle with Mixpost Enterprise and get started with processing payments:
1. Sign up for a Paddle Account
- Production: If you haven’t already, visit Paddle's website and sign up for an account.
- Sandbox (only for testing): If you haven’t already, visit Paddle's sandbox website and sign up for an account.
We recommend integrating a Sandbox account first and testing the integration. If everything is fine, you can switch to a production Paddle account.
2. Access the Paddle Dashboard
Once you've registered, log in to your Paddle account and access the Dashboard. This will be your primary interface for managing payments.
3. Get Your API Keys
From the Dashboard:
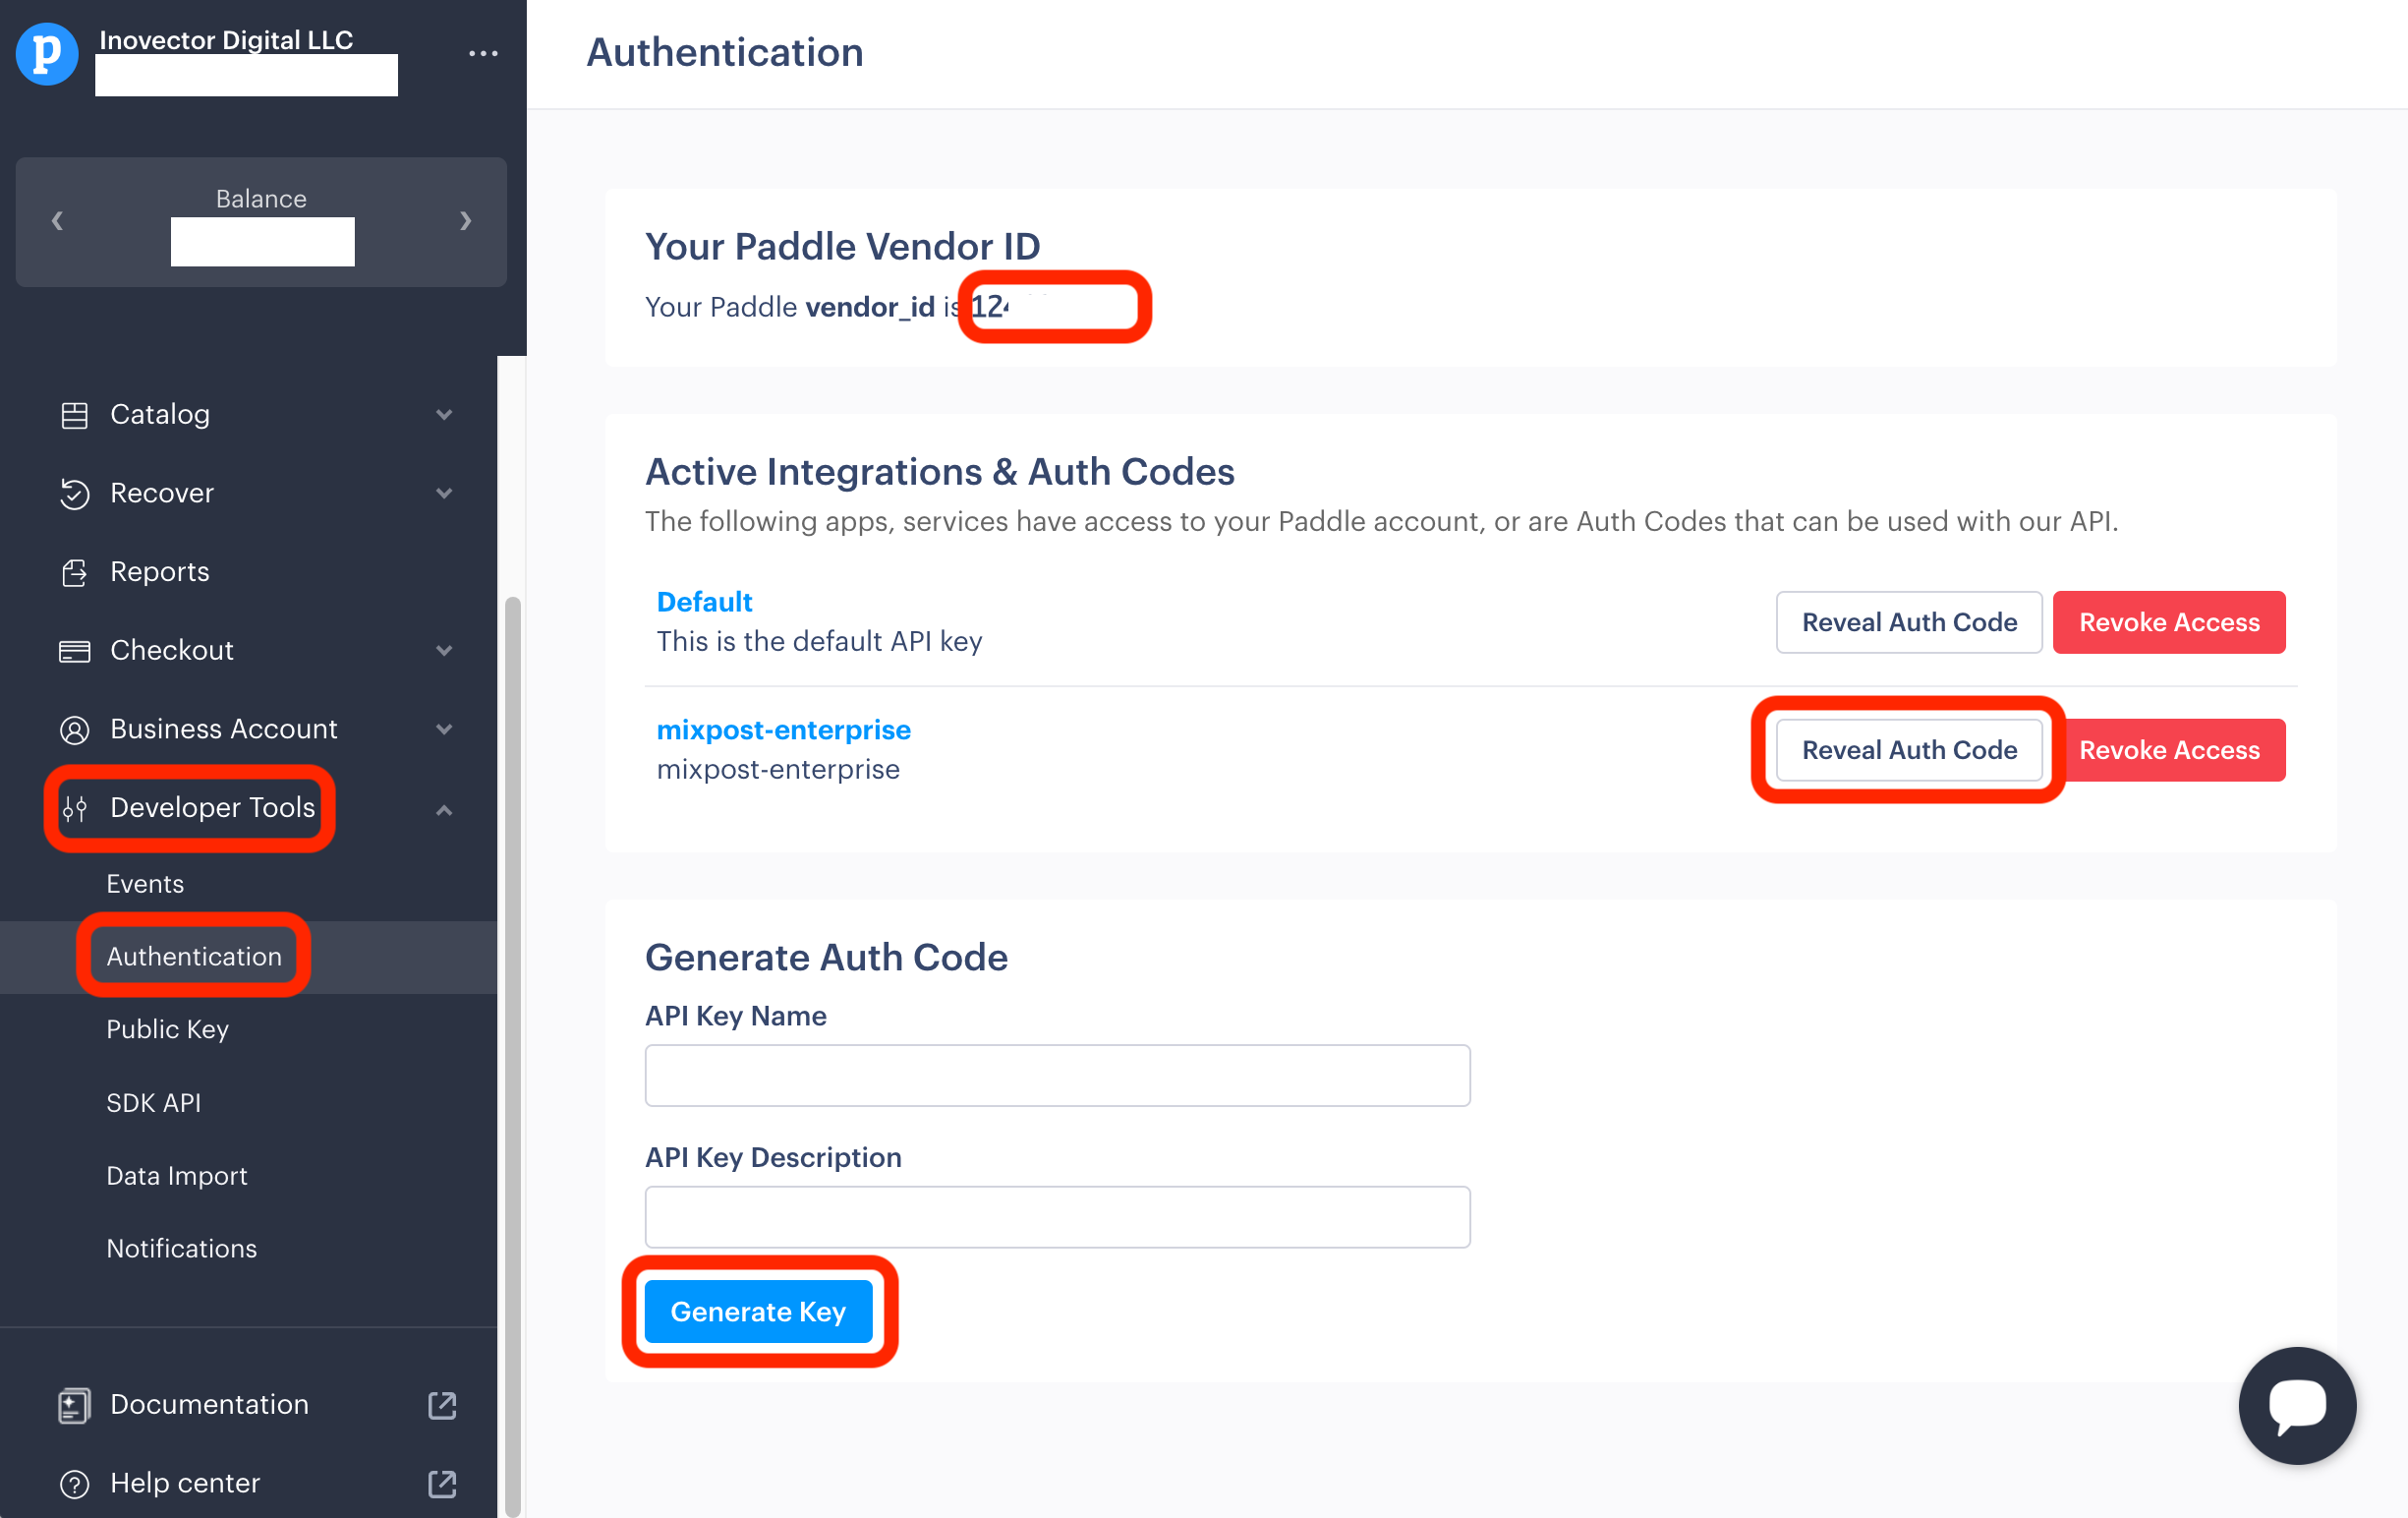
- Go to the “Developer Tools” section.
- Click on "Authentication".
- You'll see Your Paddle Vendor ID. Copy it.
- Scroll down to the "Generate Auth Code" section and generate one.
- You will see your generated key and the "Reveal Auth Code" button. Click on it and copy the key.
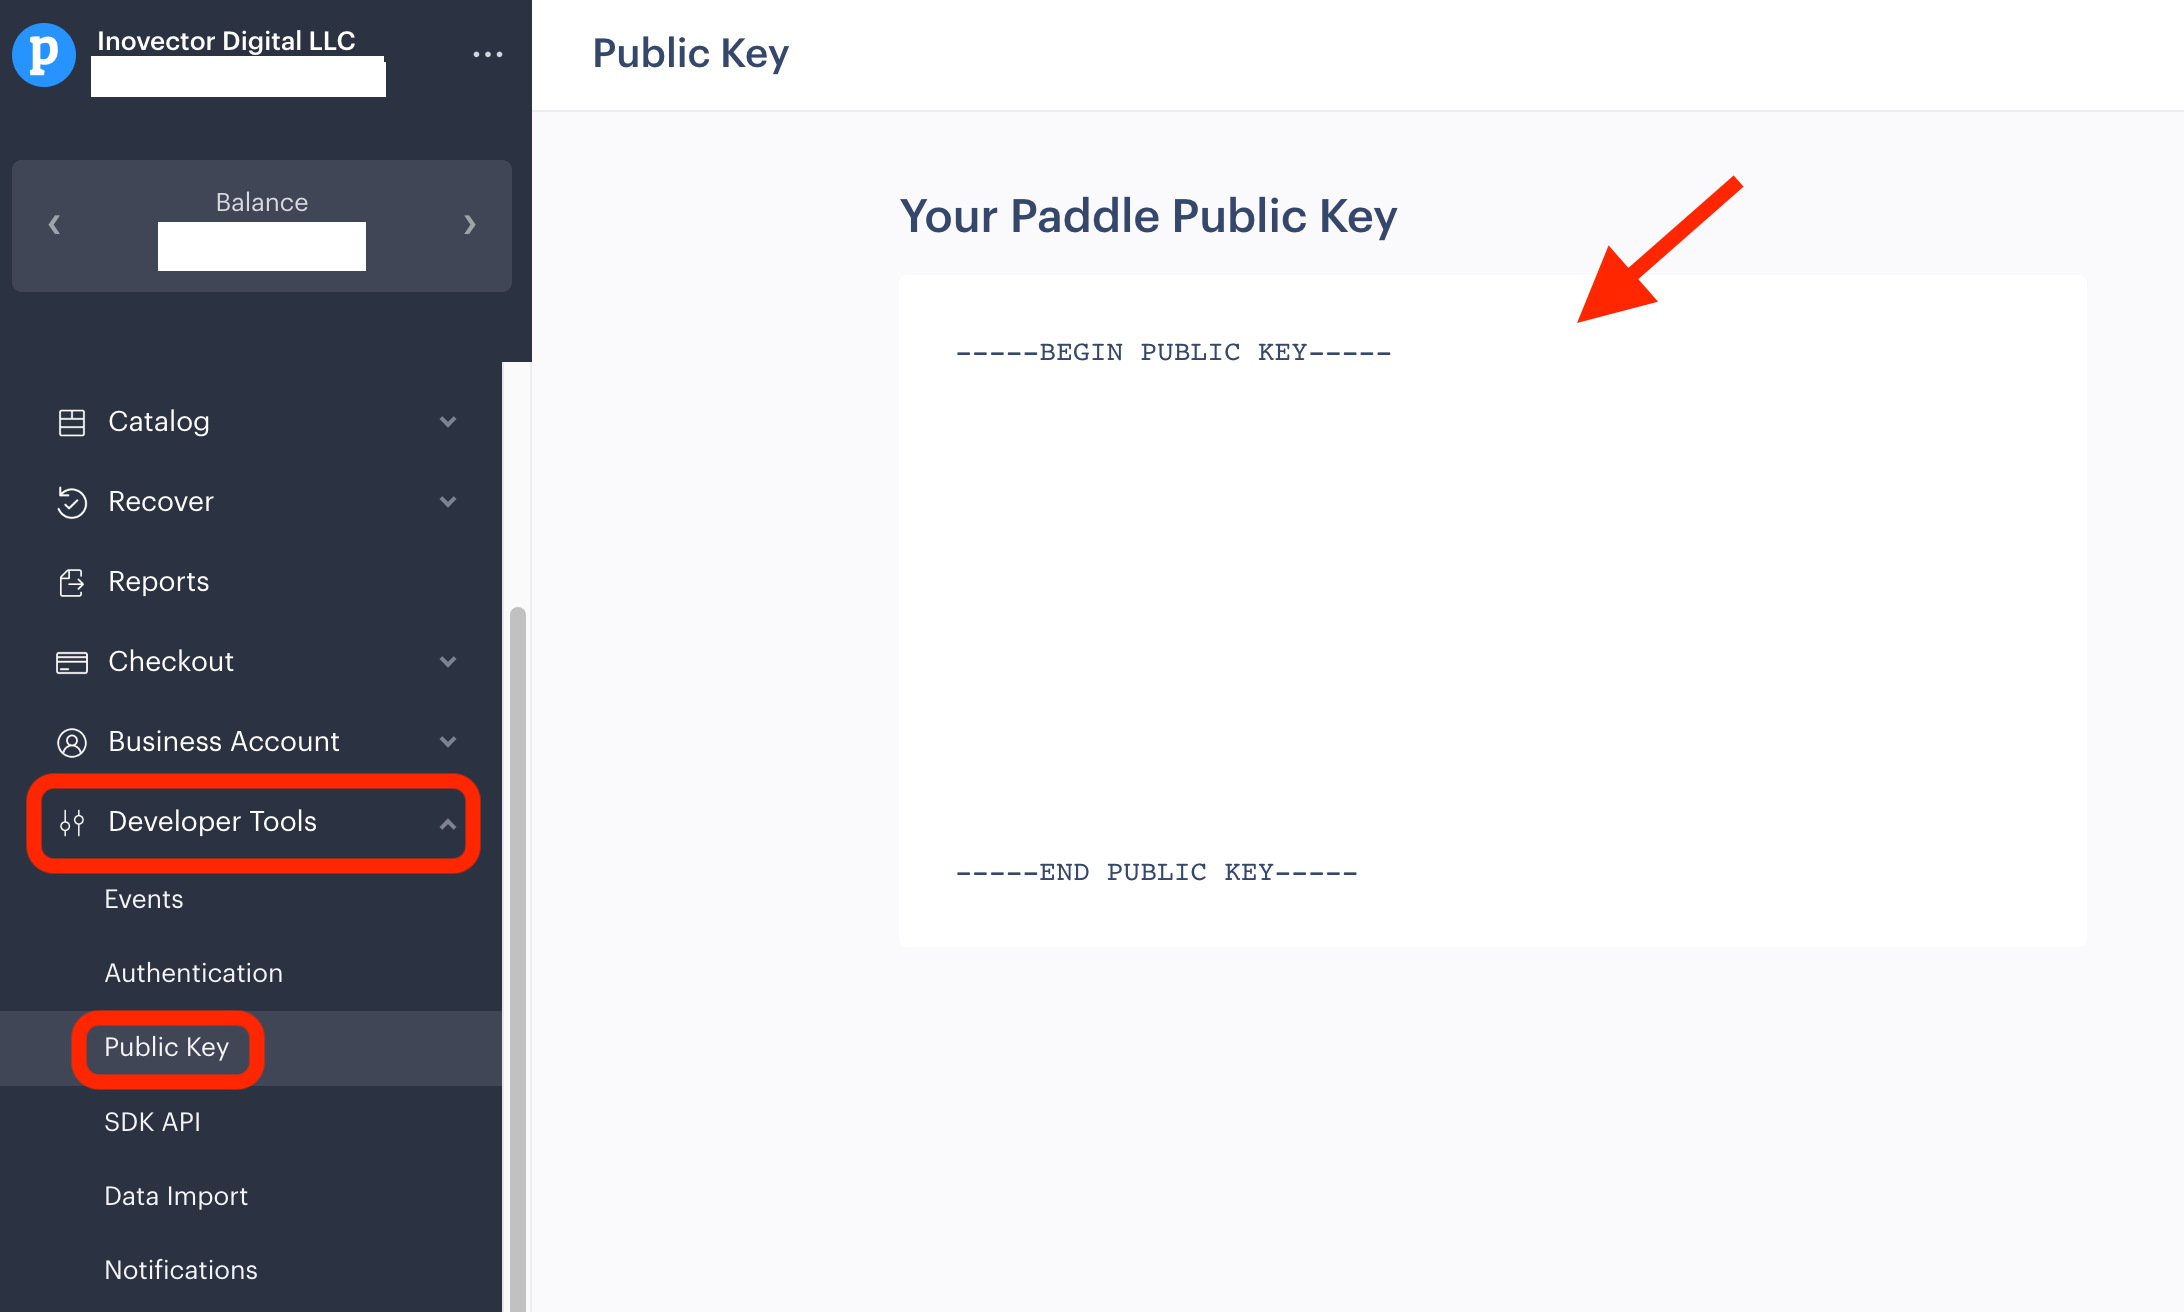
- Go to the “Public Key” page (under the Developer Tools menu) and copy the entire Public Key
Note: Always keep your Secret Key confidential.
4. Integrate API Keys into Mixpost Enterprise
Once you have your API keys:
- Open the Enterprise Console from the user menu.
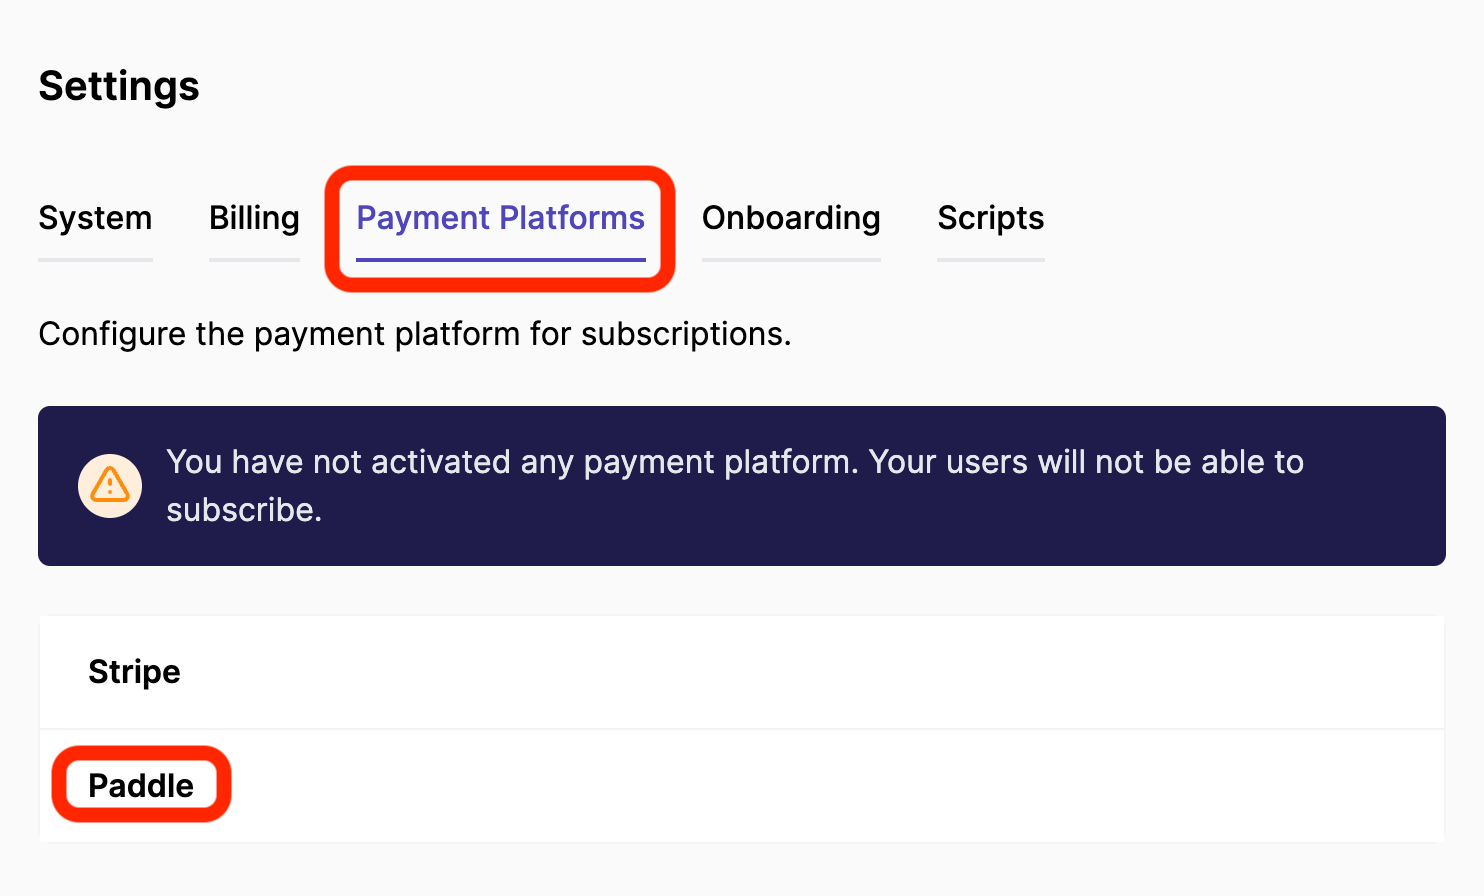
- Navigate to Settings ->
- Click on Paddle
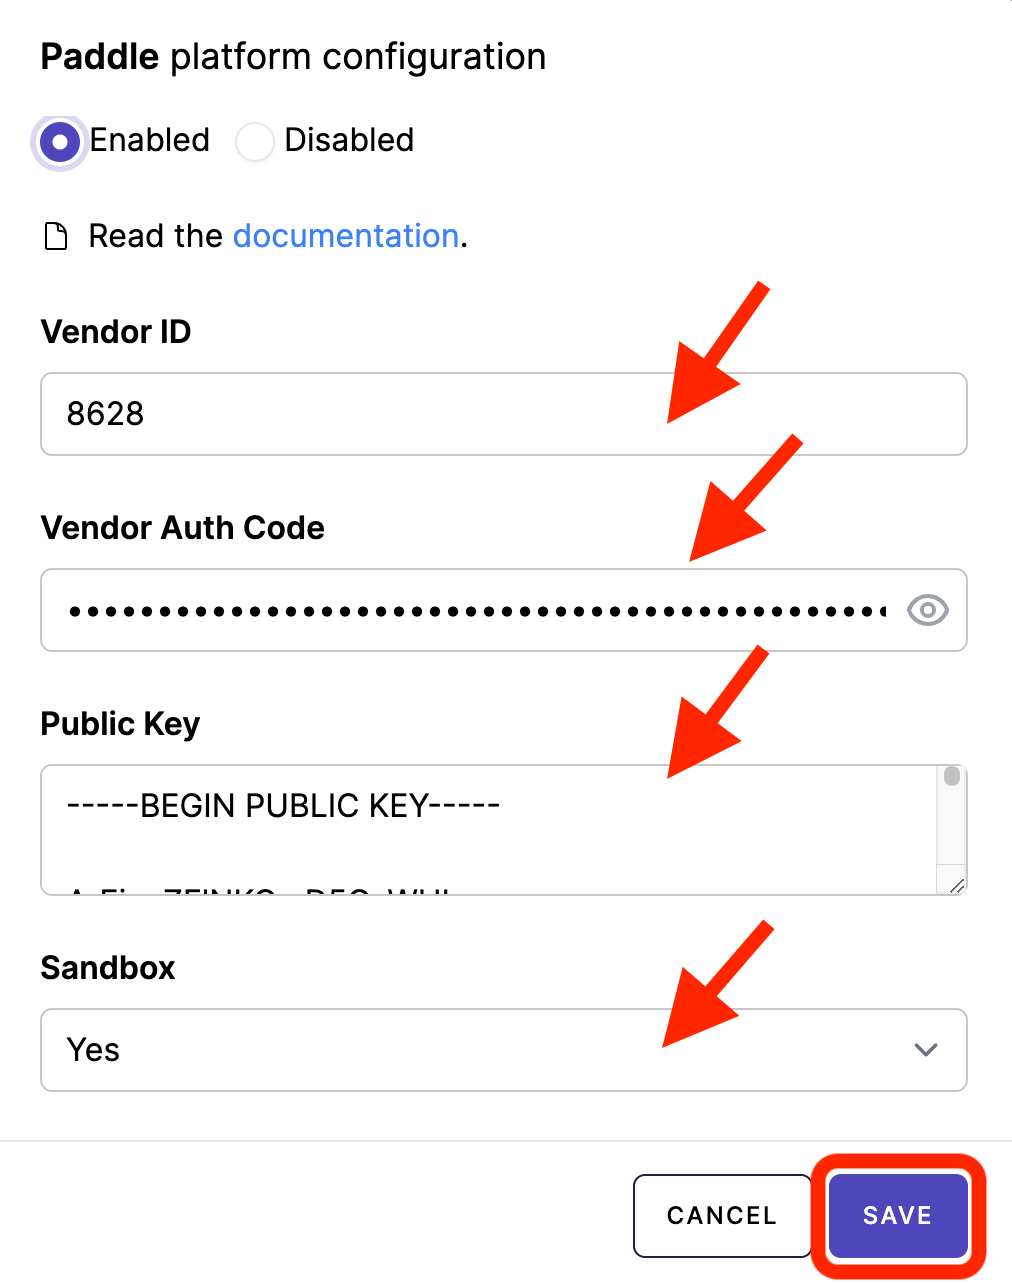
- Choose "Enabled" radio input
- Input your Vendor ID, Vendor Auth Code, and Public Key.
- Select Sandbox (Yes) If you are in a Sandbox Paddle account.
- Save
5. Set Up Webhooks
Webhooks allow Paddle to communicate with Mixpost Enterprise when certain events happen (e.g., a successful payment, subscription changes, etc.).
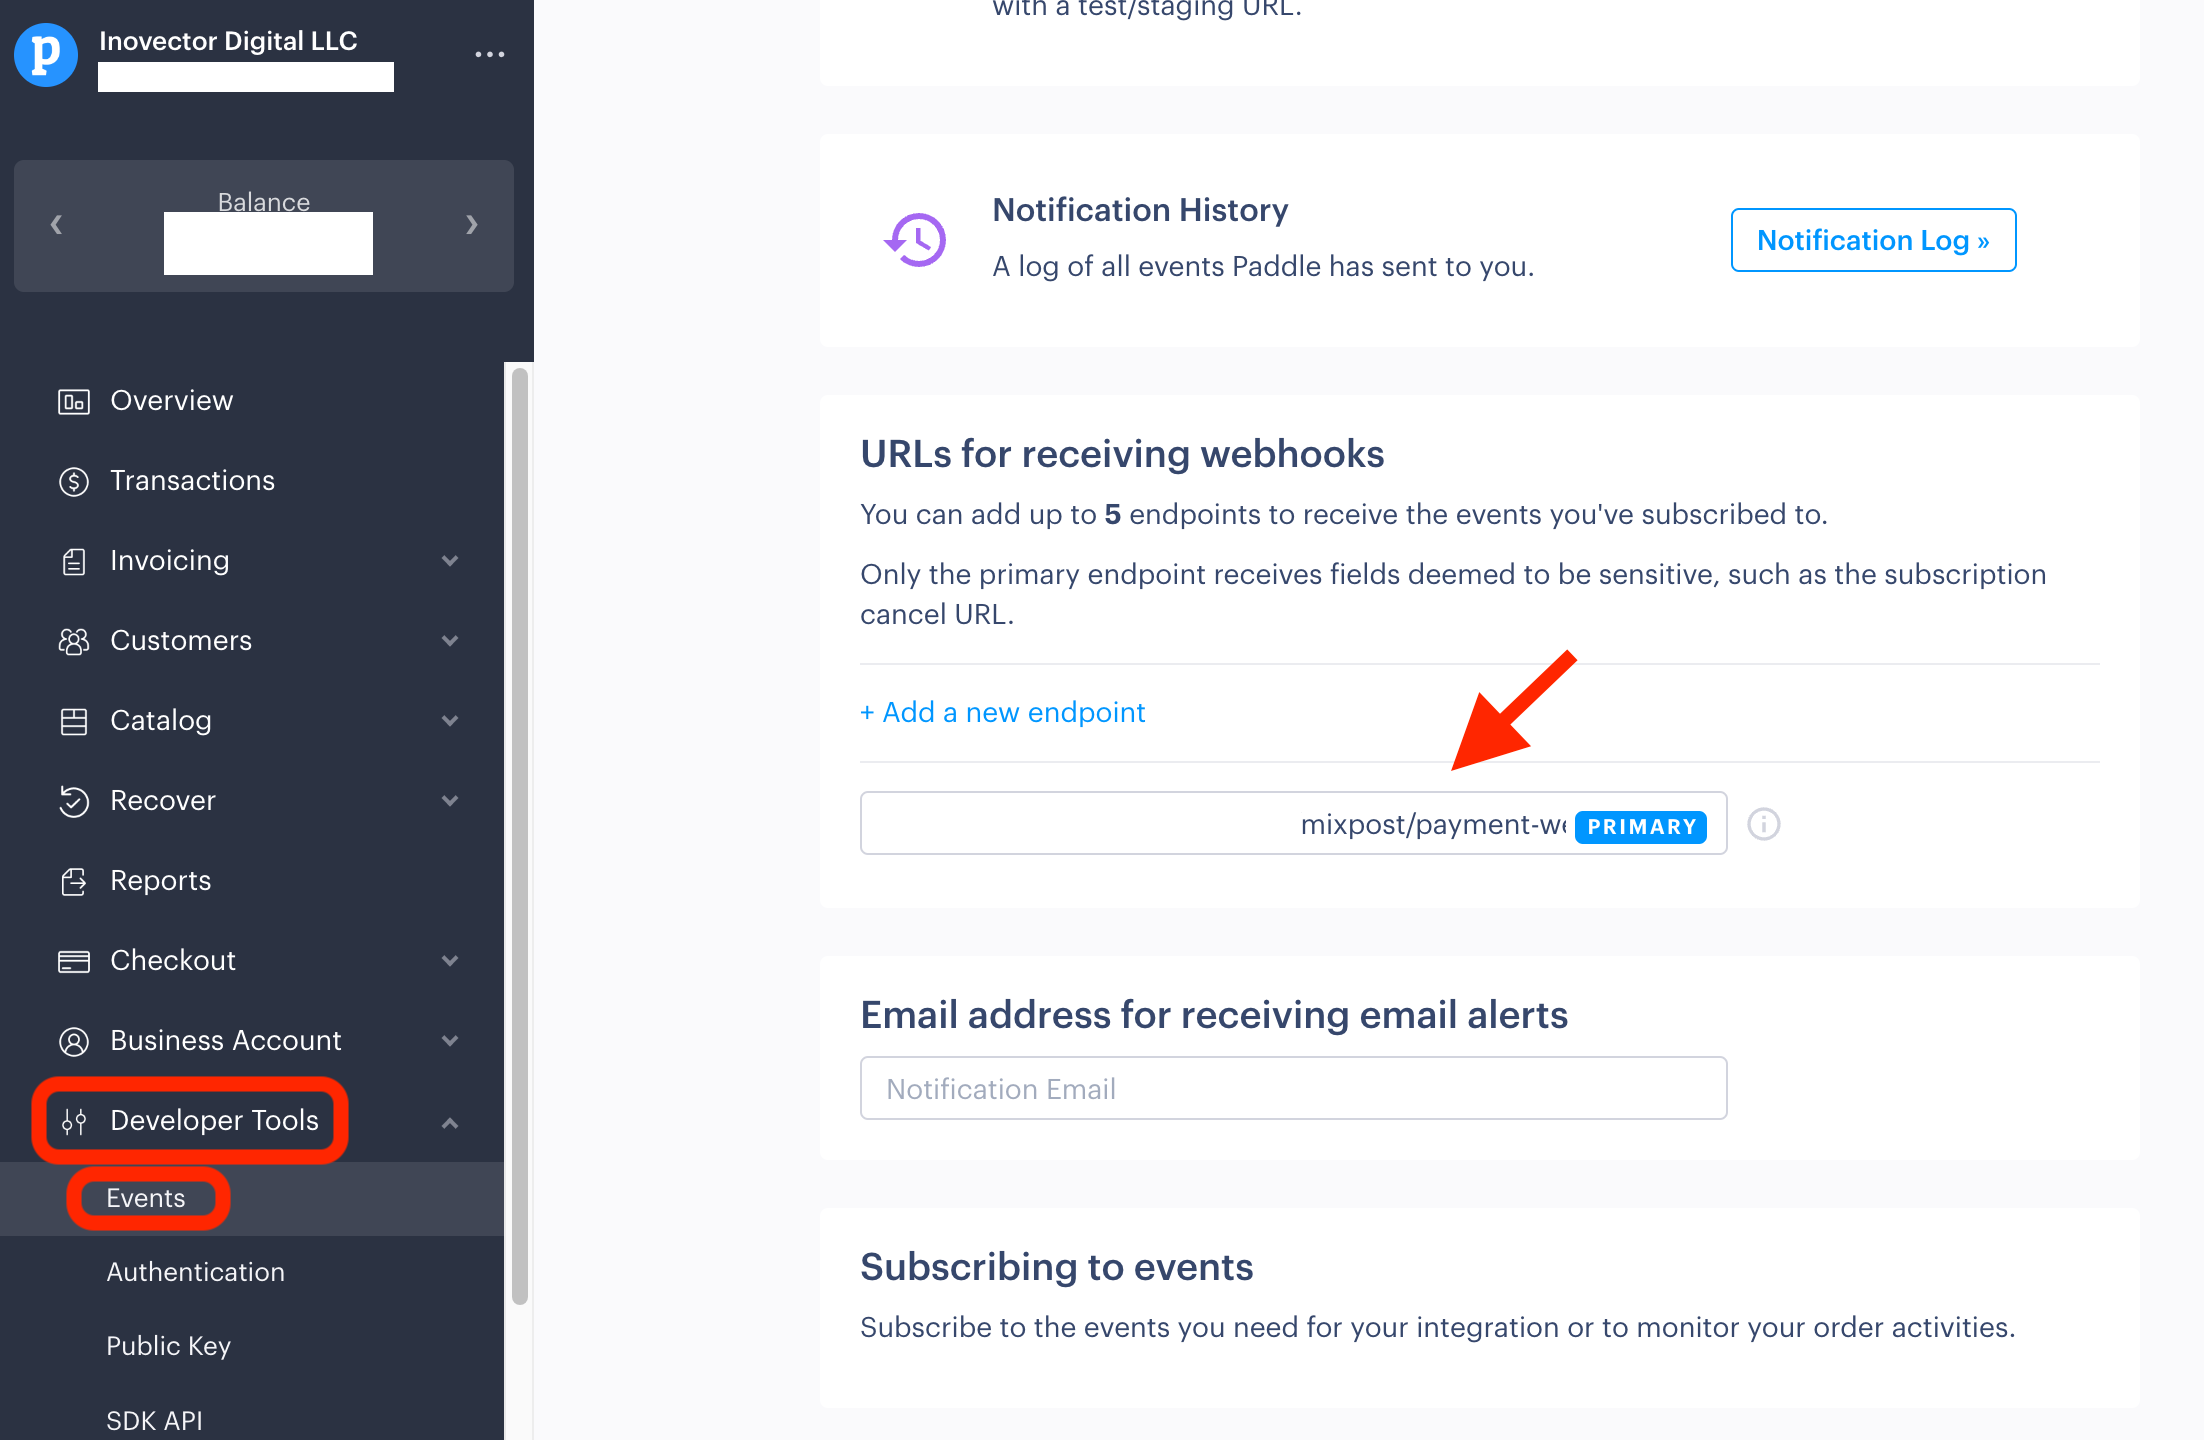
- In your Paddle Dashboard, navigate to the "Developers" section.
- Click on "Events".
- Scroll down to the "URLs for receiving webhooks" section.
- Input Endpoint URL "https://your-app-url.com/mixpost/payment-webhook".
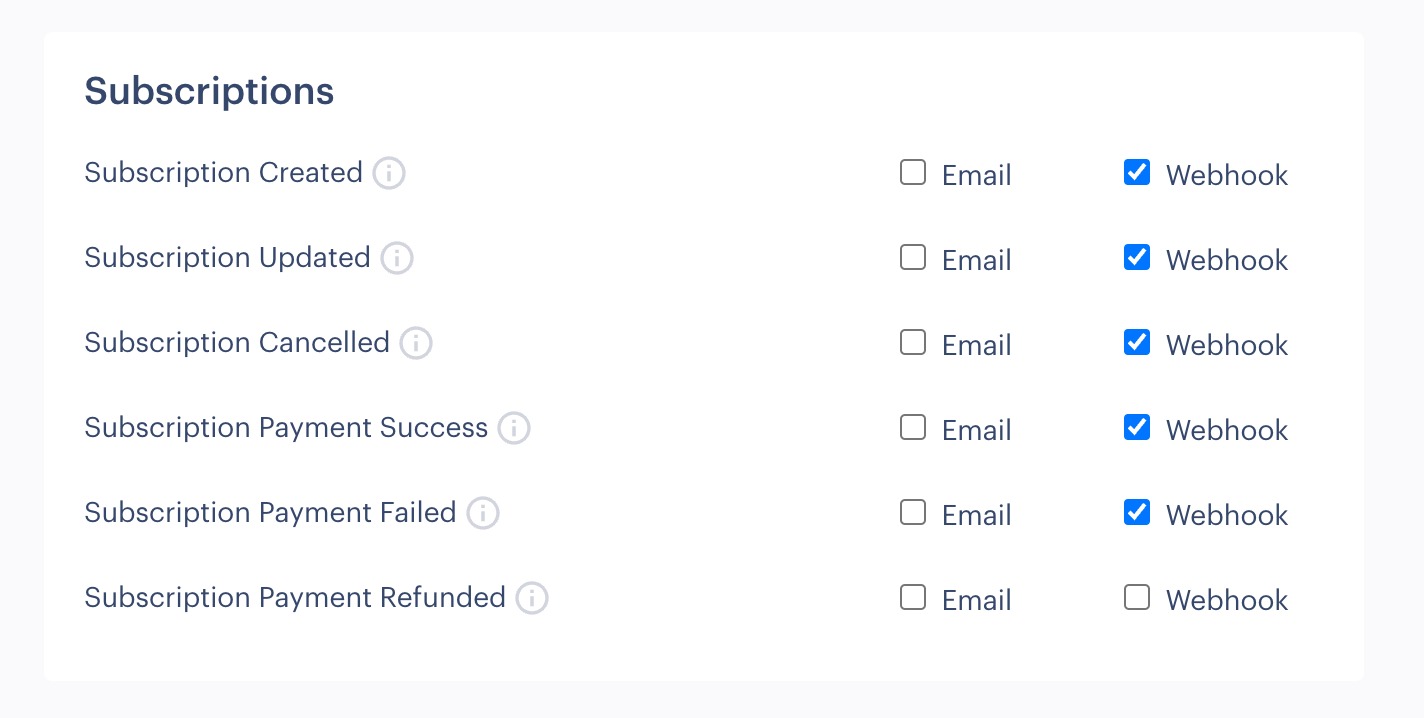
- Scroll down to the event's configuration and select Webhook for the following events:
- Subscription Created
- Subscription Updated
- Subscription Cancelled
- Subscription Payment Success
- Subscription Payment Failed
- Save Changes
6. Add pricing plans
We are adding all the necessary pricing plans in both Paddle and Mixpost Enterprise.
- In your Paddle Dashboard, navigate to the "Catalog".
- Click on "Subscription Plans"
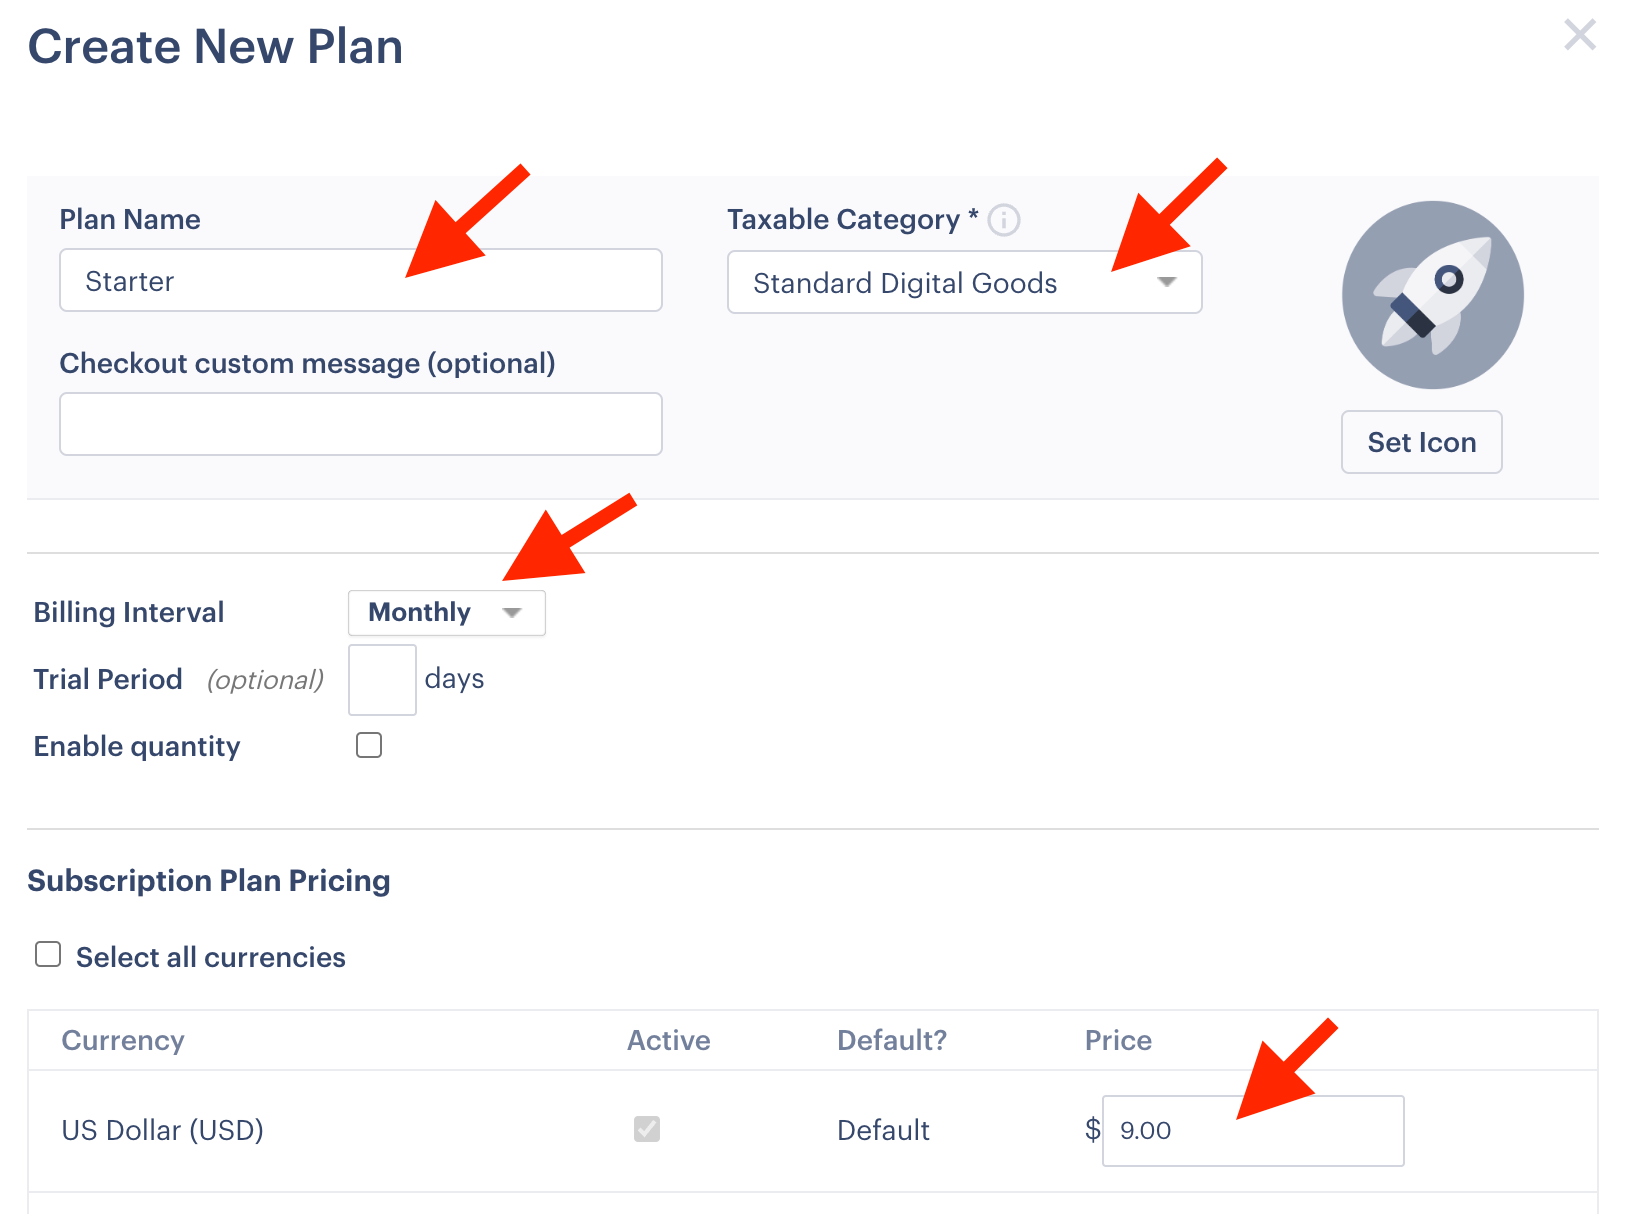
- Here, you'll see the “+ New Plan” button. Click on it.
- Give a plan name, for example: "Starter"
- Taxable Category, select "Standard Digital Goods"
- Select "Billing interval". Mixpost only accepts Monthly or Yearly billing periods.
- Scroll down to the "Subscription Plan Pricing" section
- Select the "Standard pricing" model.
- Input the default plan price, for example: "$9.00"
- Save plan
If you want to support Monthly and Yearly billing periods for plans, you should add the same Plan twice, first select "Billing Interval" under "Monthly" and then select "Yearly".

After the plans have been created in your Paddle dashboard. You should copy the Plan ID of each subscription plan to your created plans in the Mixpost Dashboard. See the instructions.
7. Test the Integration
- Try to register a user and subscribe to a plan.
- Use Paddle's test card numbers to make sure the subscription is done correctly.
8. Go Live
If you have integrated with your Paddle's sandbox account, and you're confident in the integration:
- Repeat the integration process for your Production Paddle account.
- Ensure you've added any necessary pricing plans in both Paddle and your Mixpost Enterprise console.
- Start onboarding users and generating revenue!