Create Subscription Plans
With Mixpost Enterprise, setting up your own subscription plans is super easy. You can easily pick and choose which features to offer and even set limits for different plan levels. It's all about giving you the flexibility to create the perfect plan for your customers. From the Mixpost billing portal, your customers can subscribe to plans, update the subscription plan, update their payment information, and download their invoices.
Integrate a payment platform and create pricing plans
Mixpost Enterprise supports payment platforms like Stripe and Paddle. If you have not yet integrated a payment platform, follow the integration instructions.
Create pricing plans in Mixpost Enterprise
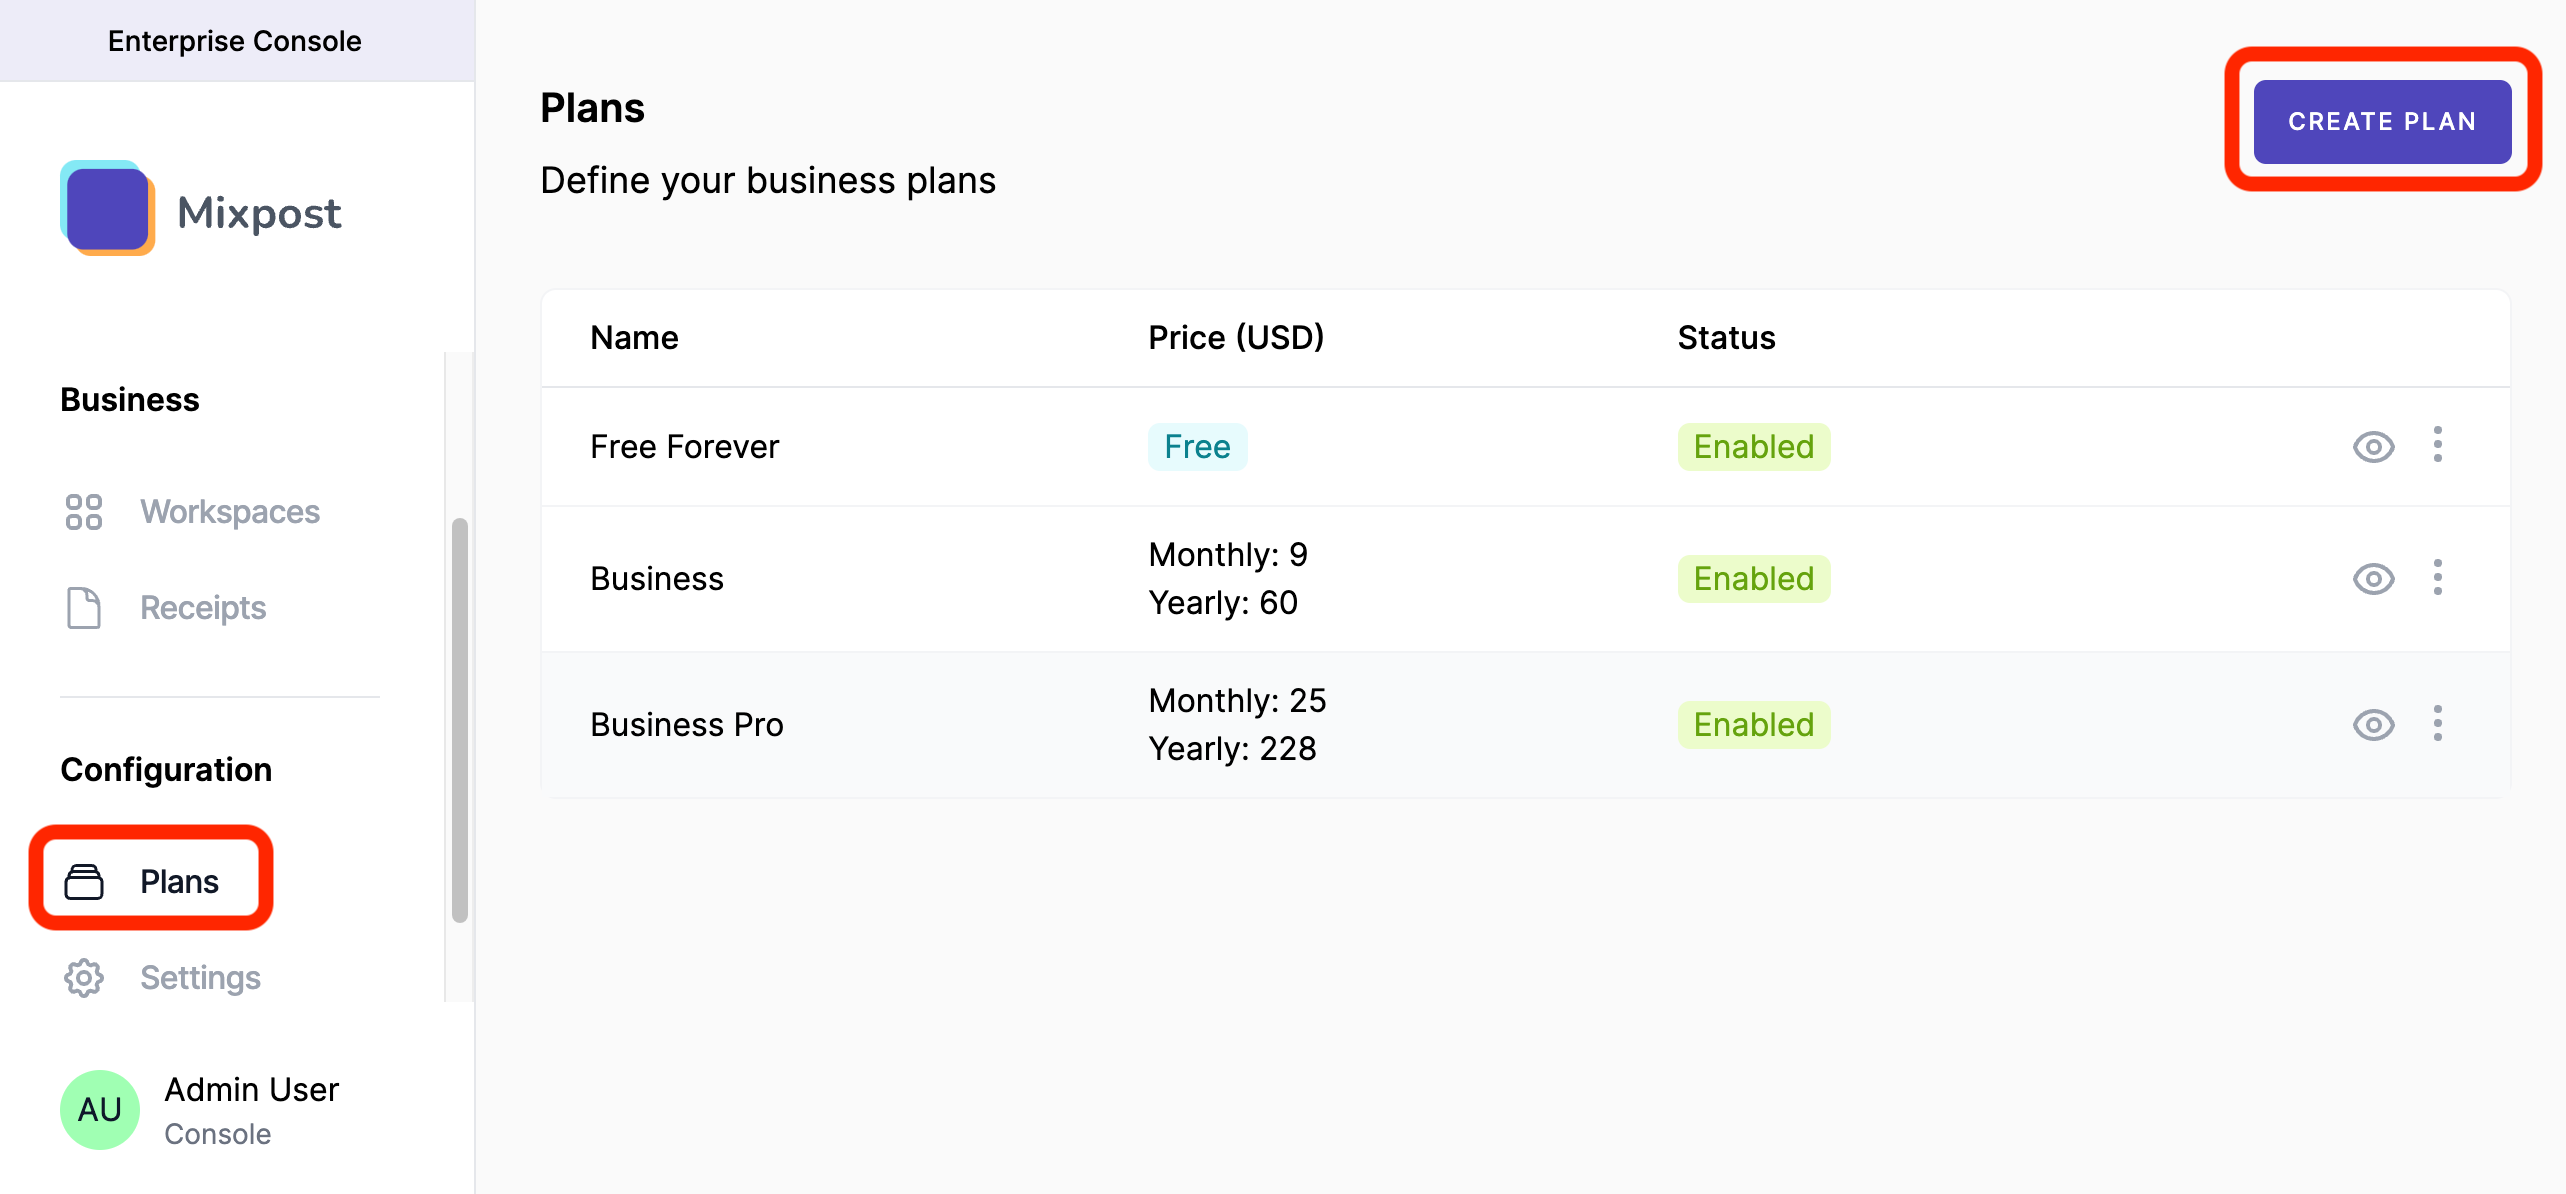
- Open the Enterprise Console from the user menu.
- Navigate to "Plans"
- Here, you'll see the "Create Plan" button. Click on it.
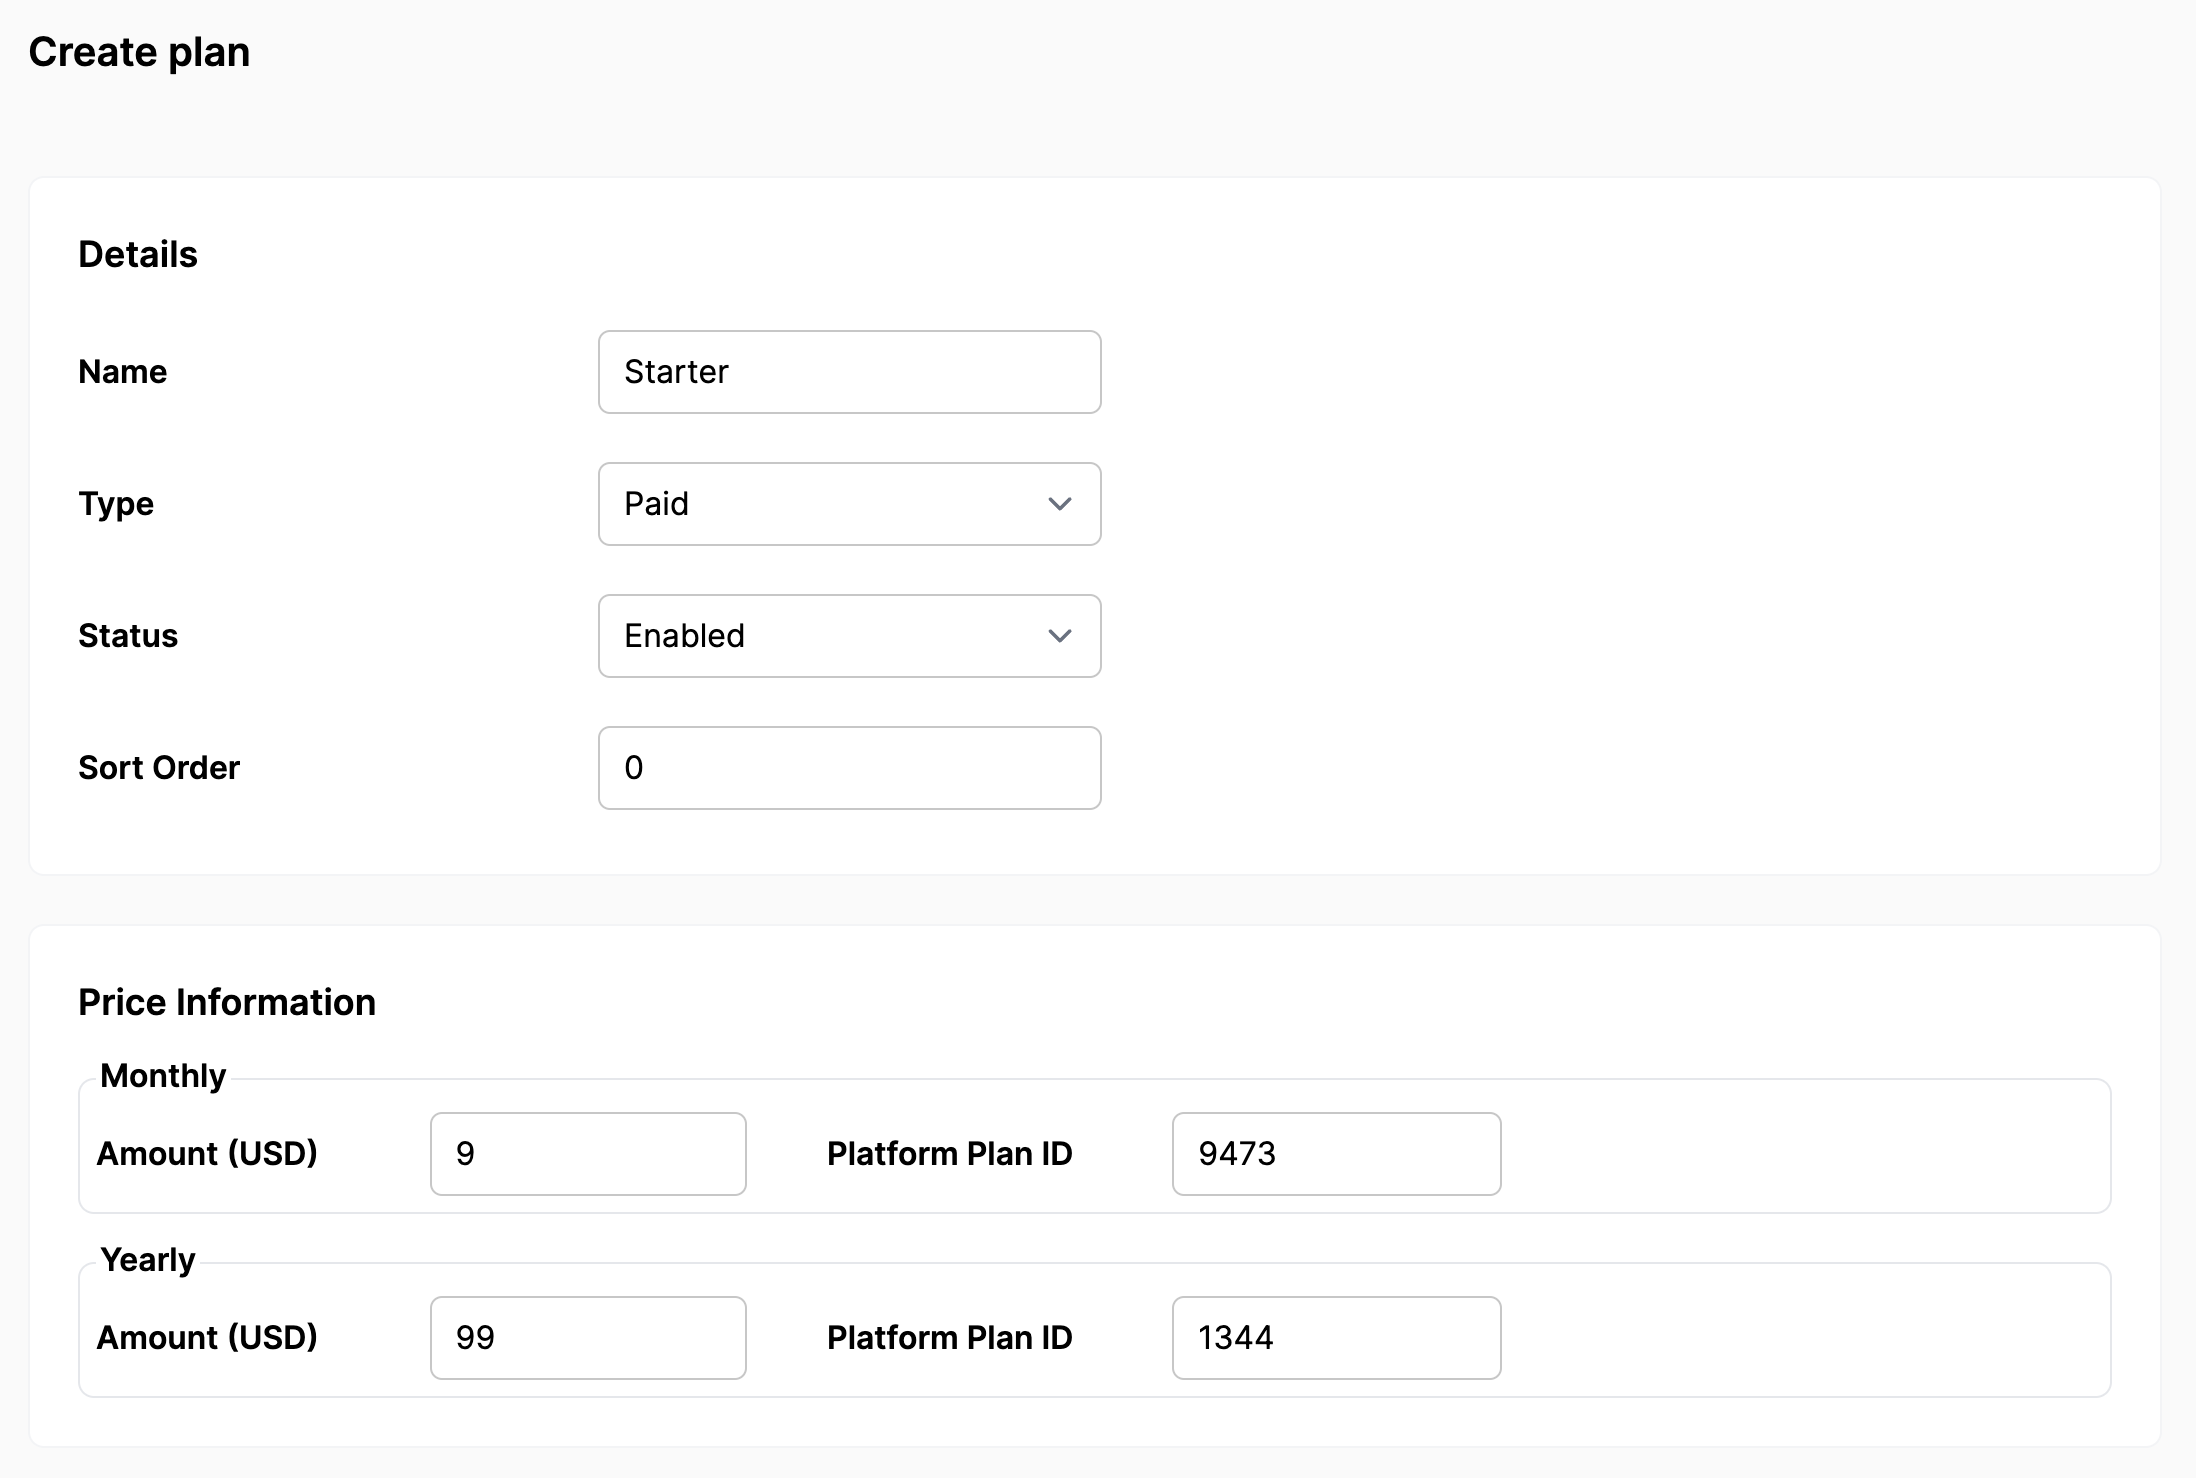
- Give a plan name, for example: "Starter"
- Select "Type" of the plan:
- Free - That says the plan is free. You can only have one free plan.
- Paid - That says it requires payment processing. Here you need to input the Price information:
- Monthly
- Amount - the price of your monthly plan
- Platform Plan ID - the ID of your monthly plan created in the payment platform.
- Yearly
- Amount - the price of your yearly plan
- Platform Plan ID - the ID of your yearly plan created in the payment platform.
- Monthly
- Select the status "Enabled"
- Input "Sort order". For example: Starter (1), Advanced (2), Business (3), etc.
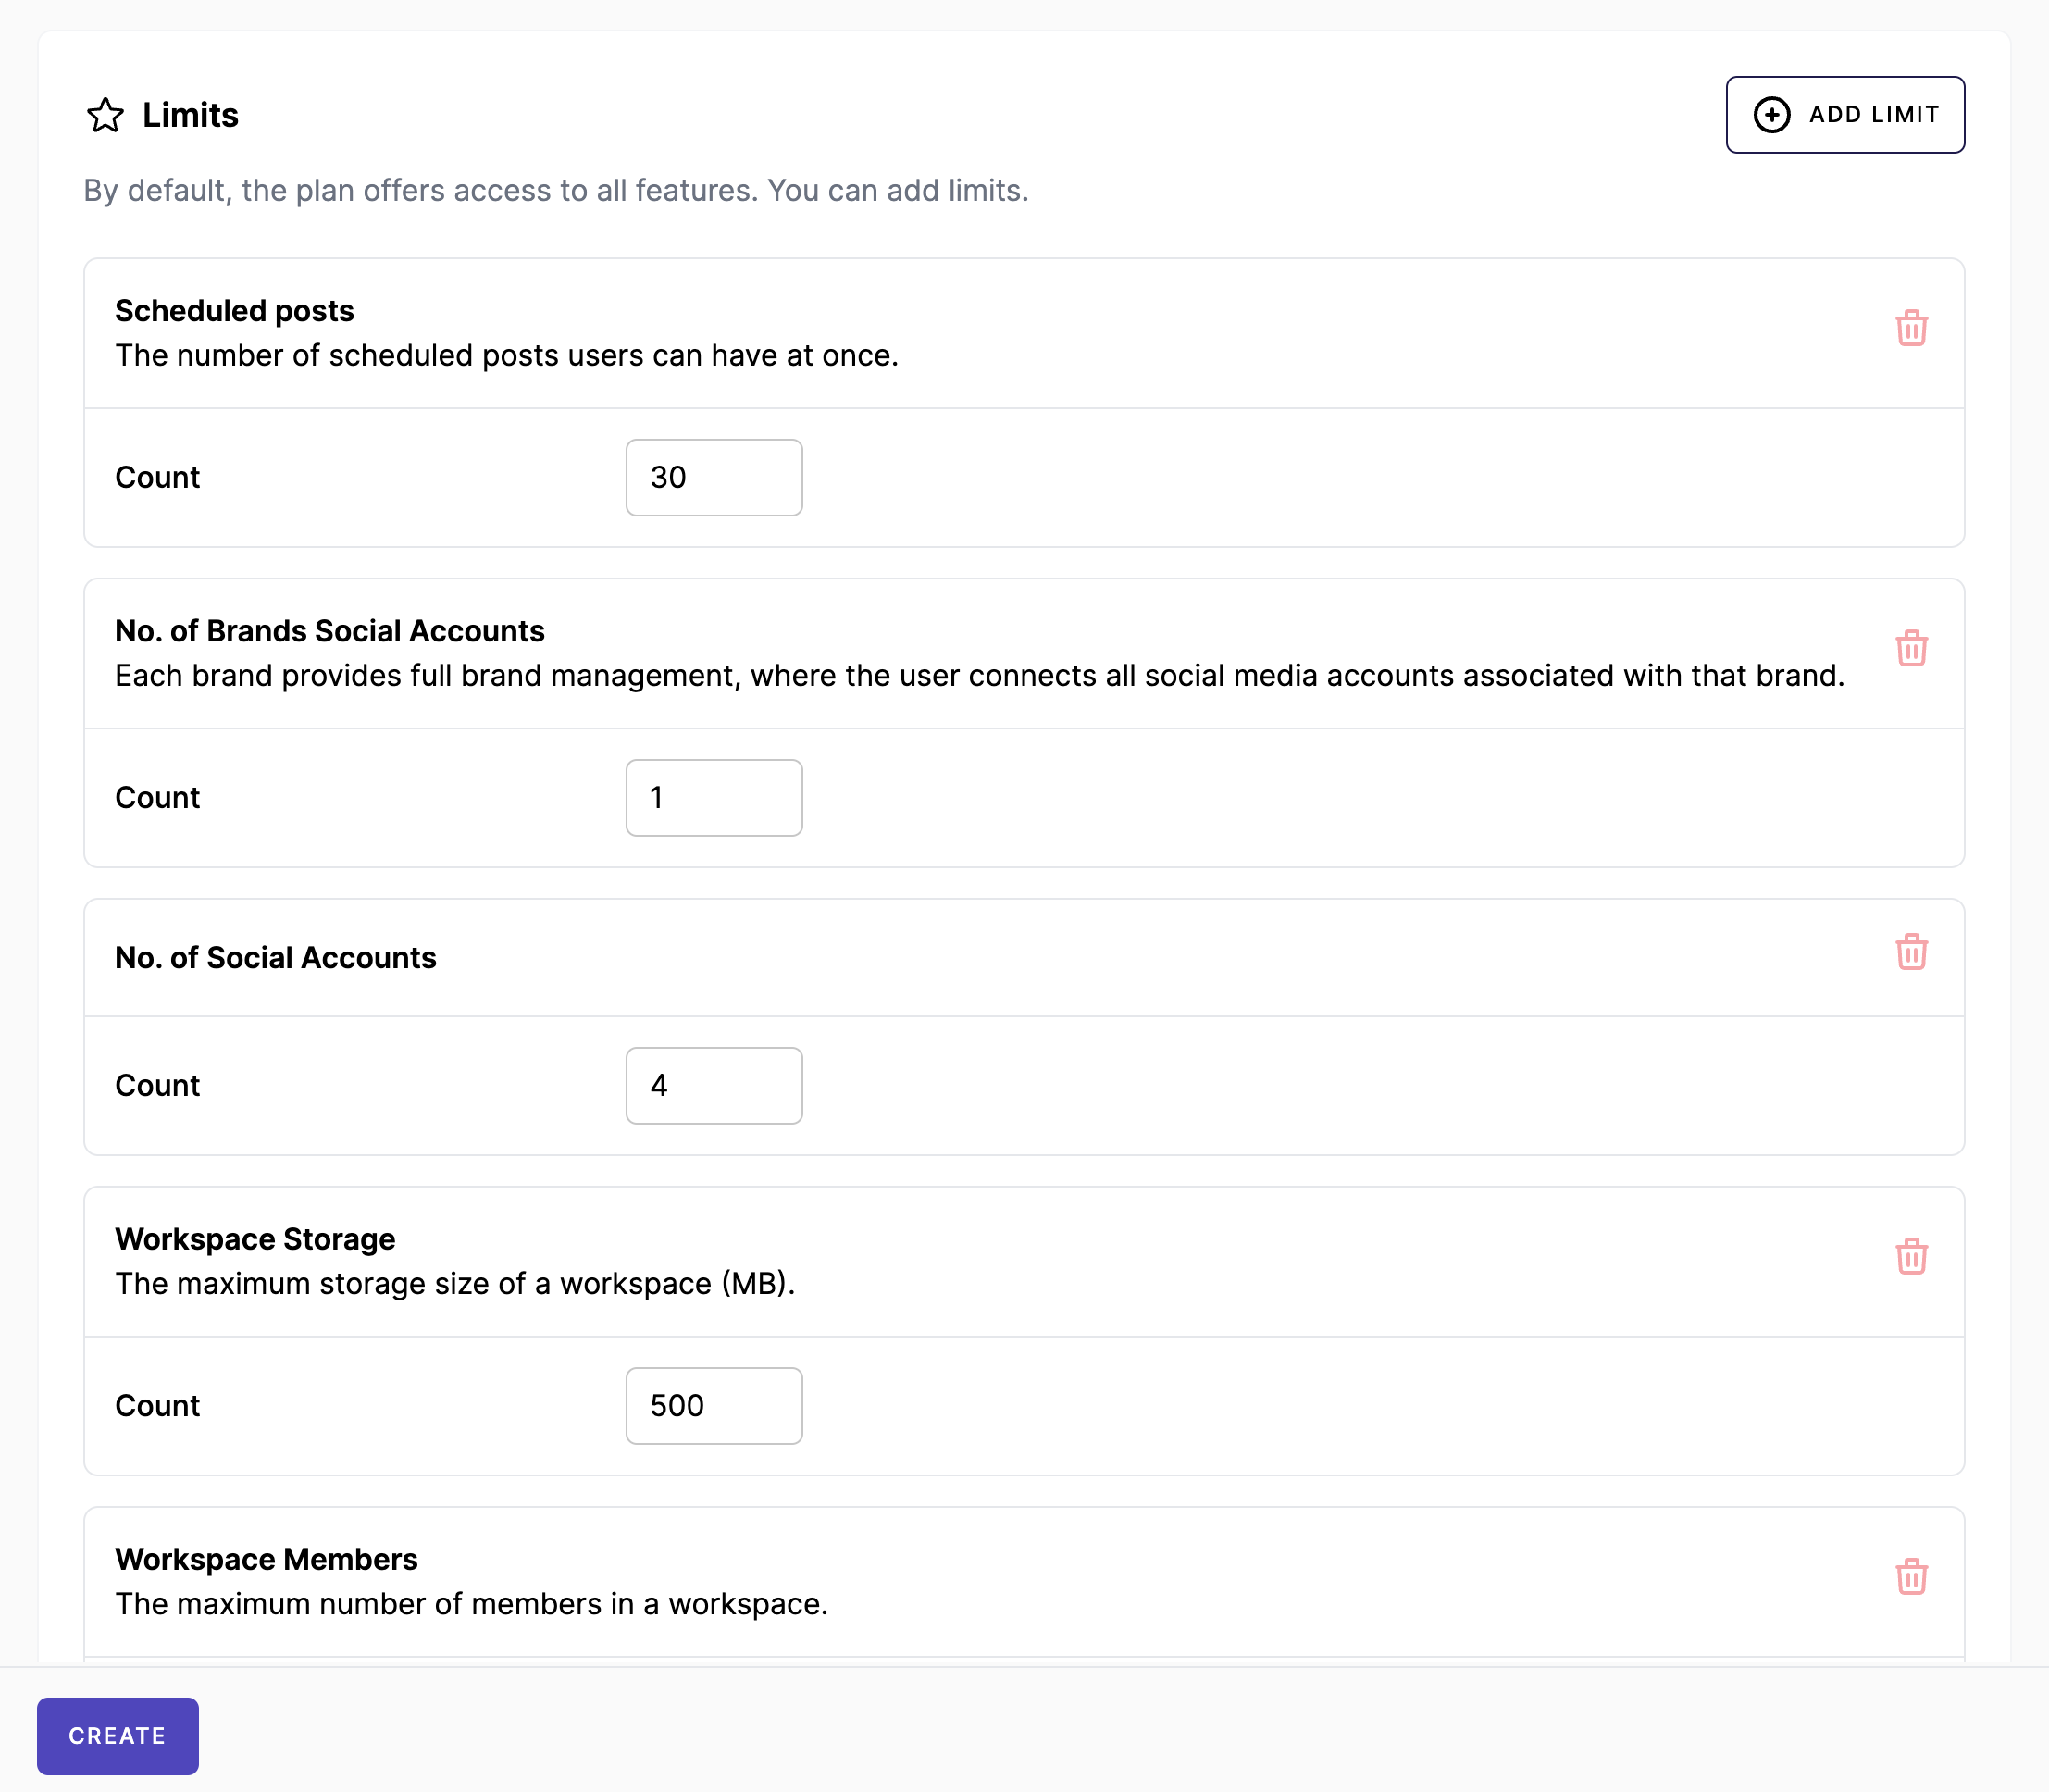
- Add limits - By default, the plan offers access to all features. You can add limits.
- Save the plan by clicking on the "Create" or "Update" button.
Conclusion
If you have successfully completed the integration of the payment platform and created plans in Mixpost Enterprise, you can test by registering a new user and subscribing to a plan.