To be able to post on Facebook and Instagram, you must create and configure a Facebook application. Because Facebook and Instagram belong to the same company Meta.
Step 1: Create a Developer Account
To create a Facebook app, you must first have a Facebook developer account. If you don't already have one, go to the Facebook for Developers website and click "Get Started" in the top right corner. Follow the instructions to sign up for a developer account.
Step 2: Create a New App
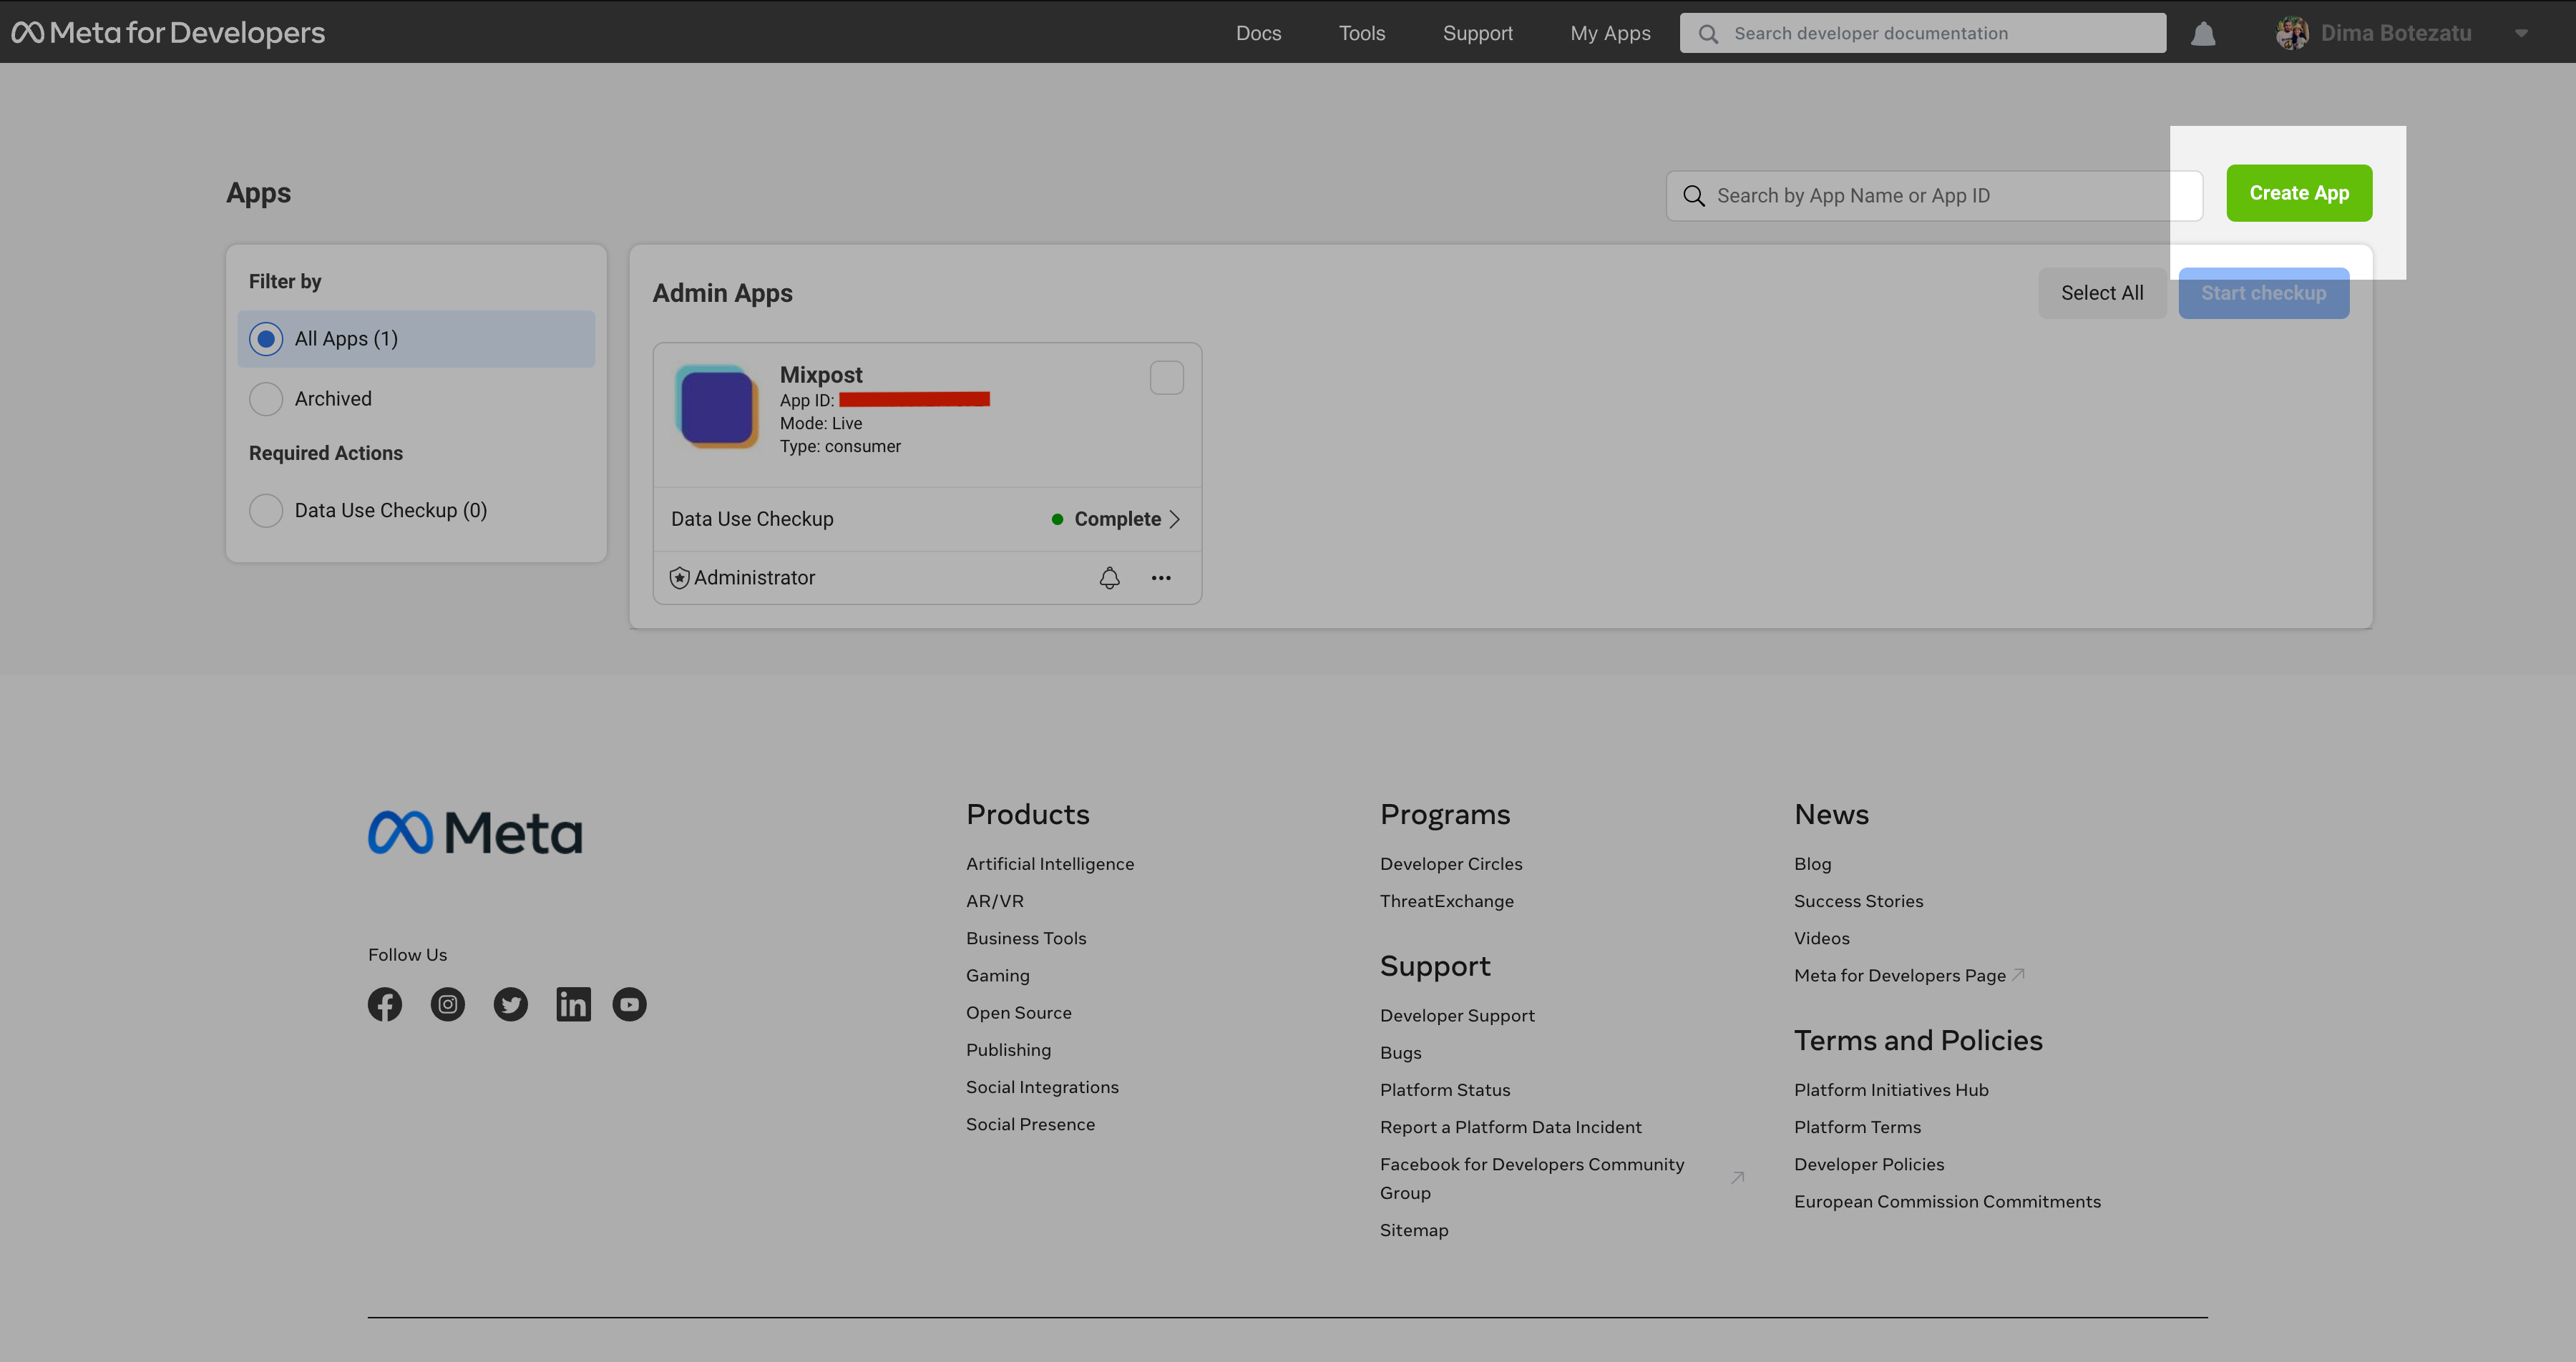
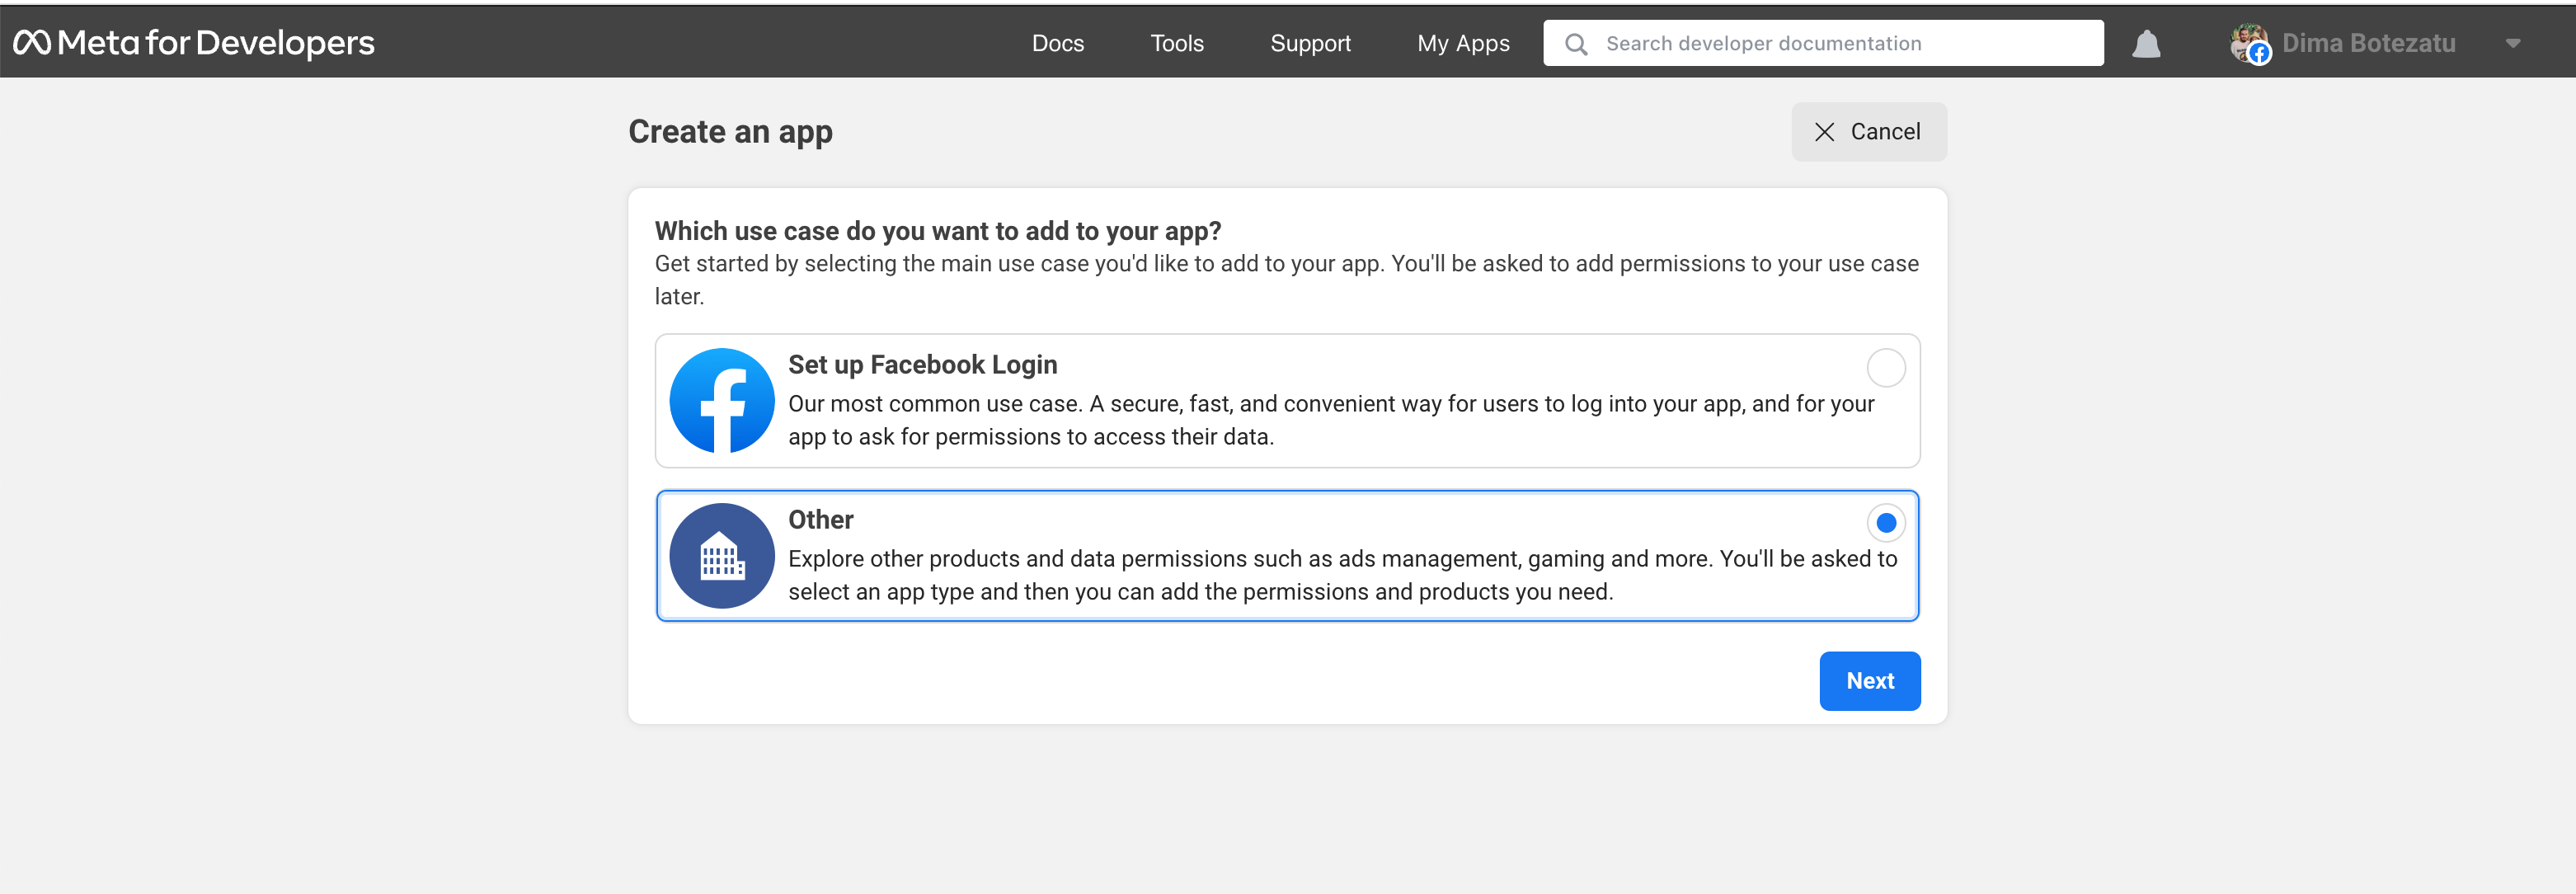
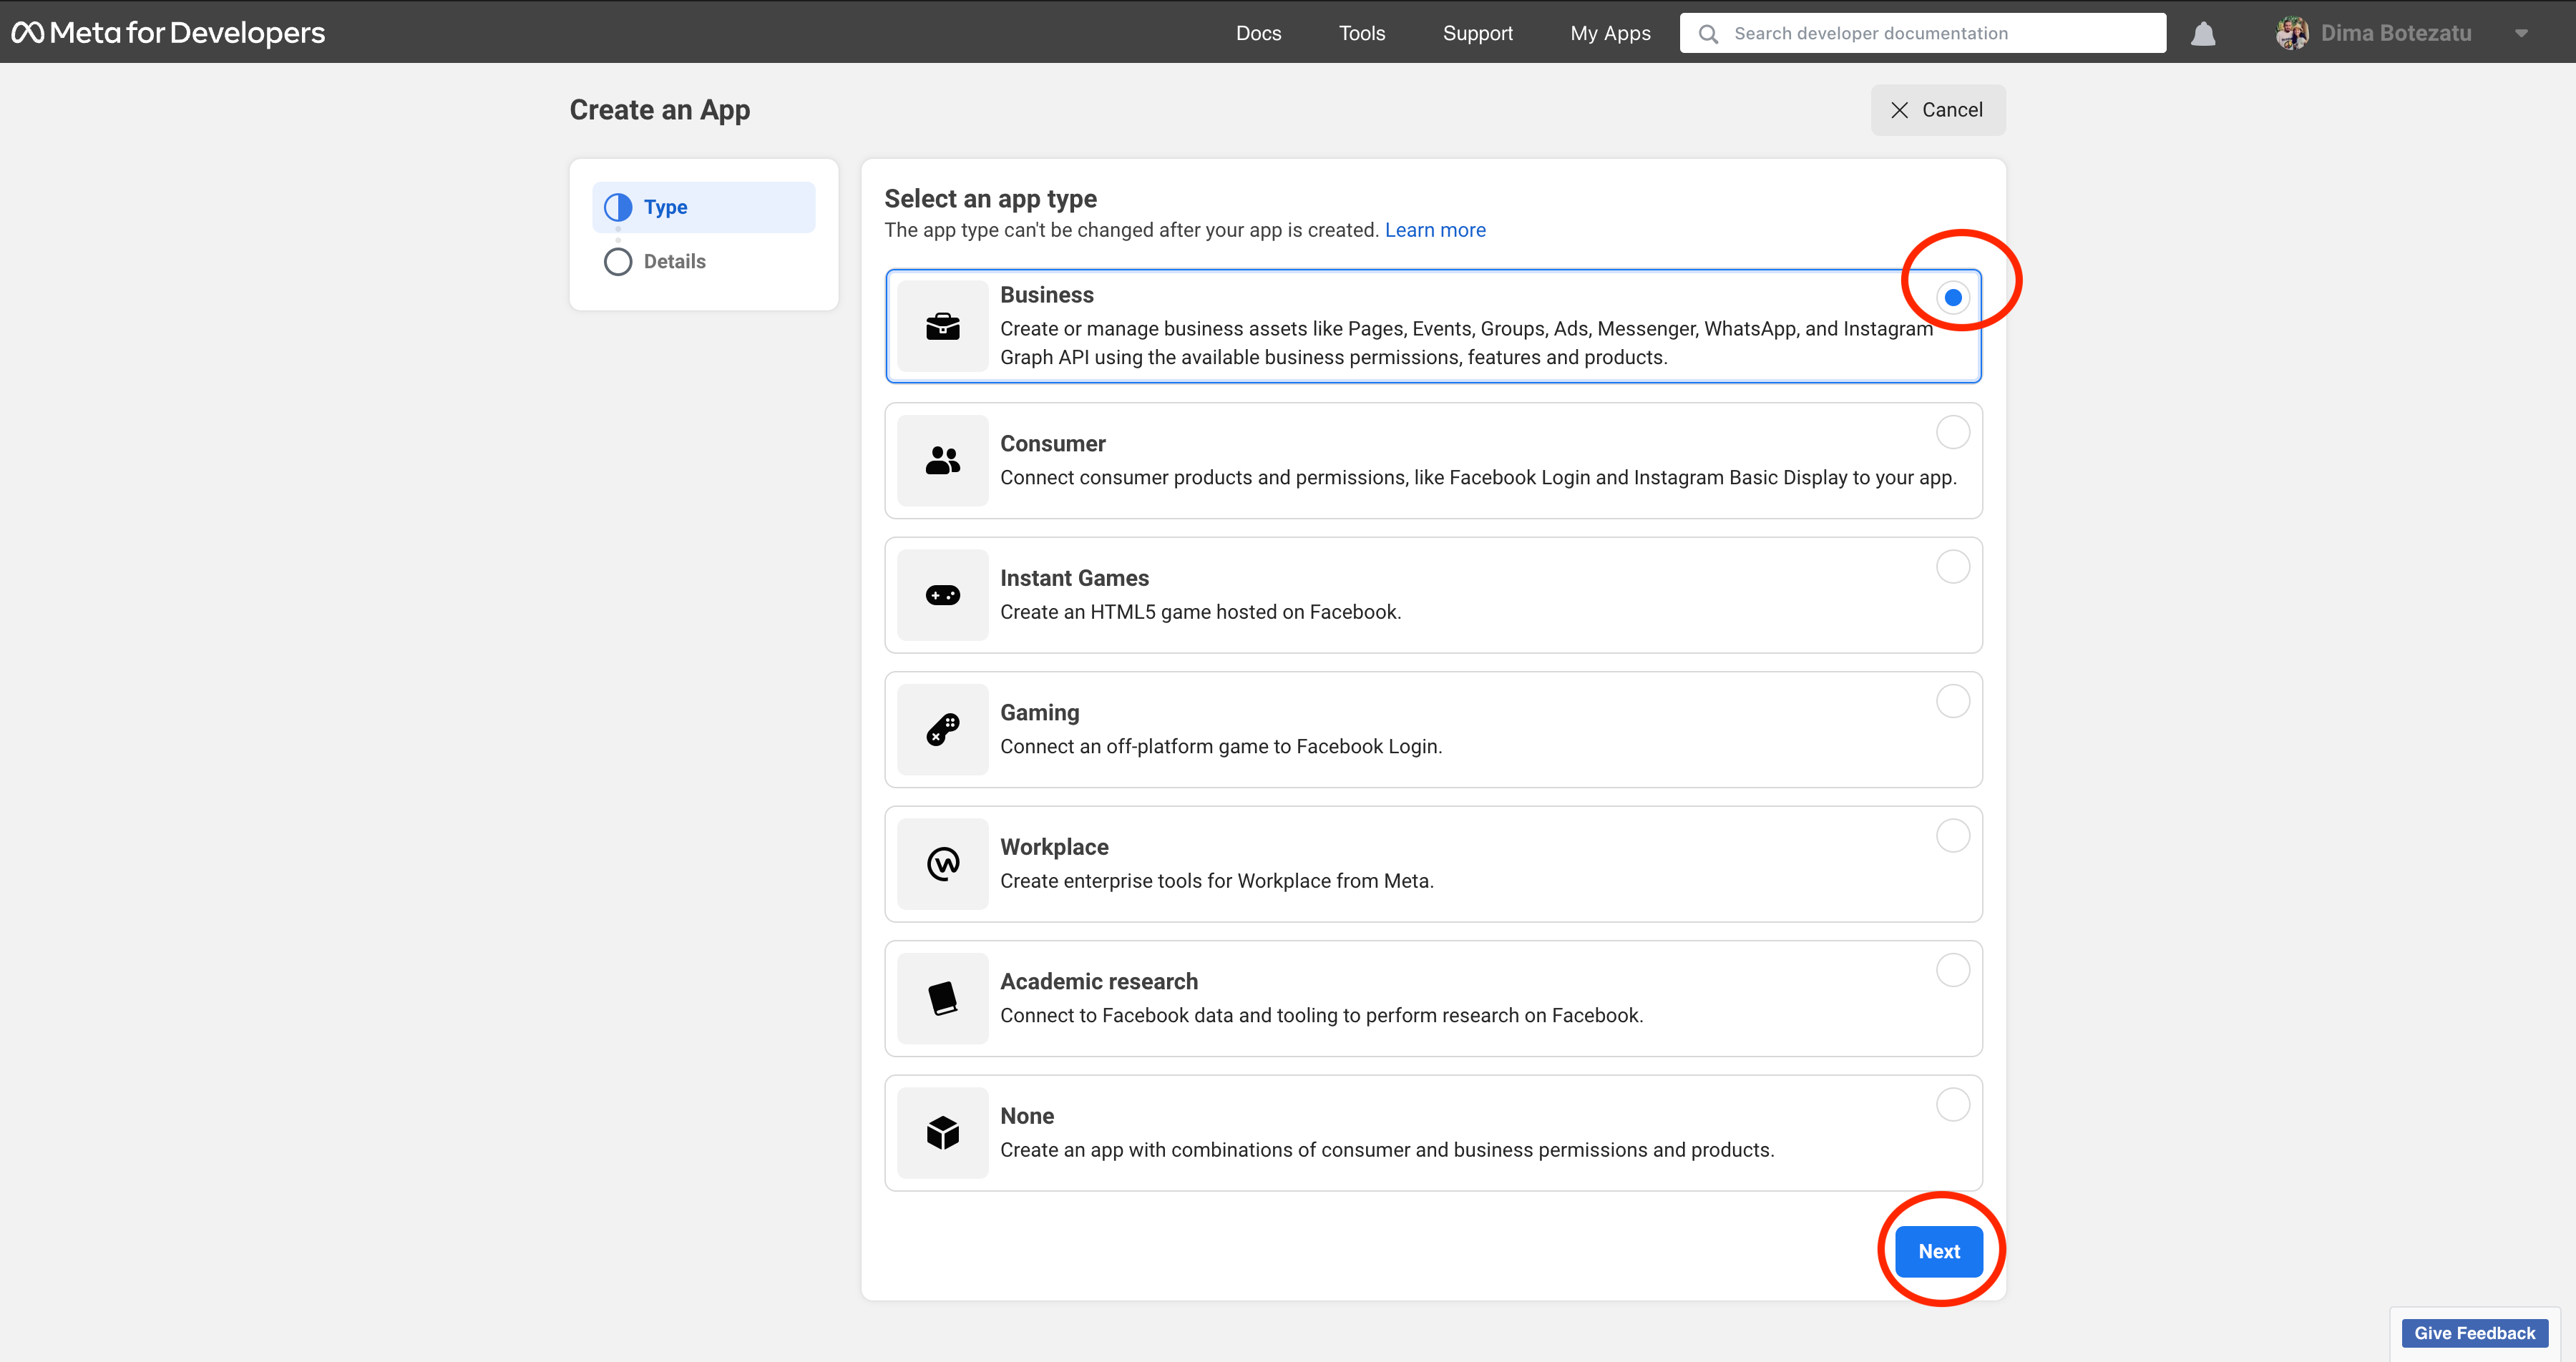
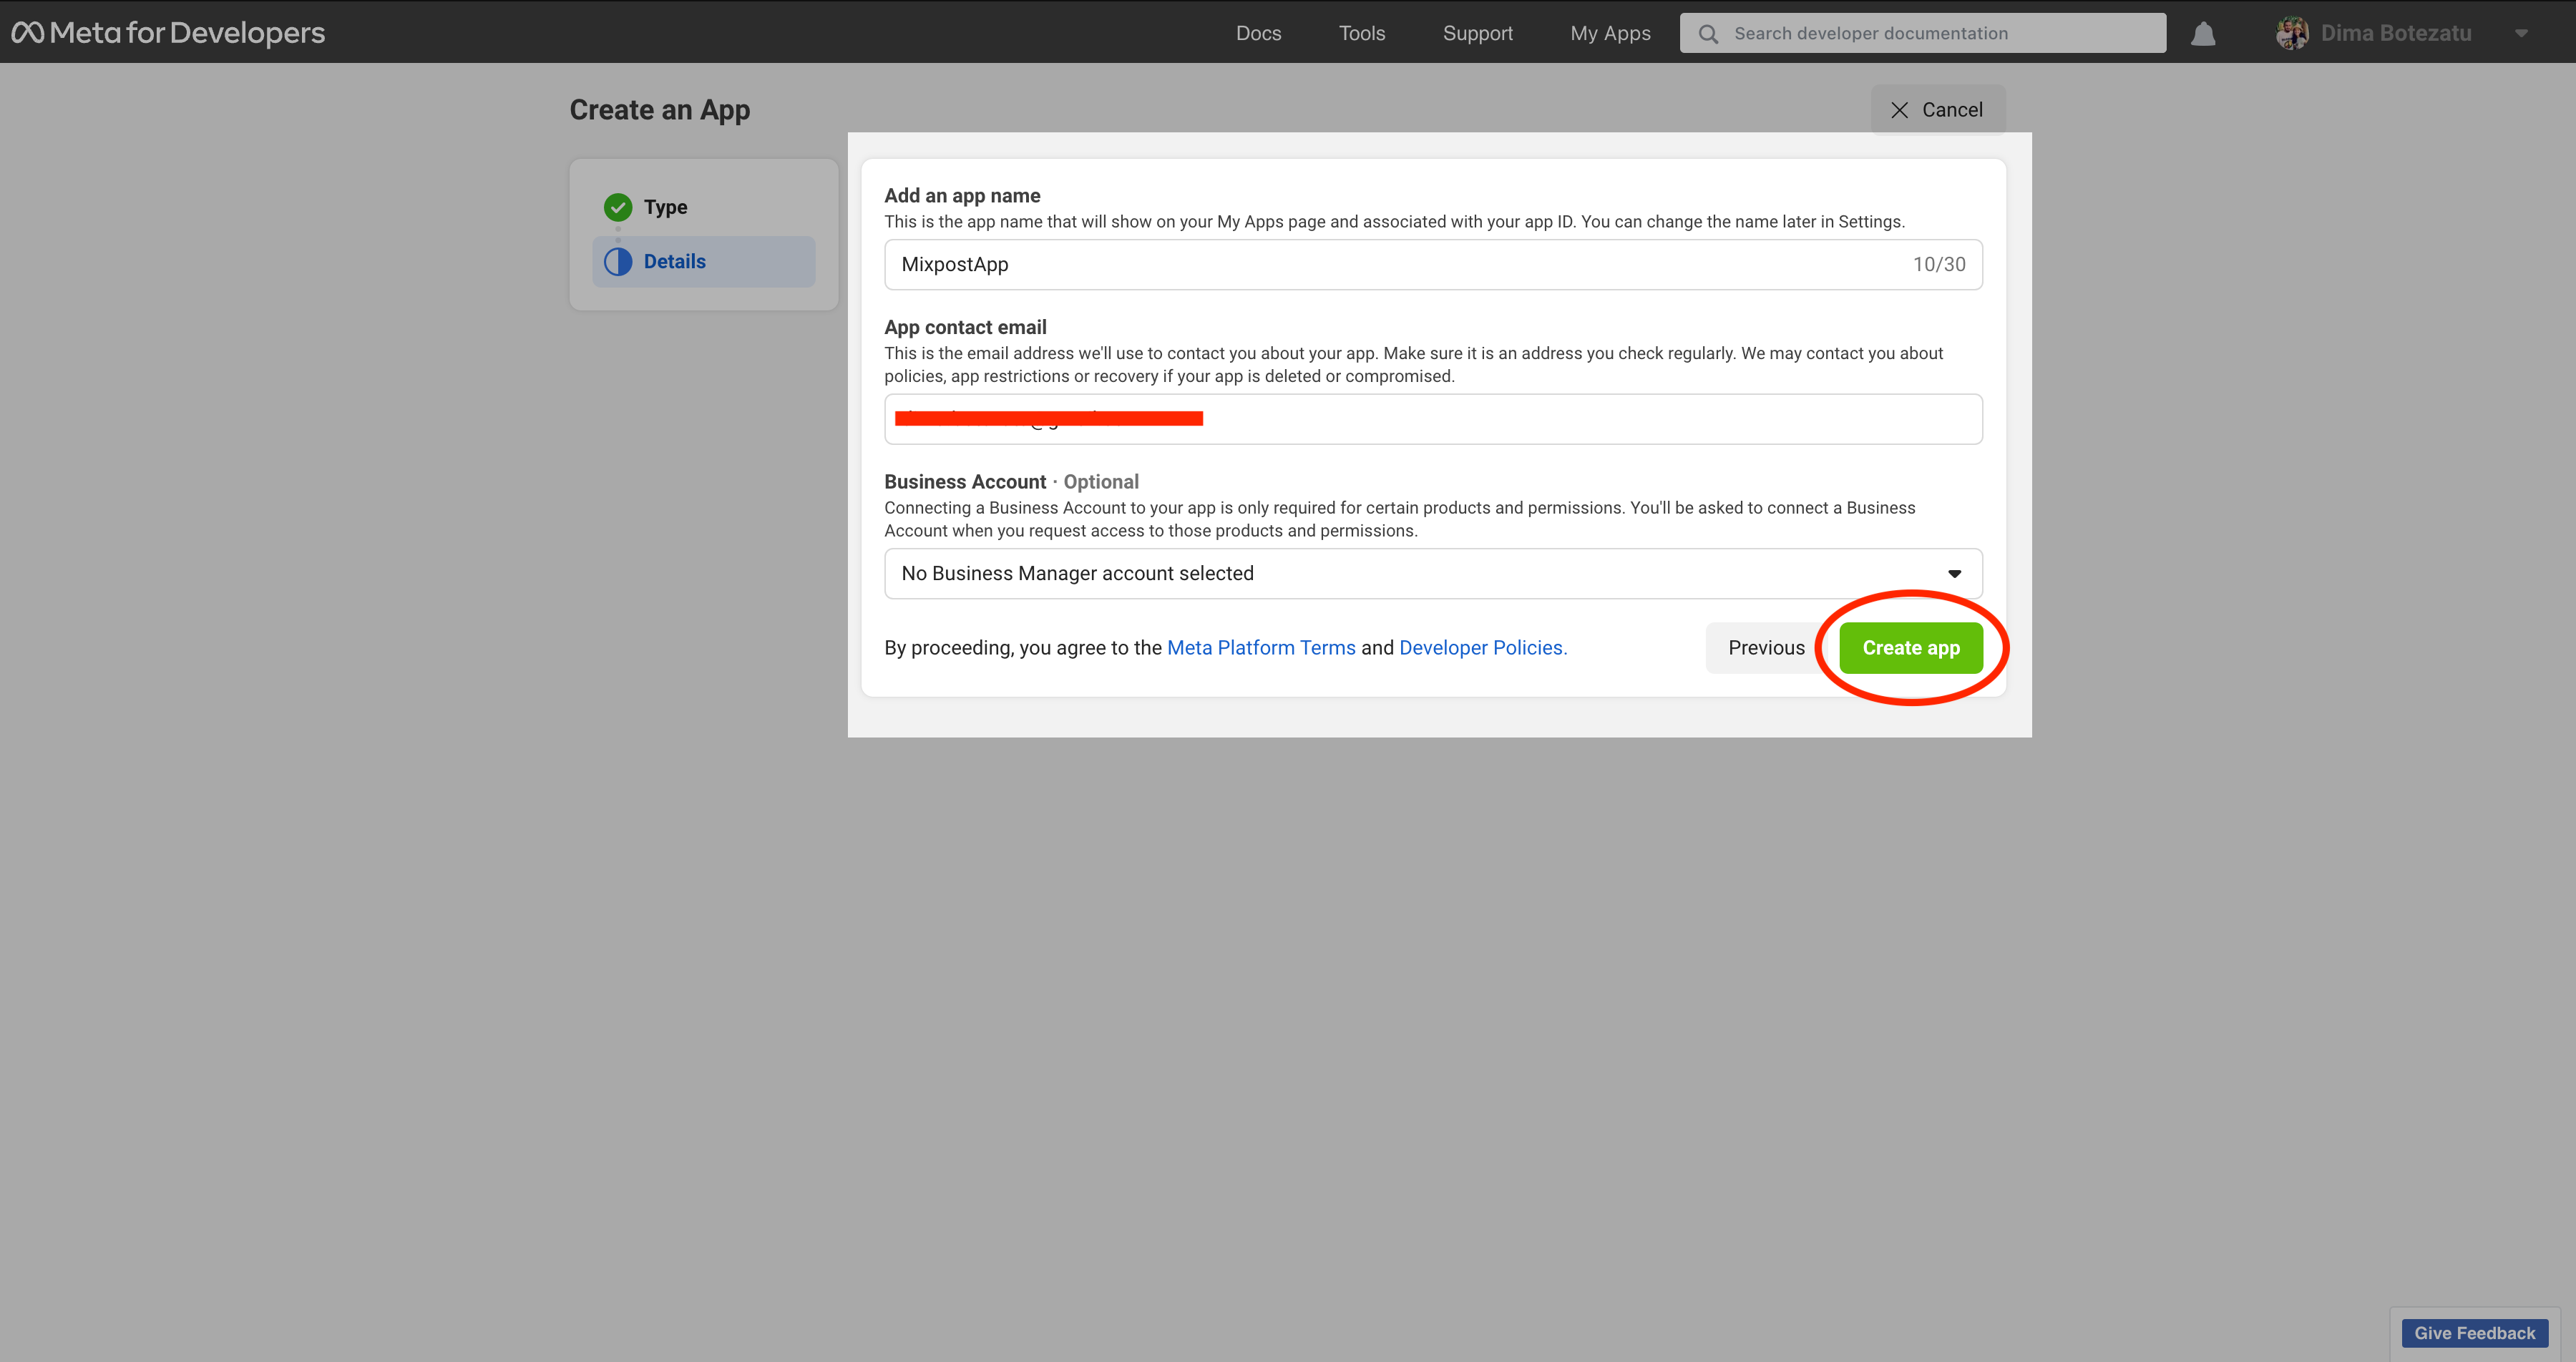
Once you have a developer account, go to the Facebook Developer Dashboard and click "Create App" in the top right corner. Choose "Business" as the app type and give your app a name.
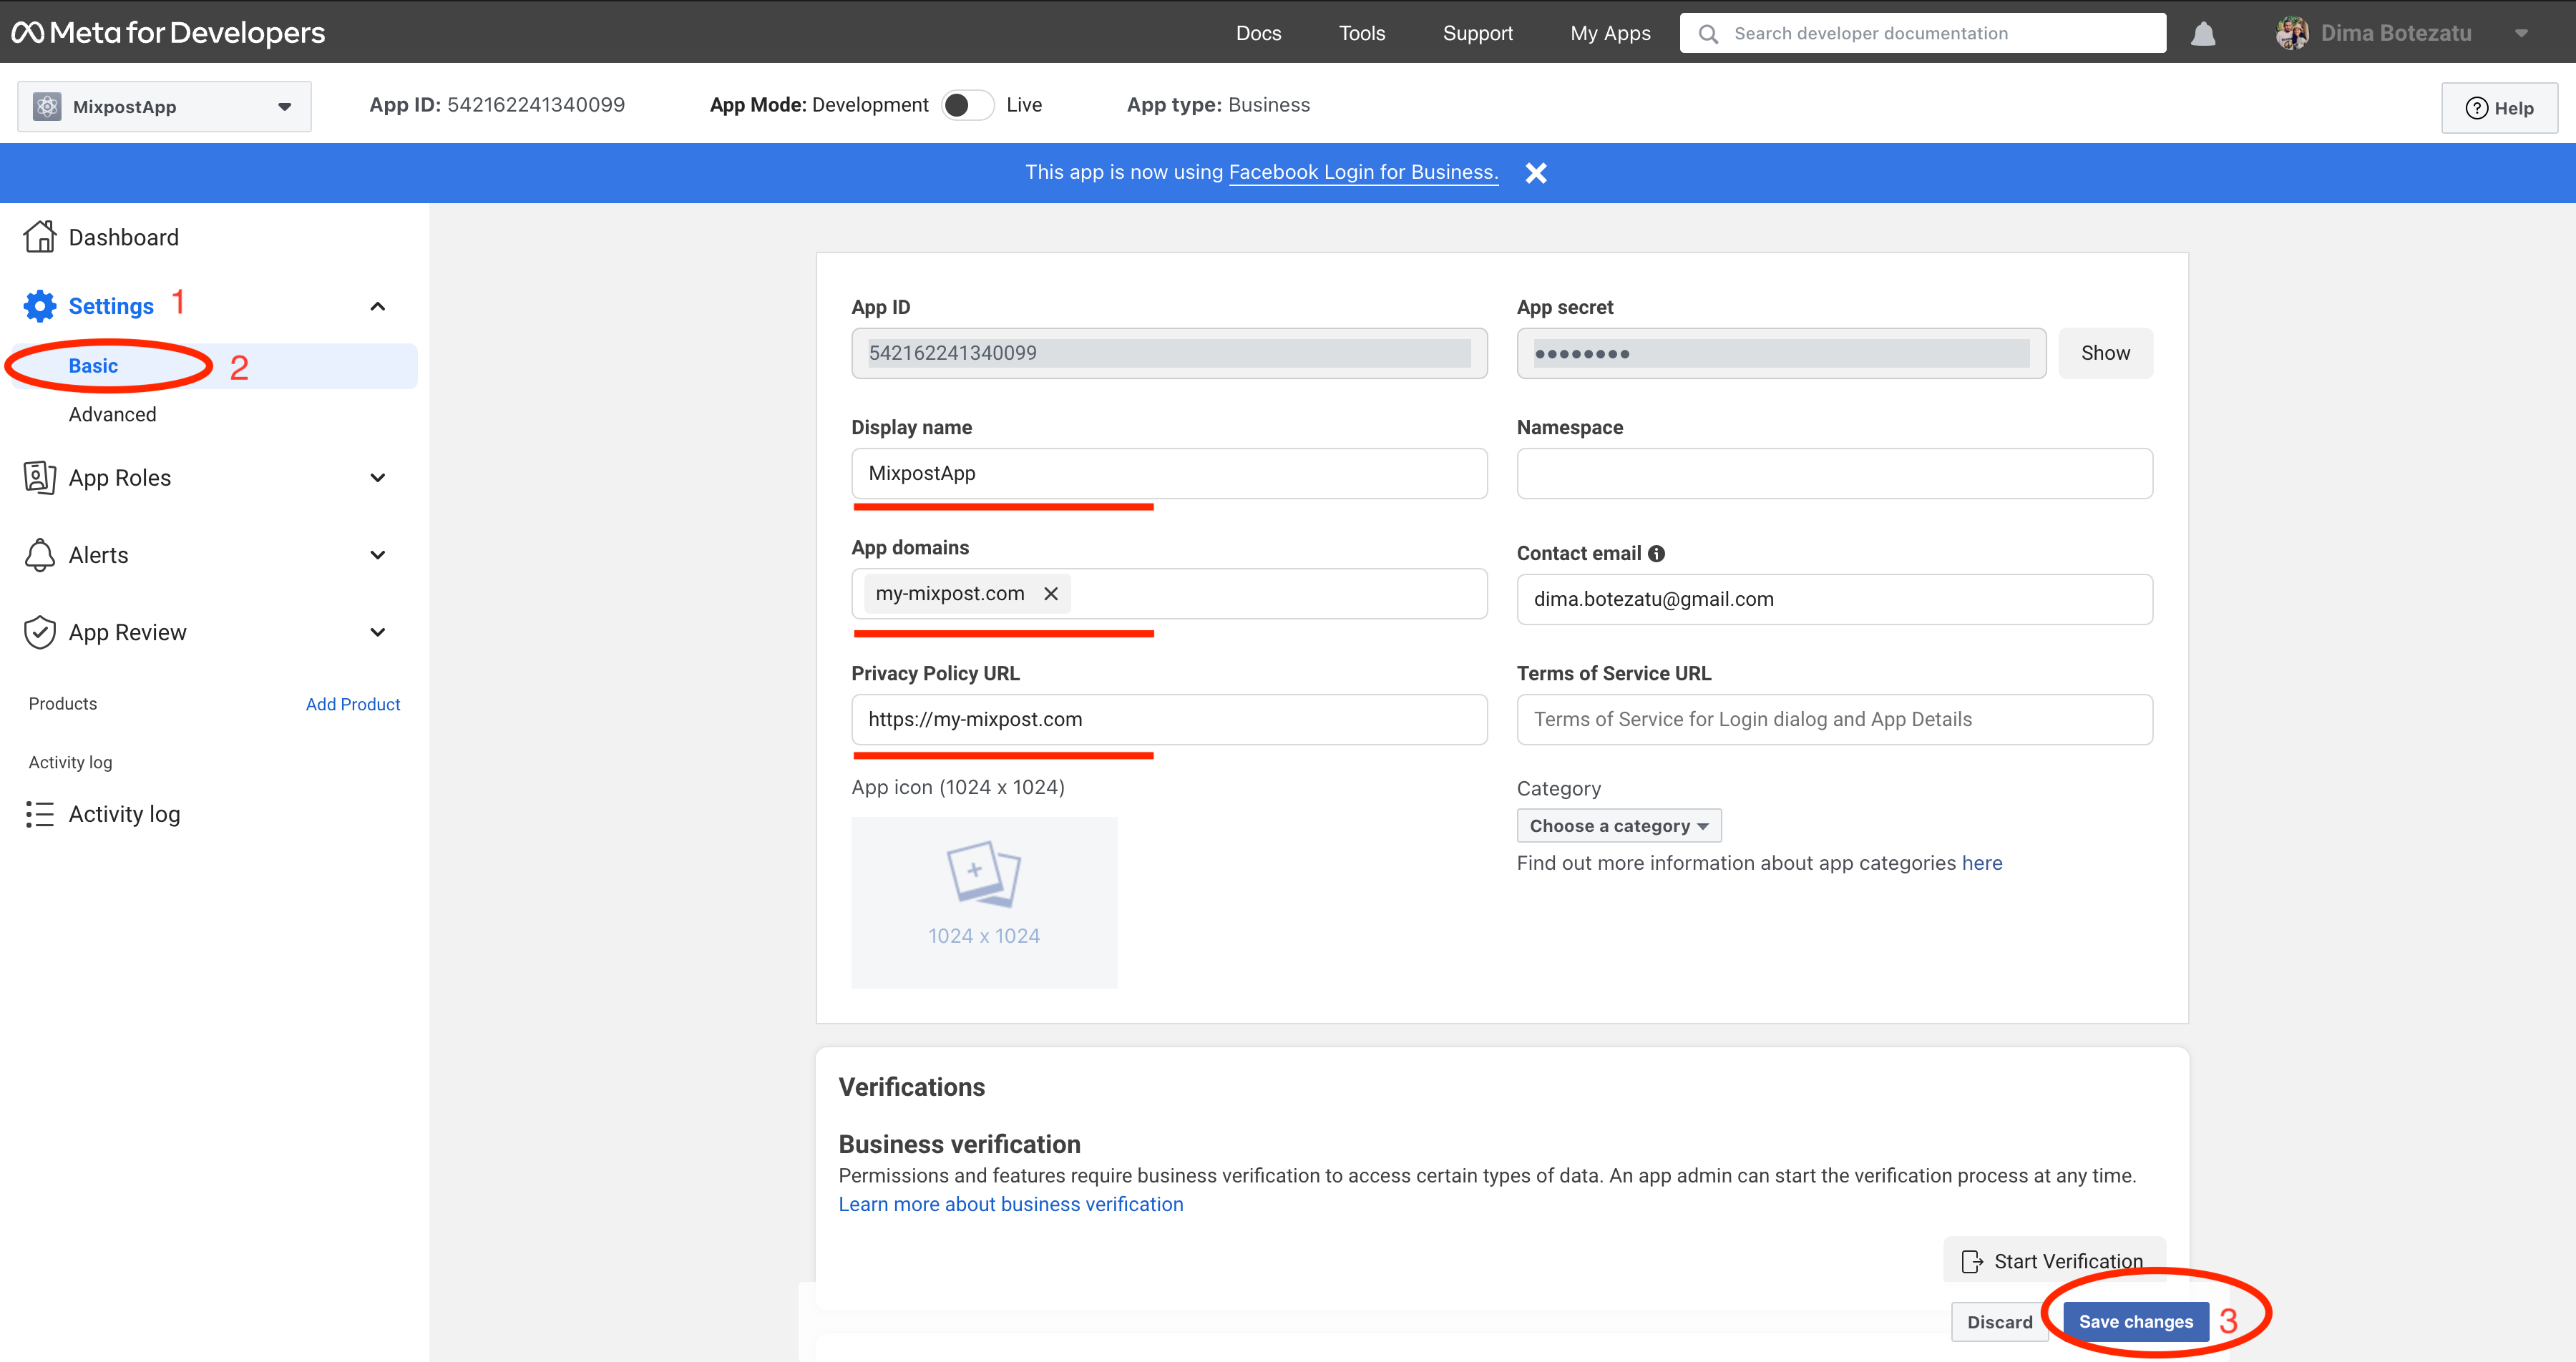
Step 3: Configure Basic Settings
After creating your app, you'll be taken to the app dashboard. Here, you can configure your app's basic settings, such as the app icon and description. You'll also need to configure the "App Domains" and "Privacy Policy URL" settings.
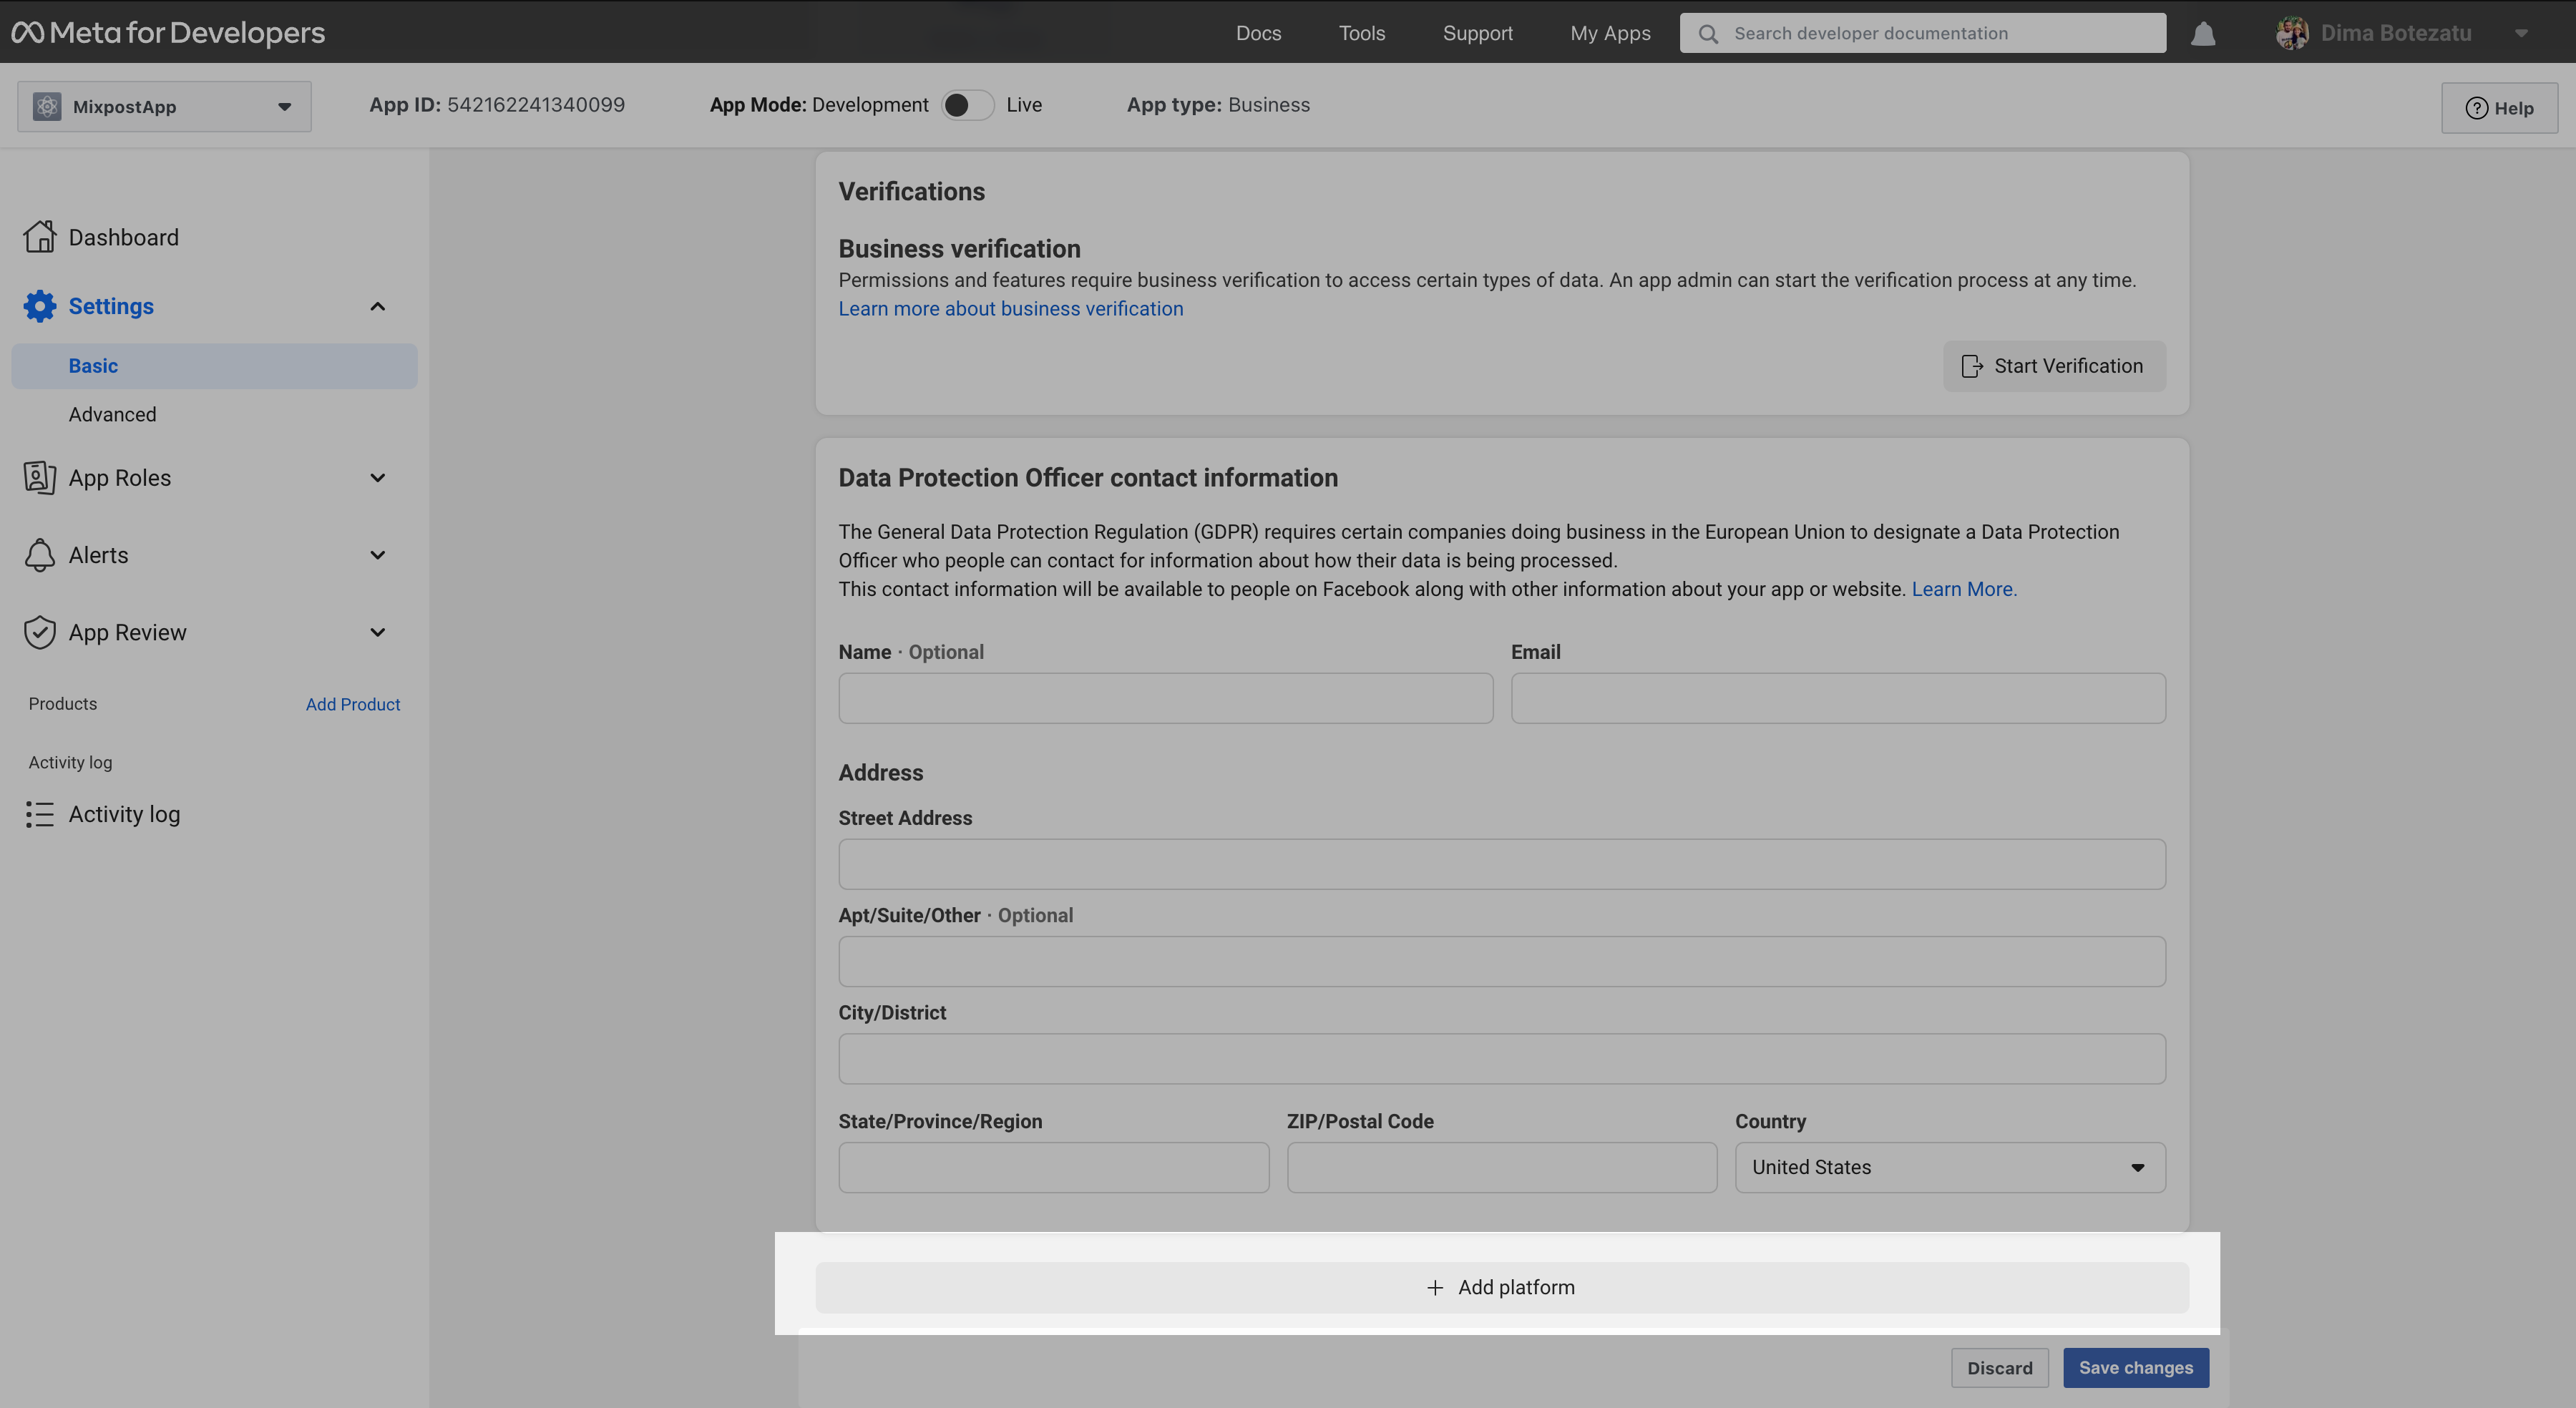
Next, on this page, scroll down to the “Add Platform” button and click it.
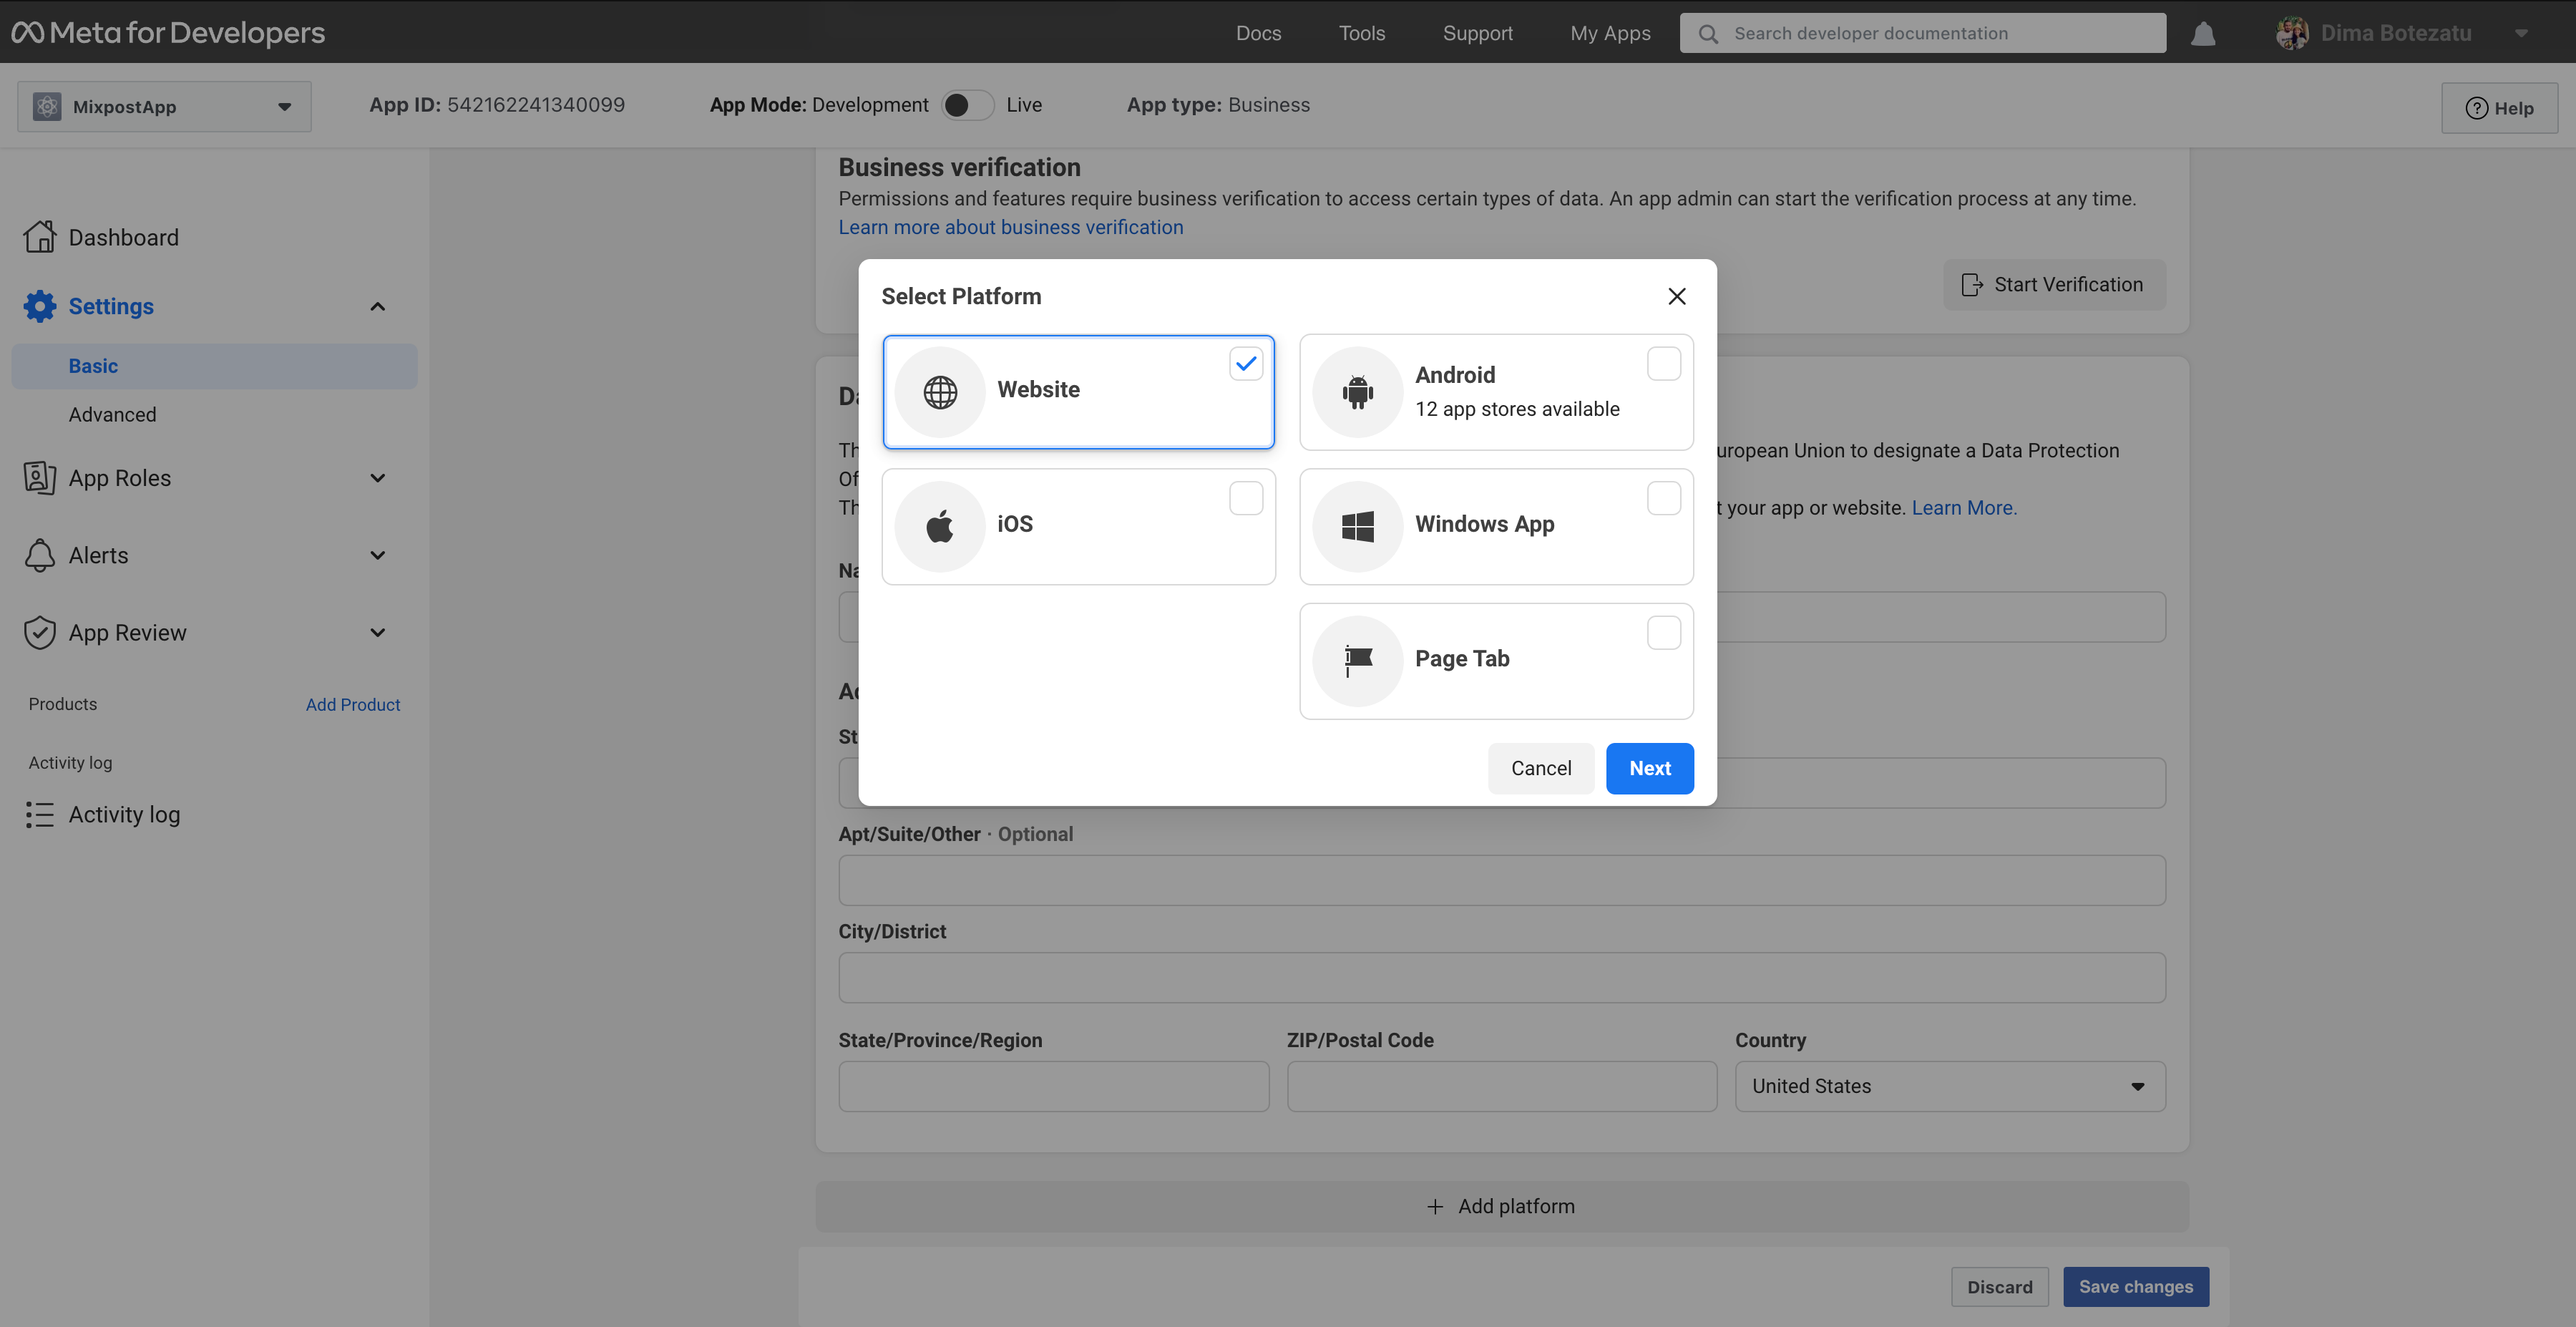
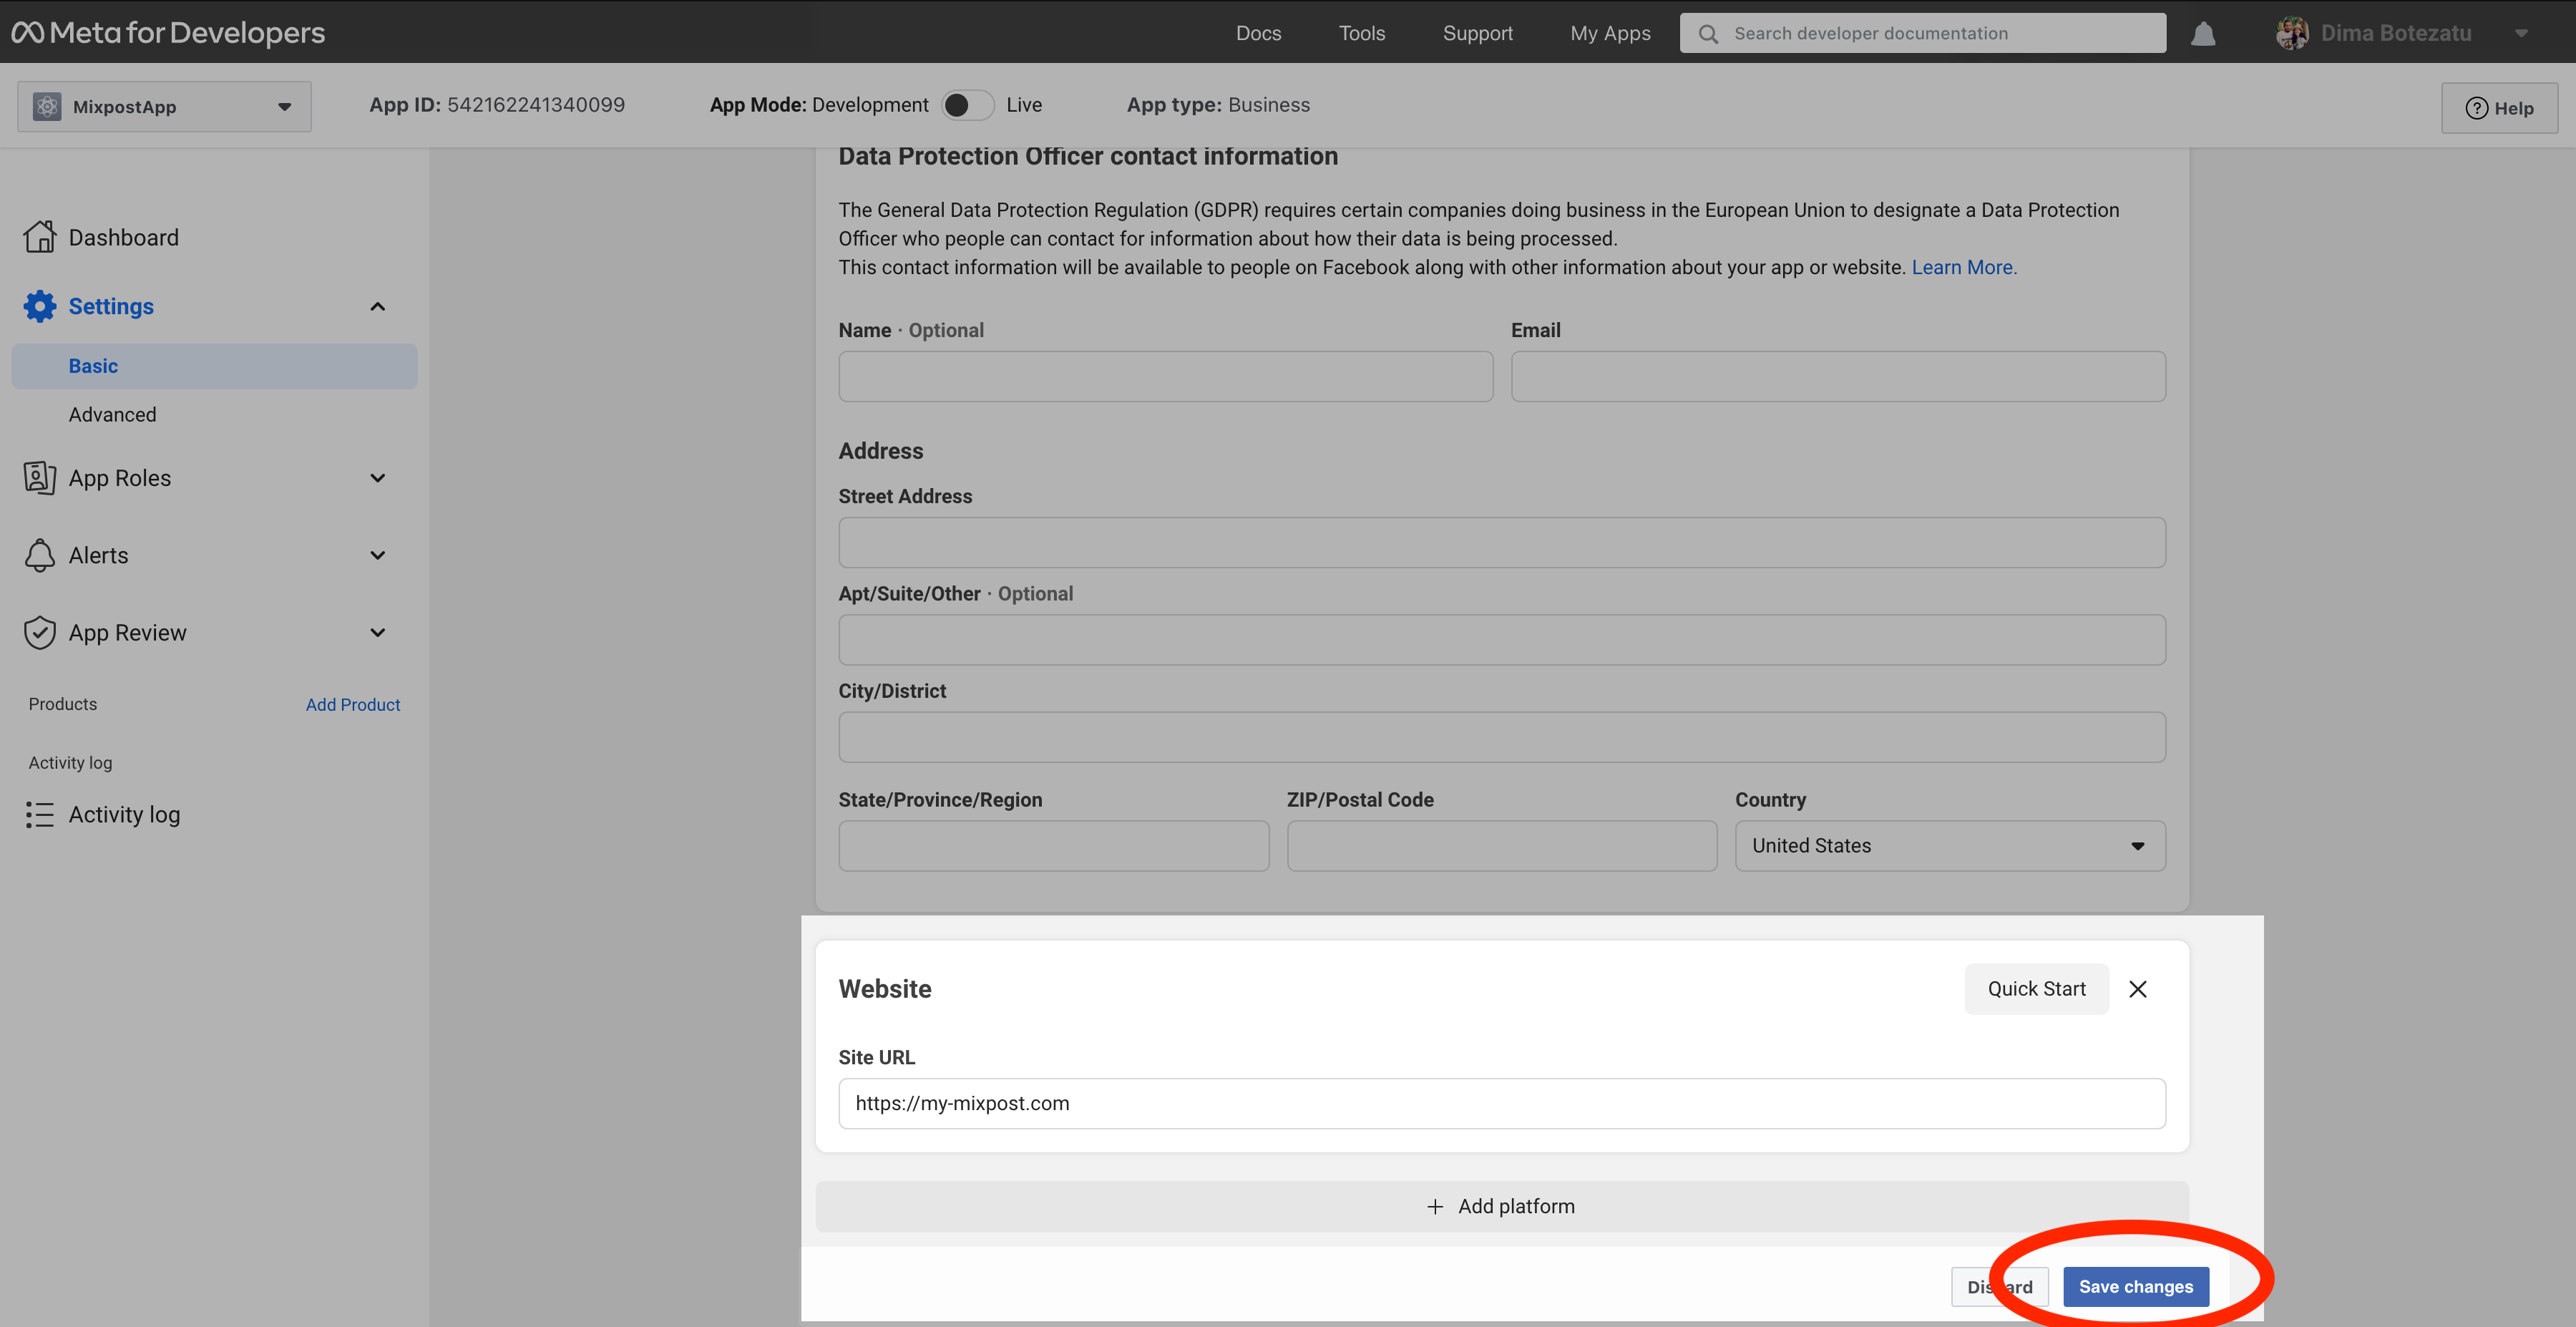
Enter your application URL. We recommend that you enter a secure URL to avoid certain problems when connecting to Mixpost.
Step 4: Copy the App ID and App Secret to Mixpost
After creating the App, you will see the App ID and hidden App Secret. Copy them, open your Mixpost dashboard, and paste the keys to Facebook third-party service form.
- Mixpost Lite: From the left sidebar->Services.
- Mixpost Pro/Enterprise: User Menu->Admin Console->Services
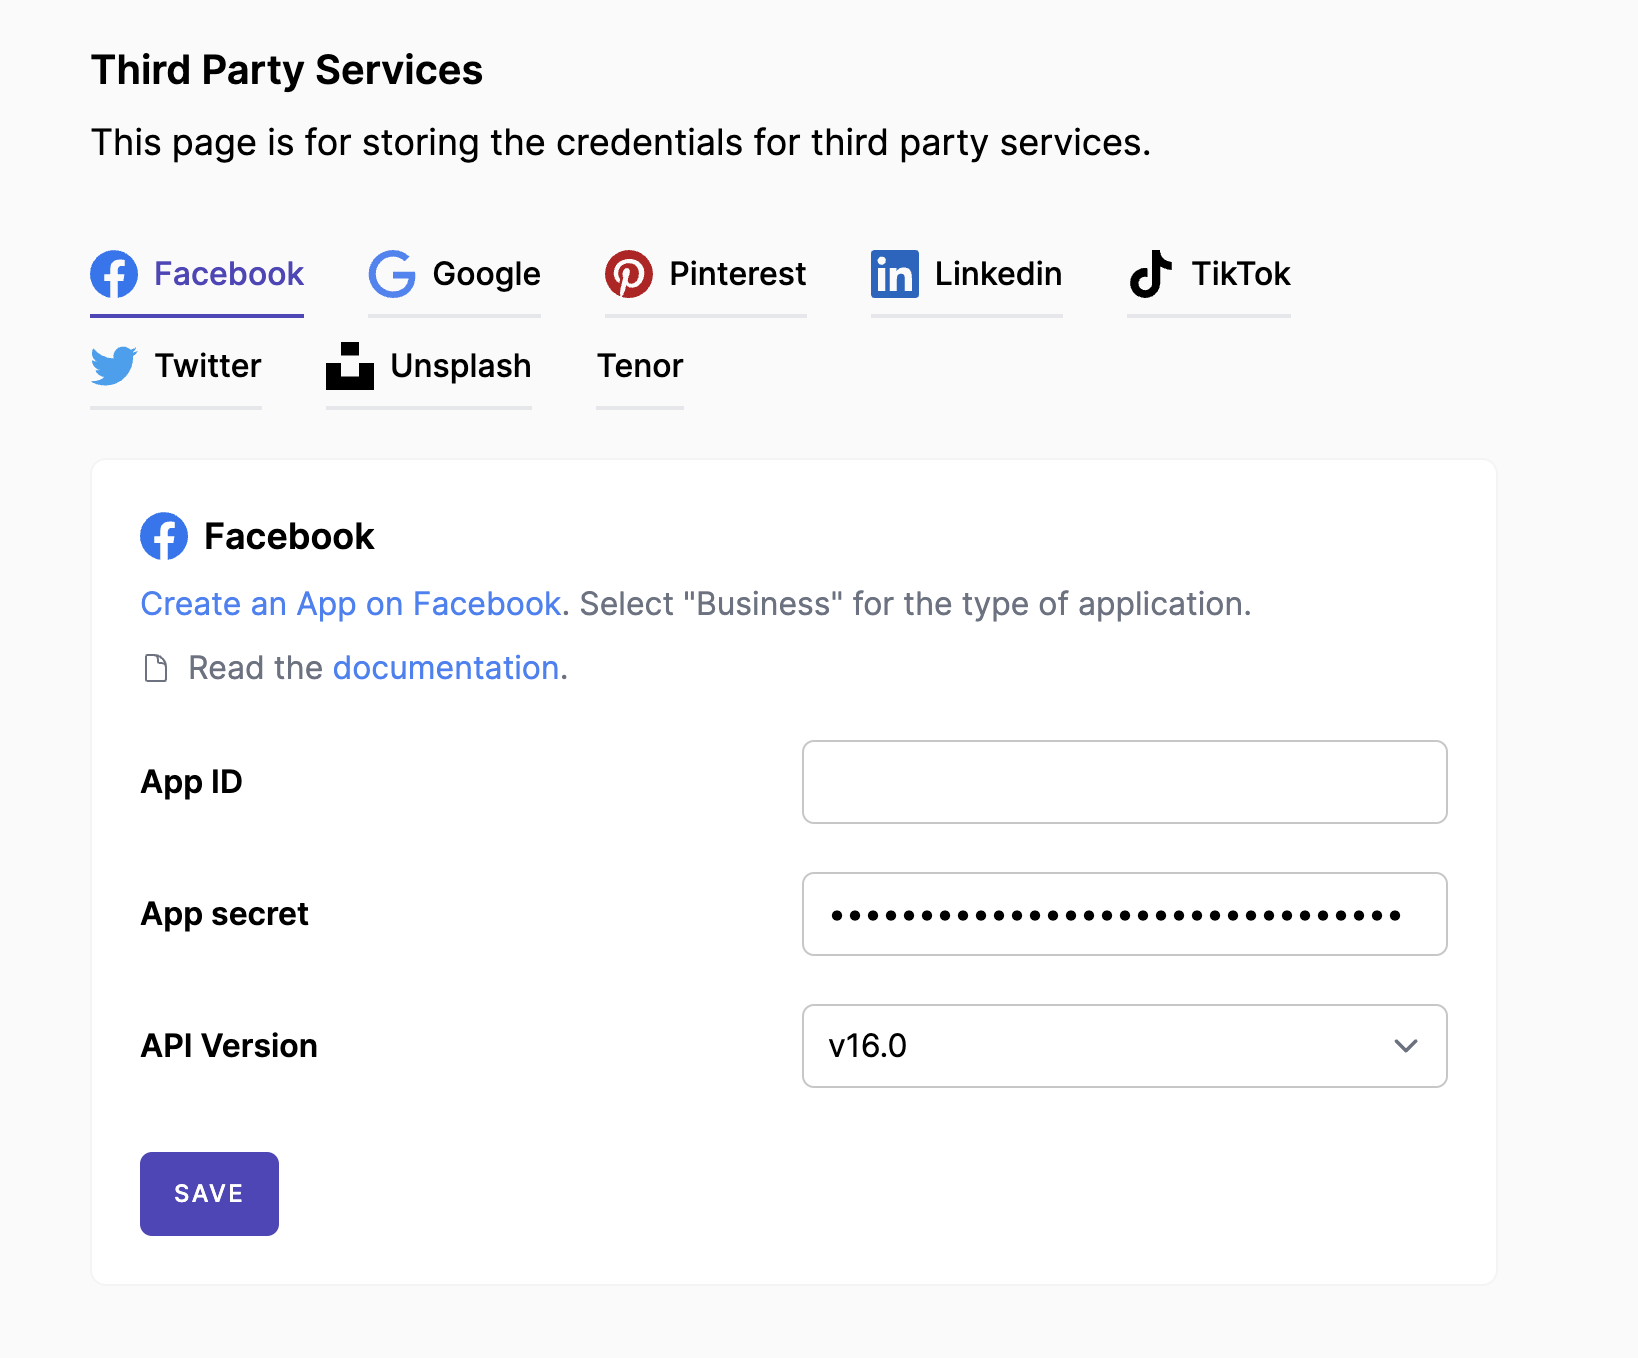
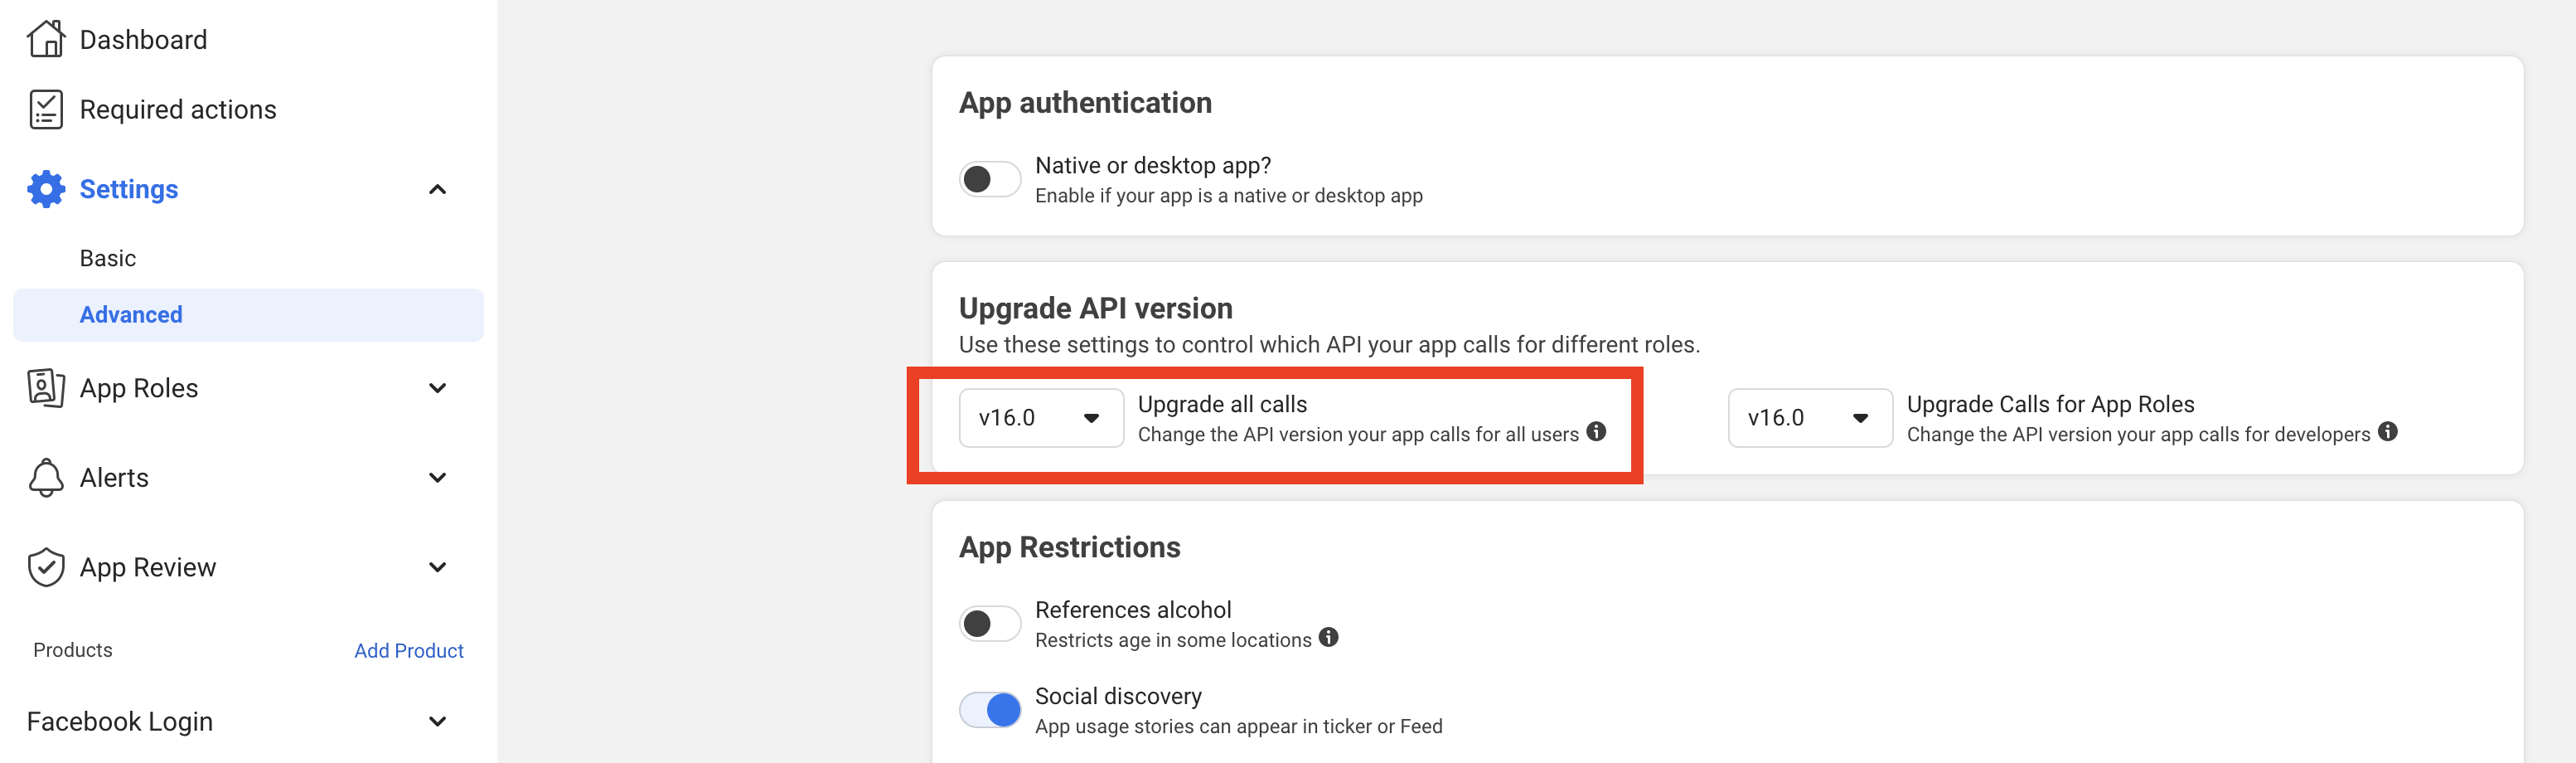
Select the version of your Facebook application: Your Facebook app->Settings->Advanced
Step 5: Setting callback links
Next, you need to do some essential configurations.
-
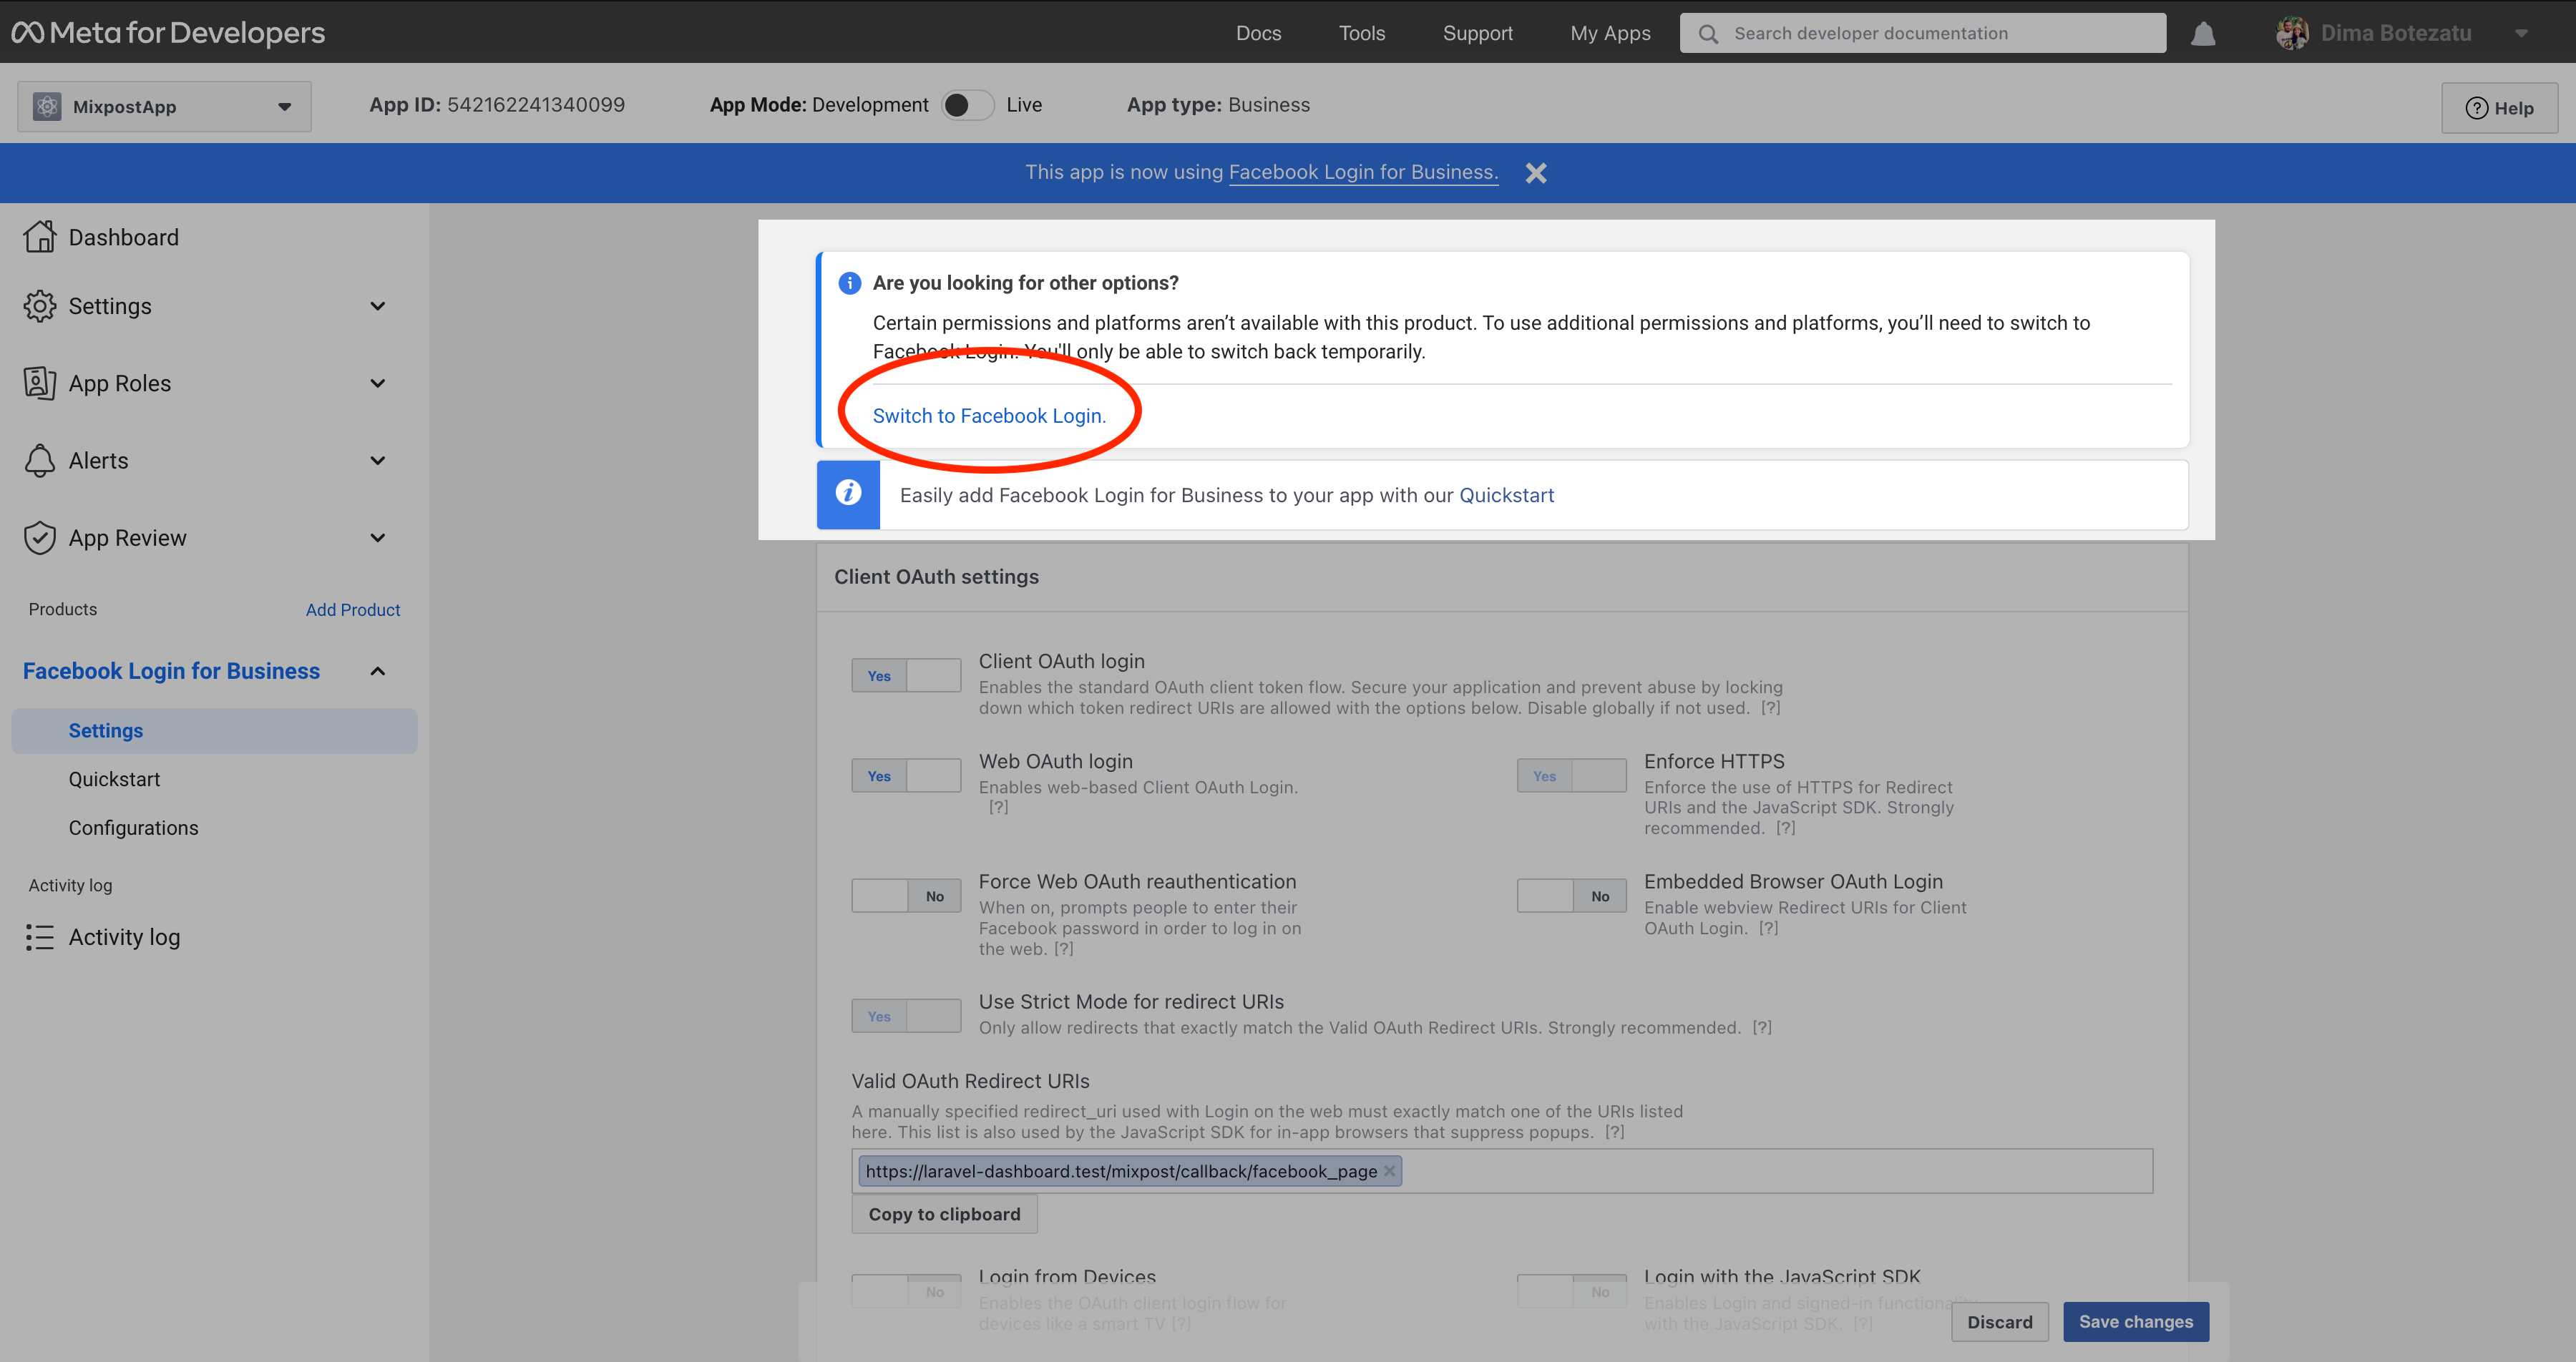
On the left sidebar, click on “Add product” and select “Facebook Login” or “Facebook Login for Business.”
-
If you selected “Facebook Login for Business”, you need to Switch to the standard “Facebook Login”.

-
Go to the “Valid OAuth Redirect URIs” input and enter these callback URLs:
- https://your-app-url.com/mixpost/callback/facebook_page
- https://your-app-url.com/mixpost/callback/facebook_group
- https://your-app-url.com/mixpost/callback/instagram (For Mixpost Pro version supports Instagram)
-
Click “Save changes”

Step 6: Testing
You can test your app by adding your Facebook account to the Mixpost.
Accounts→Add account
Conclusion
If your app is used for internal purposes and the users accessing it have a role within the application, it is not necessarily required to switch to "Live" mode.
Switch your app to Live mode
If your app is used by app users who do not have a role on your app or a role in a Business that has claimed your app, you must switch App Mode to "Live" and request approval for each permission via App Review before non-role app users can grant them to your app. This step is required by those who have Mixpost Enterprise.
Note that Business verificationVerification is required to getgain advanced access.
Navigate to "App Review > Permissions and Features"
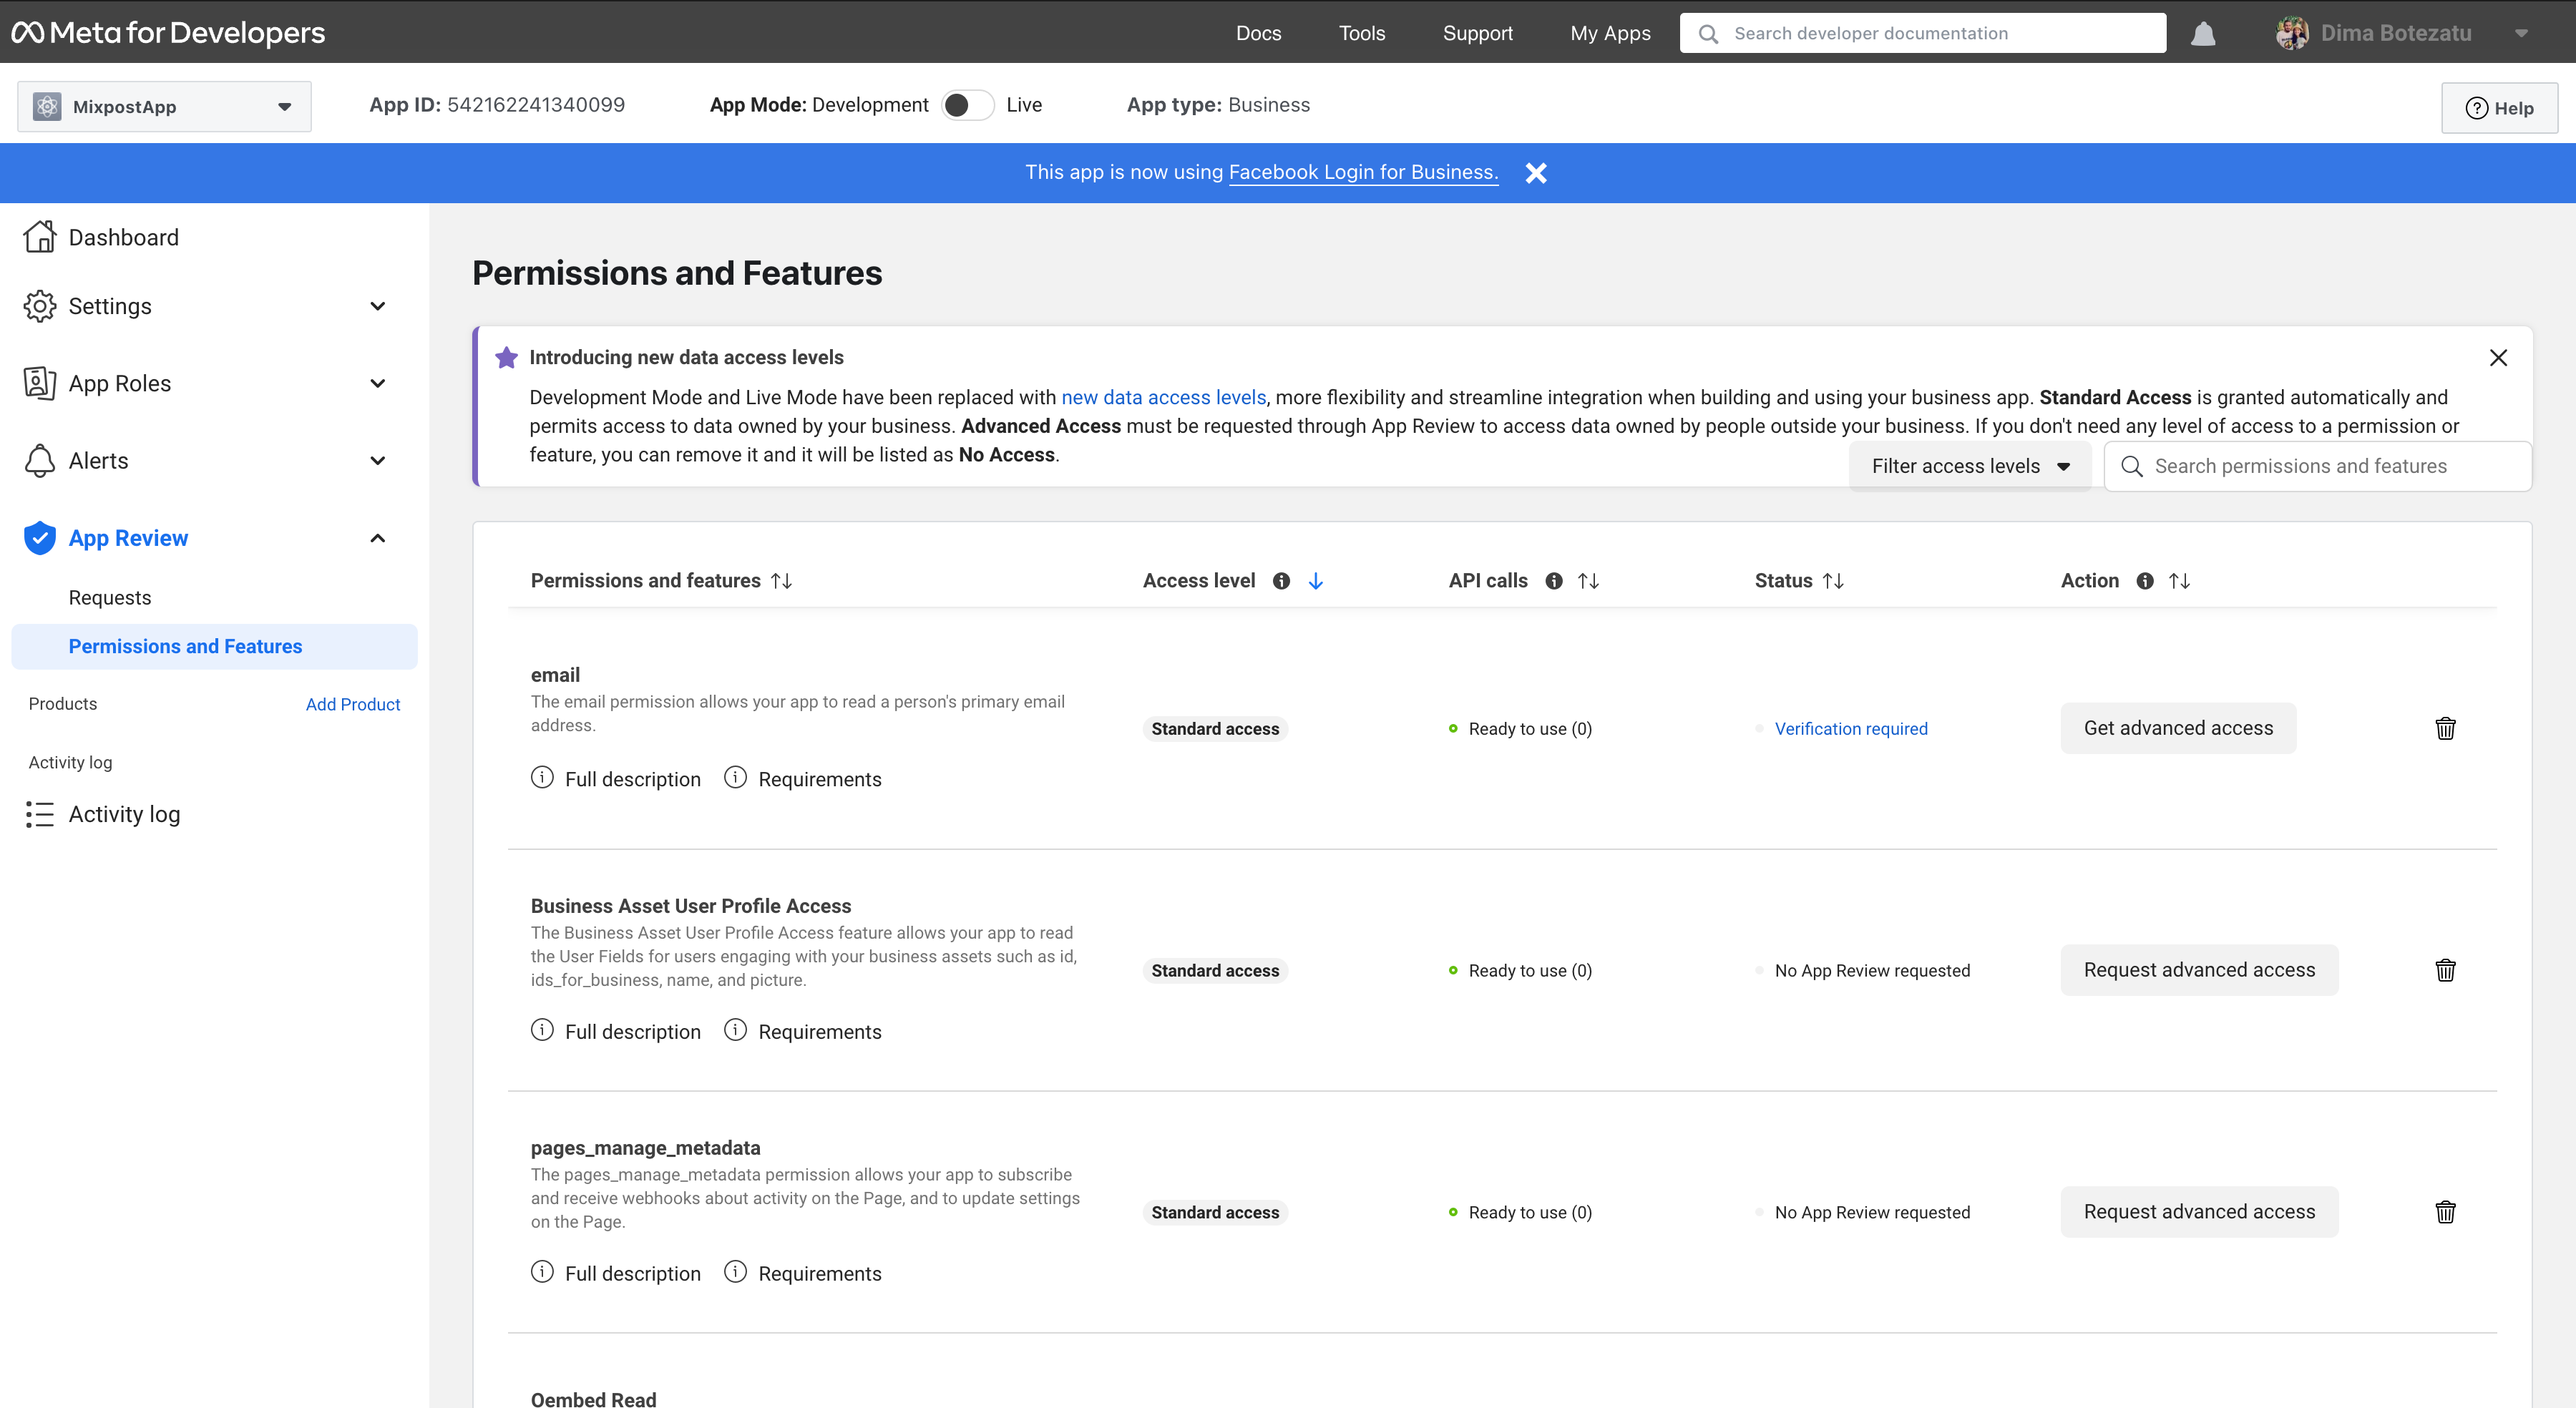
If your Facebook App is using v17.0, you must request permissions for the following scopes:
-
business_management
-
pages_show_list
-
read_insights
-
pages_manage_posts
-
publish_to_groups
-
instagram_basic
-
instagram_content_publish
-
instagram_manage_insights
If your Facebook App is using v16.0, you must request permissions for the following scopes:
-
pages_show_list
-
read_insights
-
pages_manage_posts
-
publish_to_groups
-
instagram_basic
-
instagram_content_publish
-
instagram_manage_insights
Before submitting the app for review, it is essential to finish all the required steps and provide information for each requested permission. The "Submit for Review" button located at the bottom of the page will become active only when all the review requirements, indicated by blue checkmarks, are fulfilled.
It can take several days to get a response from Facebook. You can check your pending request in the Facebook developer account in the "App Review -> Requests" section.