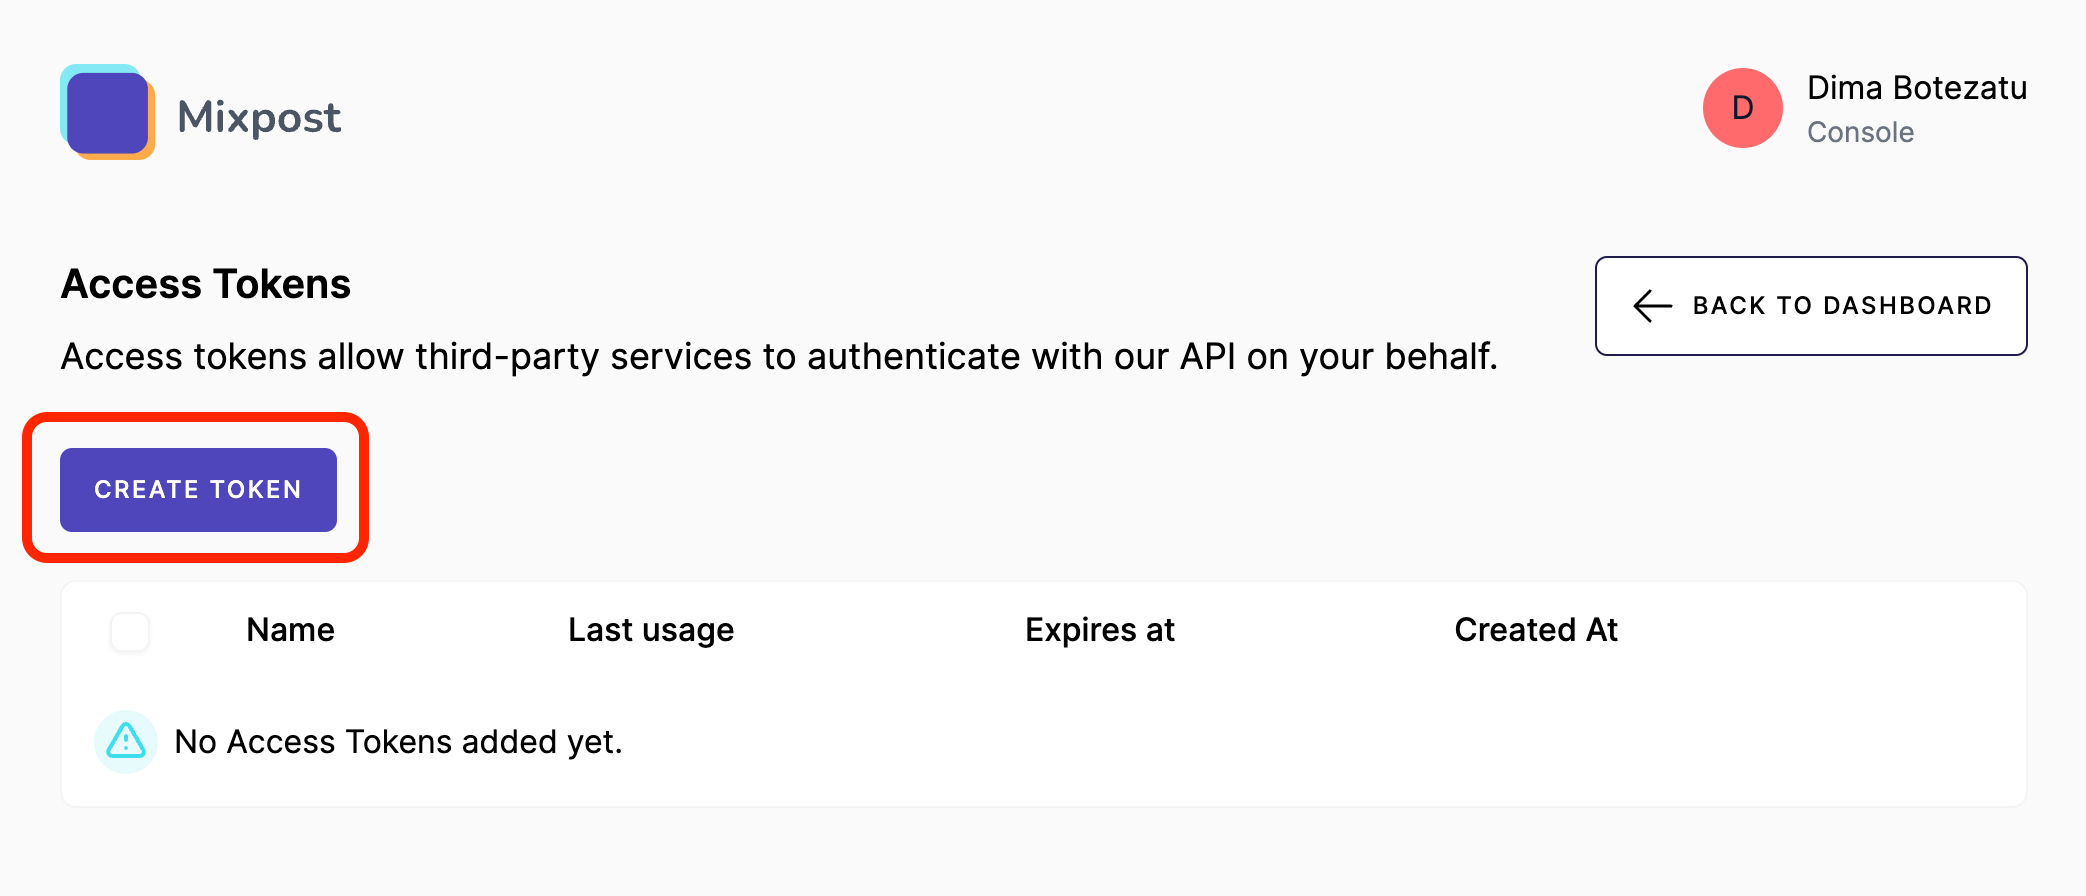
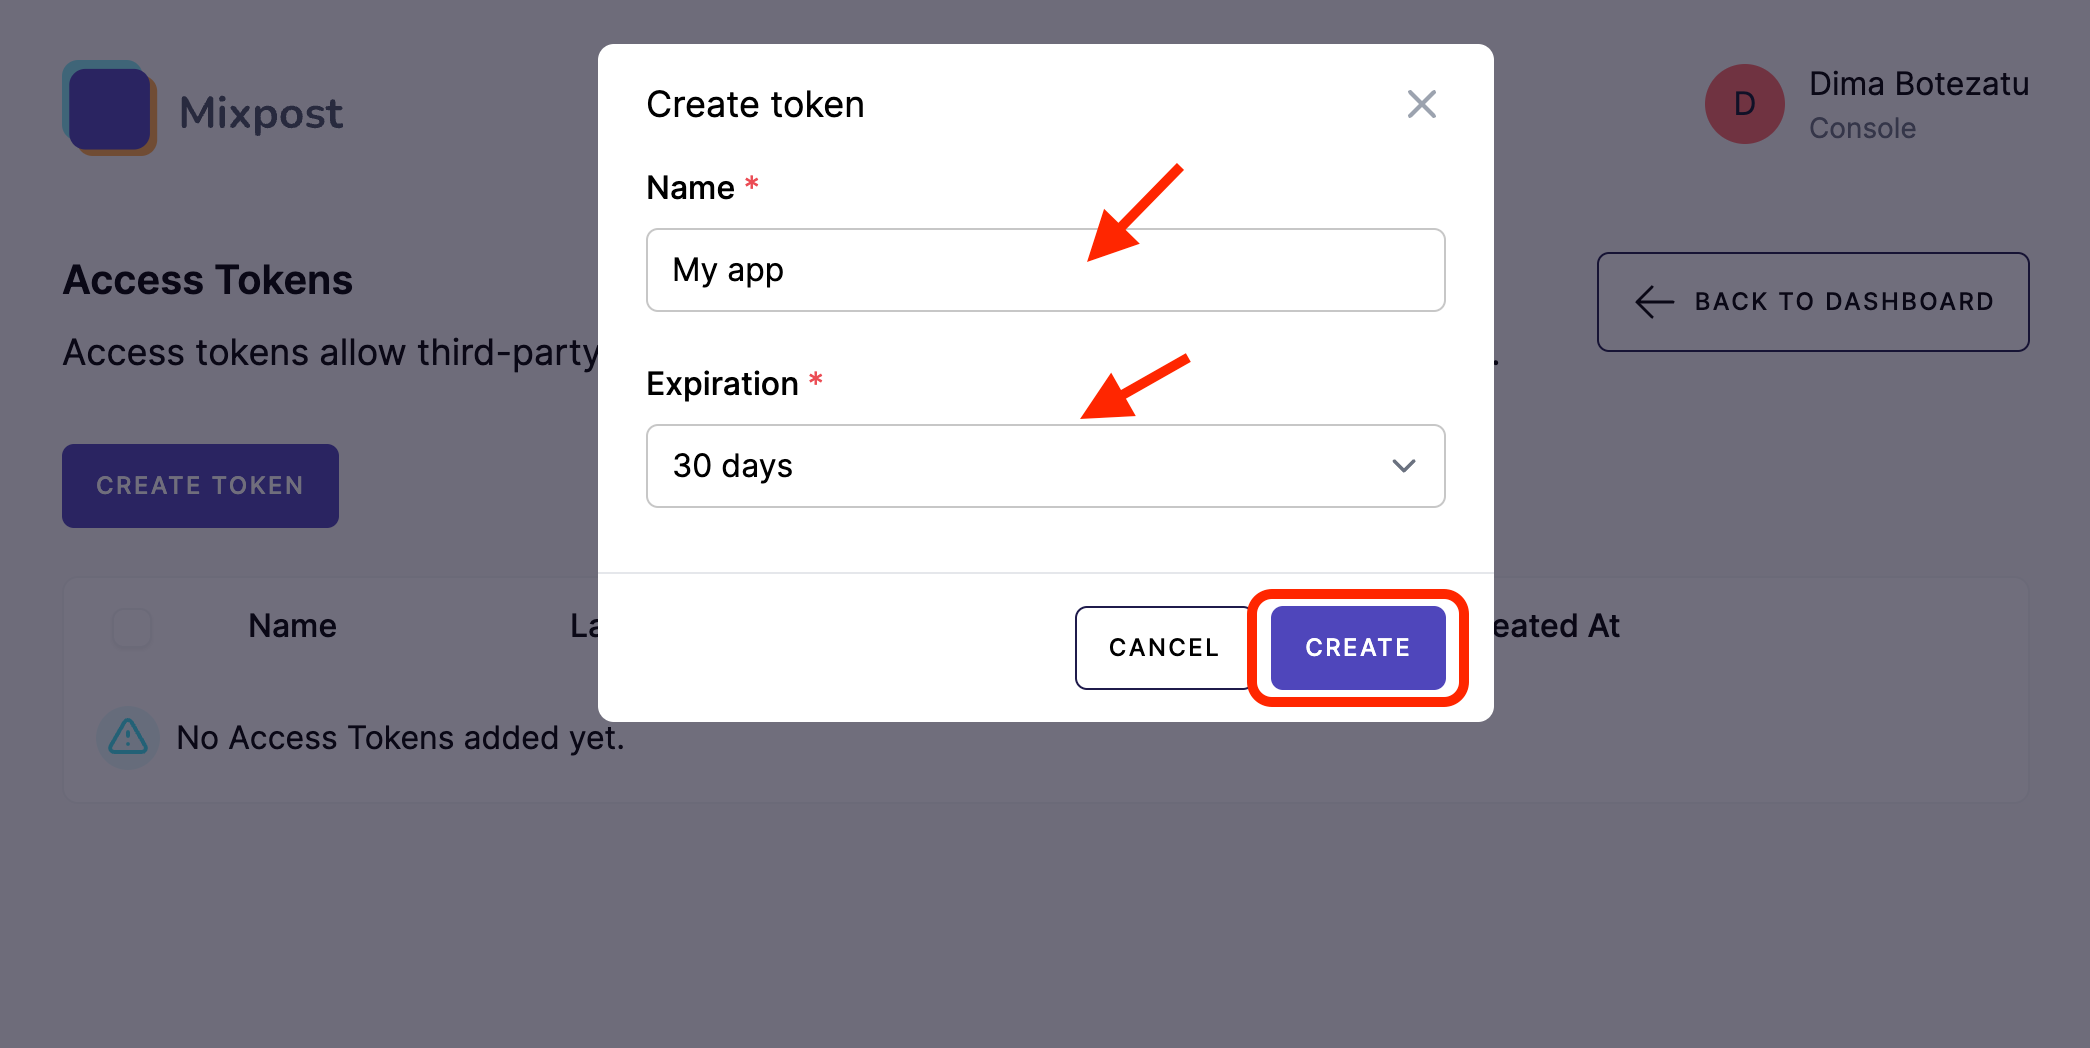
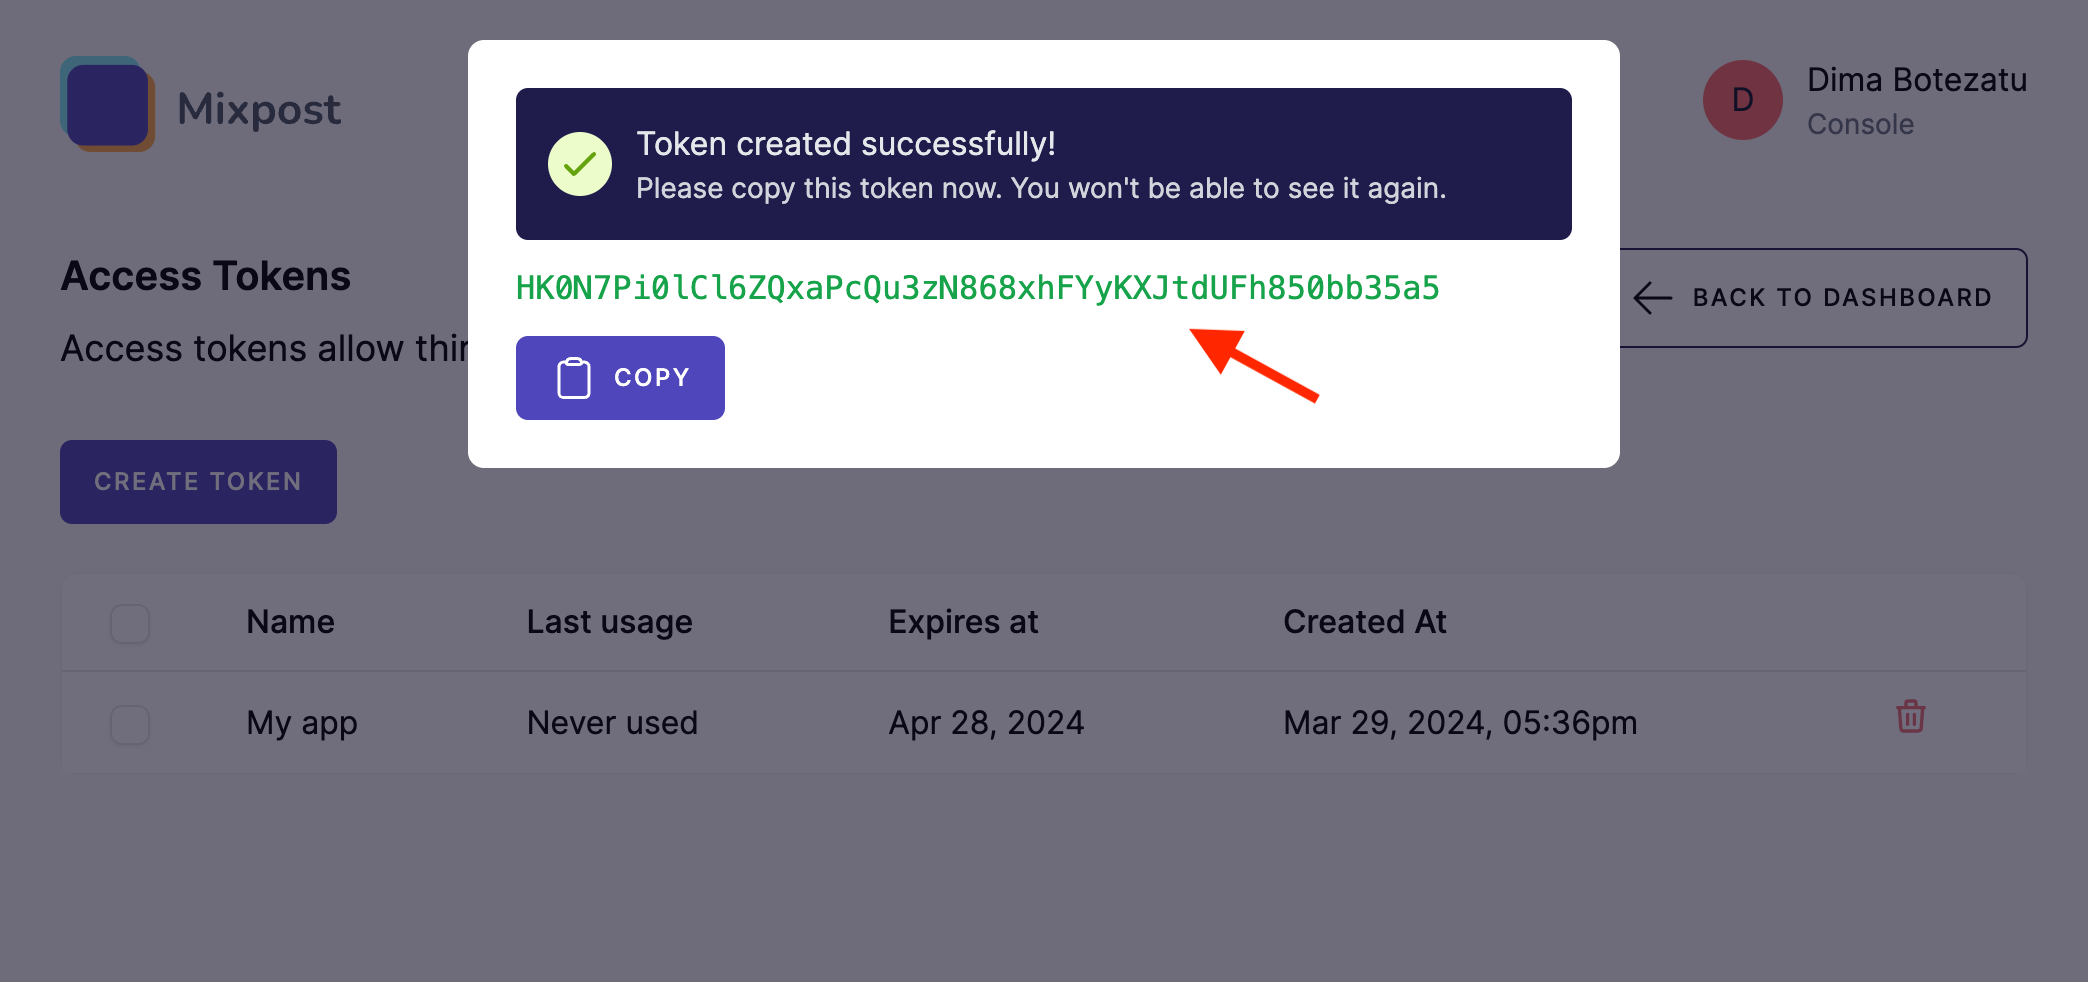
Create Access Token

Creating an access token is a straightforward process that grants applications or scripts the ability to interact with your account. Here's a step-by-step guide to creating an access token:

  1. Locate the User Menu:

    • Begin by navigating to the bottom left corner of the dashboard where you will find the user menu. This is typically represented by your avatar.
  2. Access the "Access Tokens" Page:

    • Within the user menu, look for a menu item labeled "Access Tokens" and click on it. This will take you to the page where you can manage or create new access tokens.
  3. Open Token Creation form:

    • On the "Access Tokens" page, find the "Create Token" button and click on it to start the process of creating a new access token.
  4. Configure Your Token:

    • You will be prompted to enter a name for your new access token. Choose a name that is descriptive and helps you remember the purpose of the token.
    • Next, set the expiration for the token if this option is available. The expiration is the date until which the token will remain valid. Depending on your needs, you might set it to never expire or to expire after a certain period.
  5. Copy Your New Access Token:

    • After creating the token, it will be displayed on the screen. It is crucial to copy this token and keep it in a safe place, as it will not be shown again. If you lose this token, you may need to revoke it and create a new one.
    • Ensure you copy the token completely and store it securely. Treat it as sensitively as you would your password, as it grants access to your account.

Screenshots

1-access-token.png

2-access-token.png

3-access-token.png

4-access-token.png

Conclusion

Once you have the token, you can make authorized HTTP requests to the API. To do this, you include the token in the HTTP request header using the Authorization field with the Bearer scheme. Here is an example of what the header might look like:

Authorization: Bearer YOUR_ACCESS_TOKEN_HERE

If the token is invalid or expired, the server will respond with a 401 Unauthorized status code.

The general format for API endpoints within Mixpost is as follows:

/{yourCorePath}/api/*
  • {yourCorePath} signifies the core path or base URL specific to your Mixpost instance. It's the initial segment of the Mixpost route. By default, this is set to mixpost.

  • /api/ is a fixed part of the path, indicating that the request is targeting the API segment of the Mixpost instance.

  • * (asterisk) represents a placeholder for subsequent parts of the API endpoint URL.

Important Reminder: The access token acts as a key to your account for the specific purposes you've generated it for. It's essential to keep it secure and only share it with trusted applications or services. If you suspect that your access token has been compromised, you should revoke it immediately and generate a new one.