Configuration
- Integrate third-party services
- Create Subscription Plans
- System Settings
- Billing Settings
- Onboarding Settings
- Scripts Settings
- Integrate with Sentry - Error Reporting
Integrate third-party services
After the installation of Mixpost Enterprise, the integration of third-party services is required.
Integrate Social Platforms:
Follow the integration instructions for each social platform
Integrate Payment Platforms:
Follow the integration instructions for each payment platform
Create Subscription Plans
With Mixpost Enterprise, setting up your own subscription plans is super easy. You can easily pick and choose which features to offer and even set limits for different plan levels. It's all about giving you the flexibility to create the perfect plan for your customers. From the Mixpost billing portal, your customers can subscribe to plans, update the subscription plan, update their payment information, and download their invoices.
Integrate a payment platform and create pricing plans
Mixpost Enterprise supports payment platforms like Stripe and Paddle. If you have not yet integrated a payment platform, follow the integration instructions.
Create pricing plans in Mixpost Enterprise
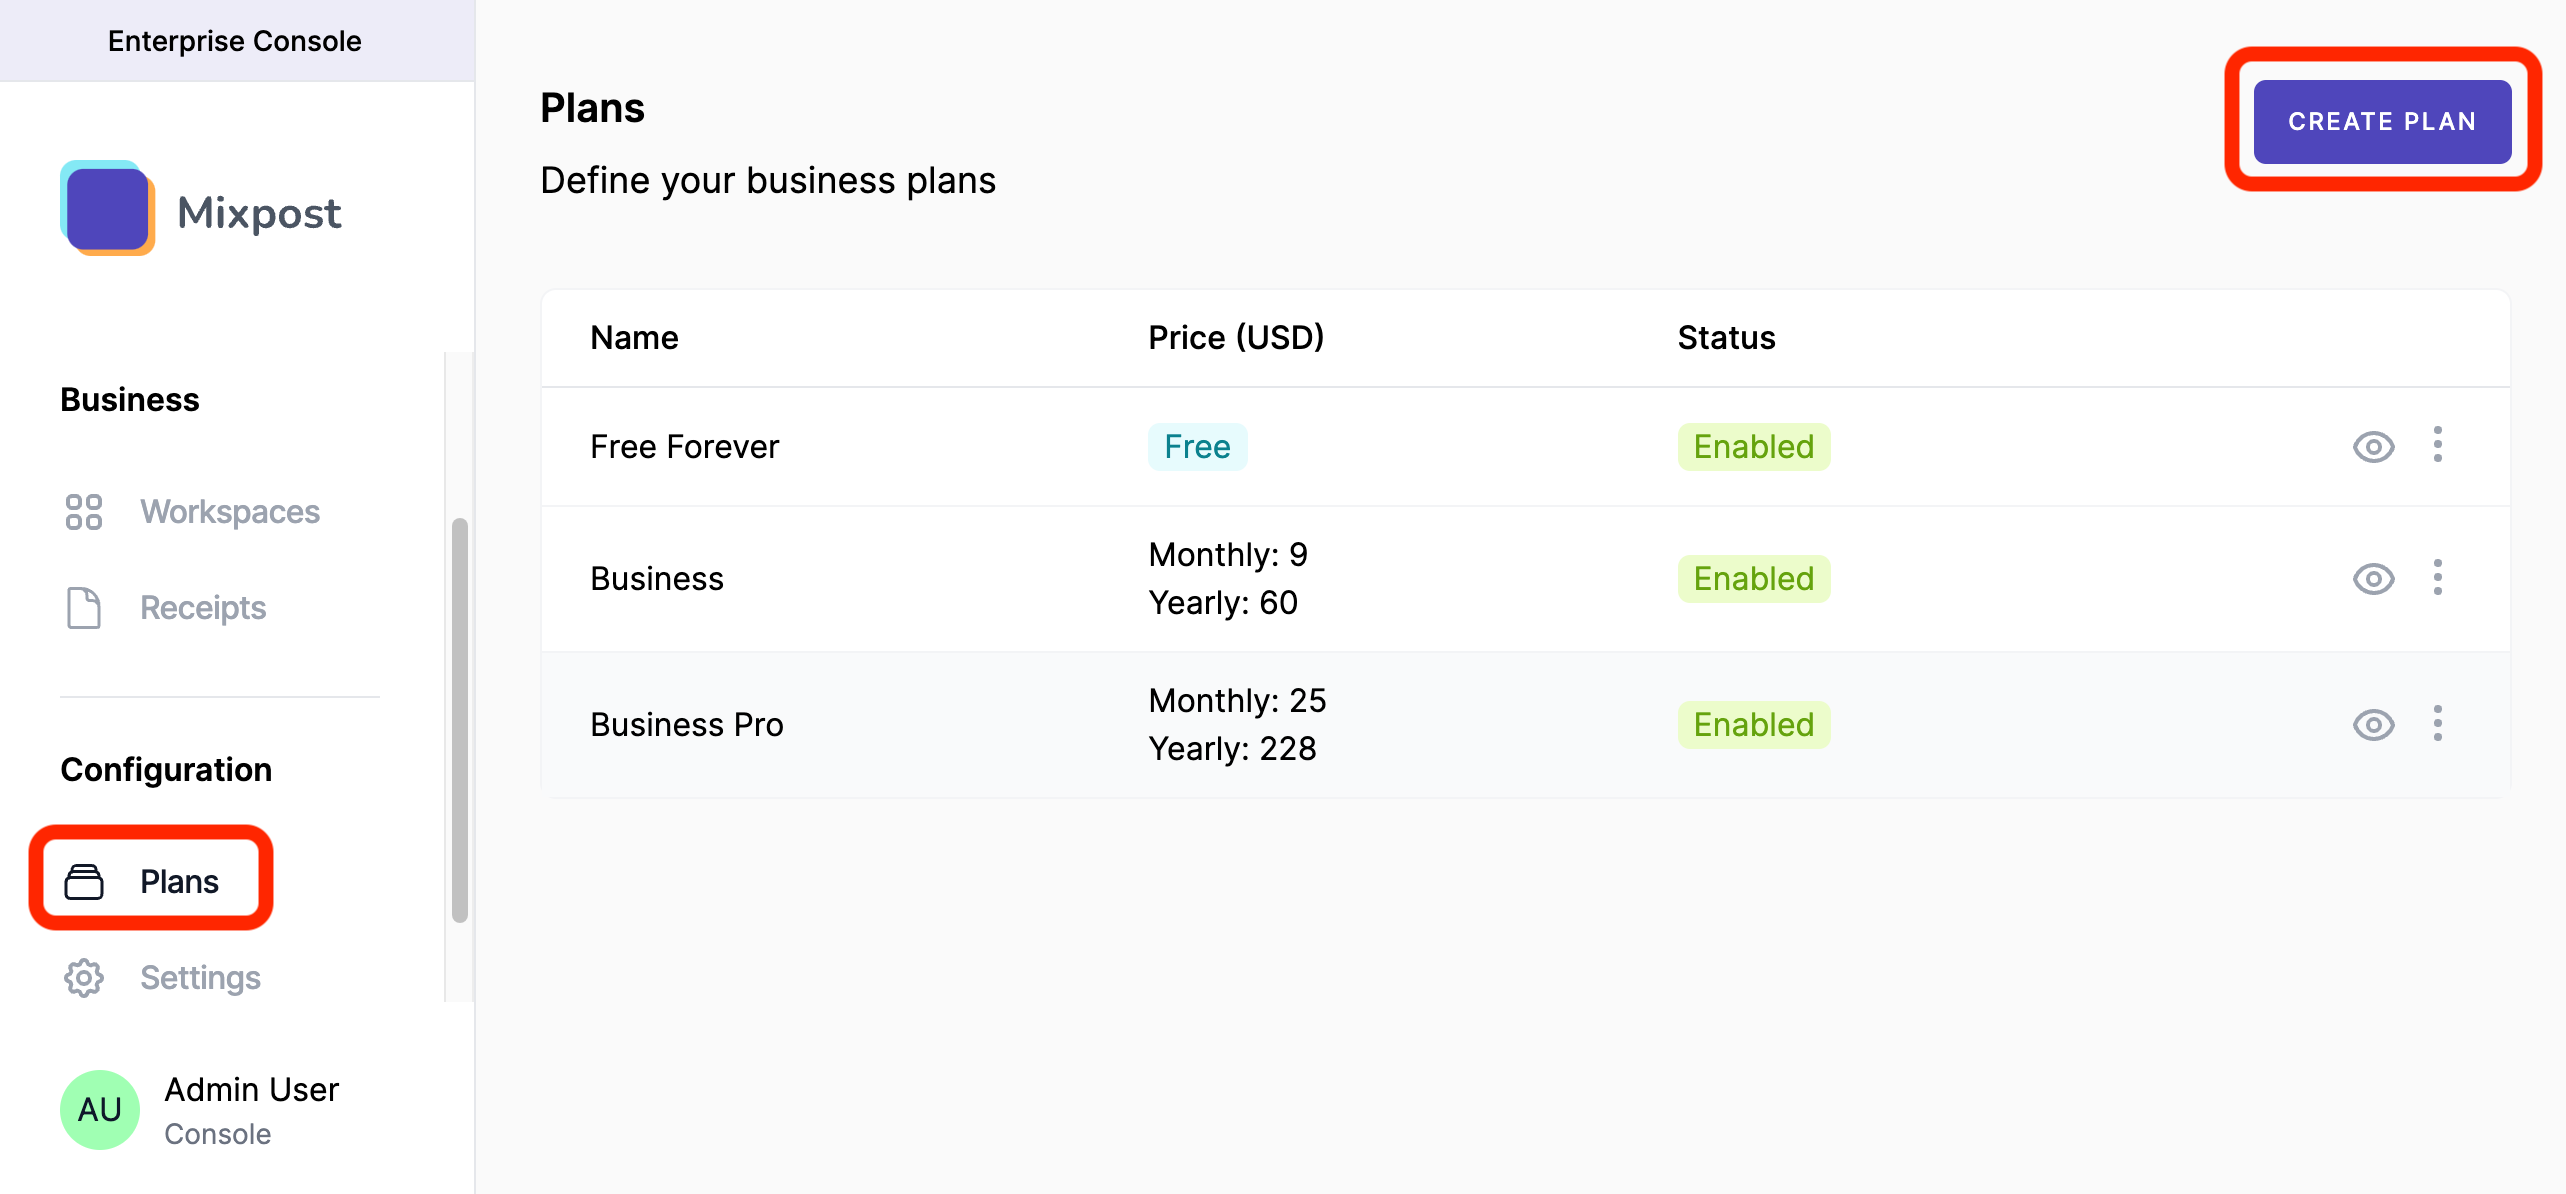
- Open the Enterprise Console from the user menu.
- Navigate to "Plans"
- Here, you'll see the "Create Plan" button. Click on it.
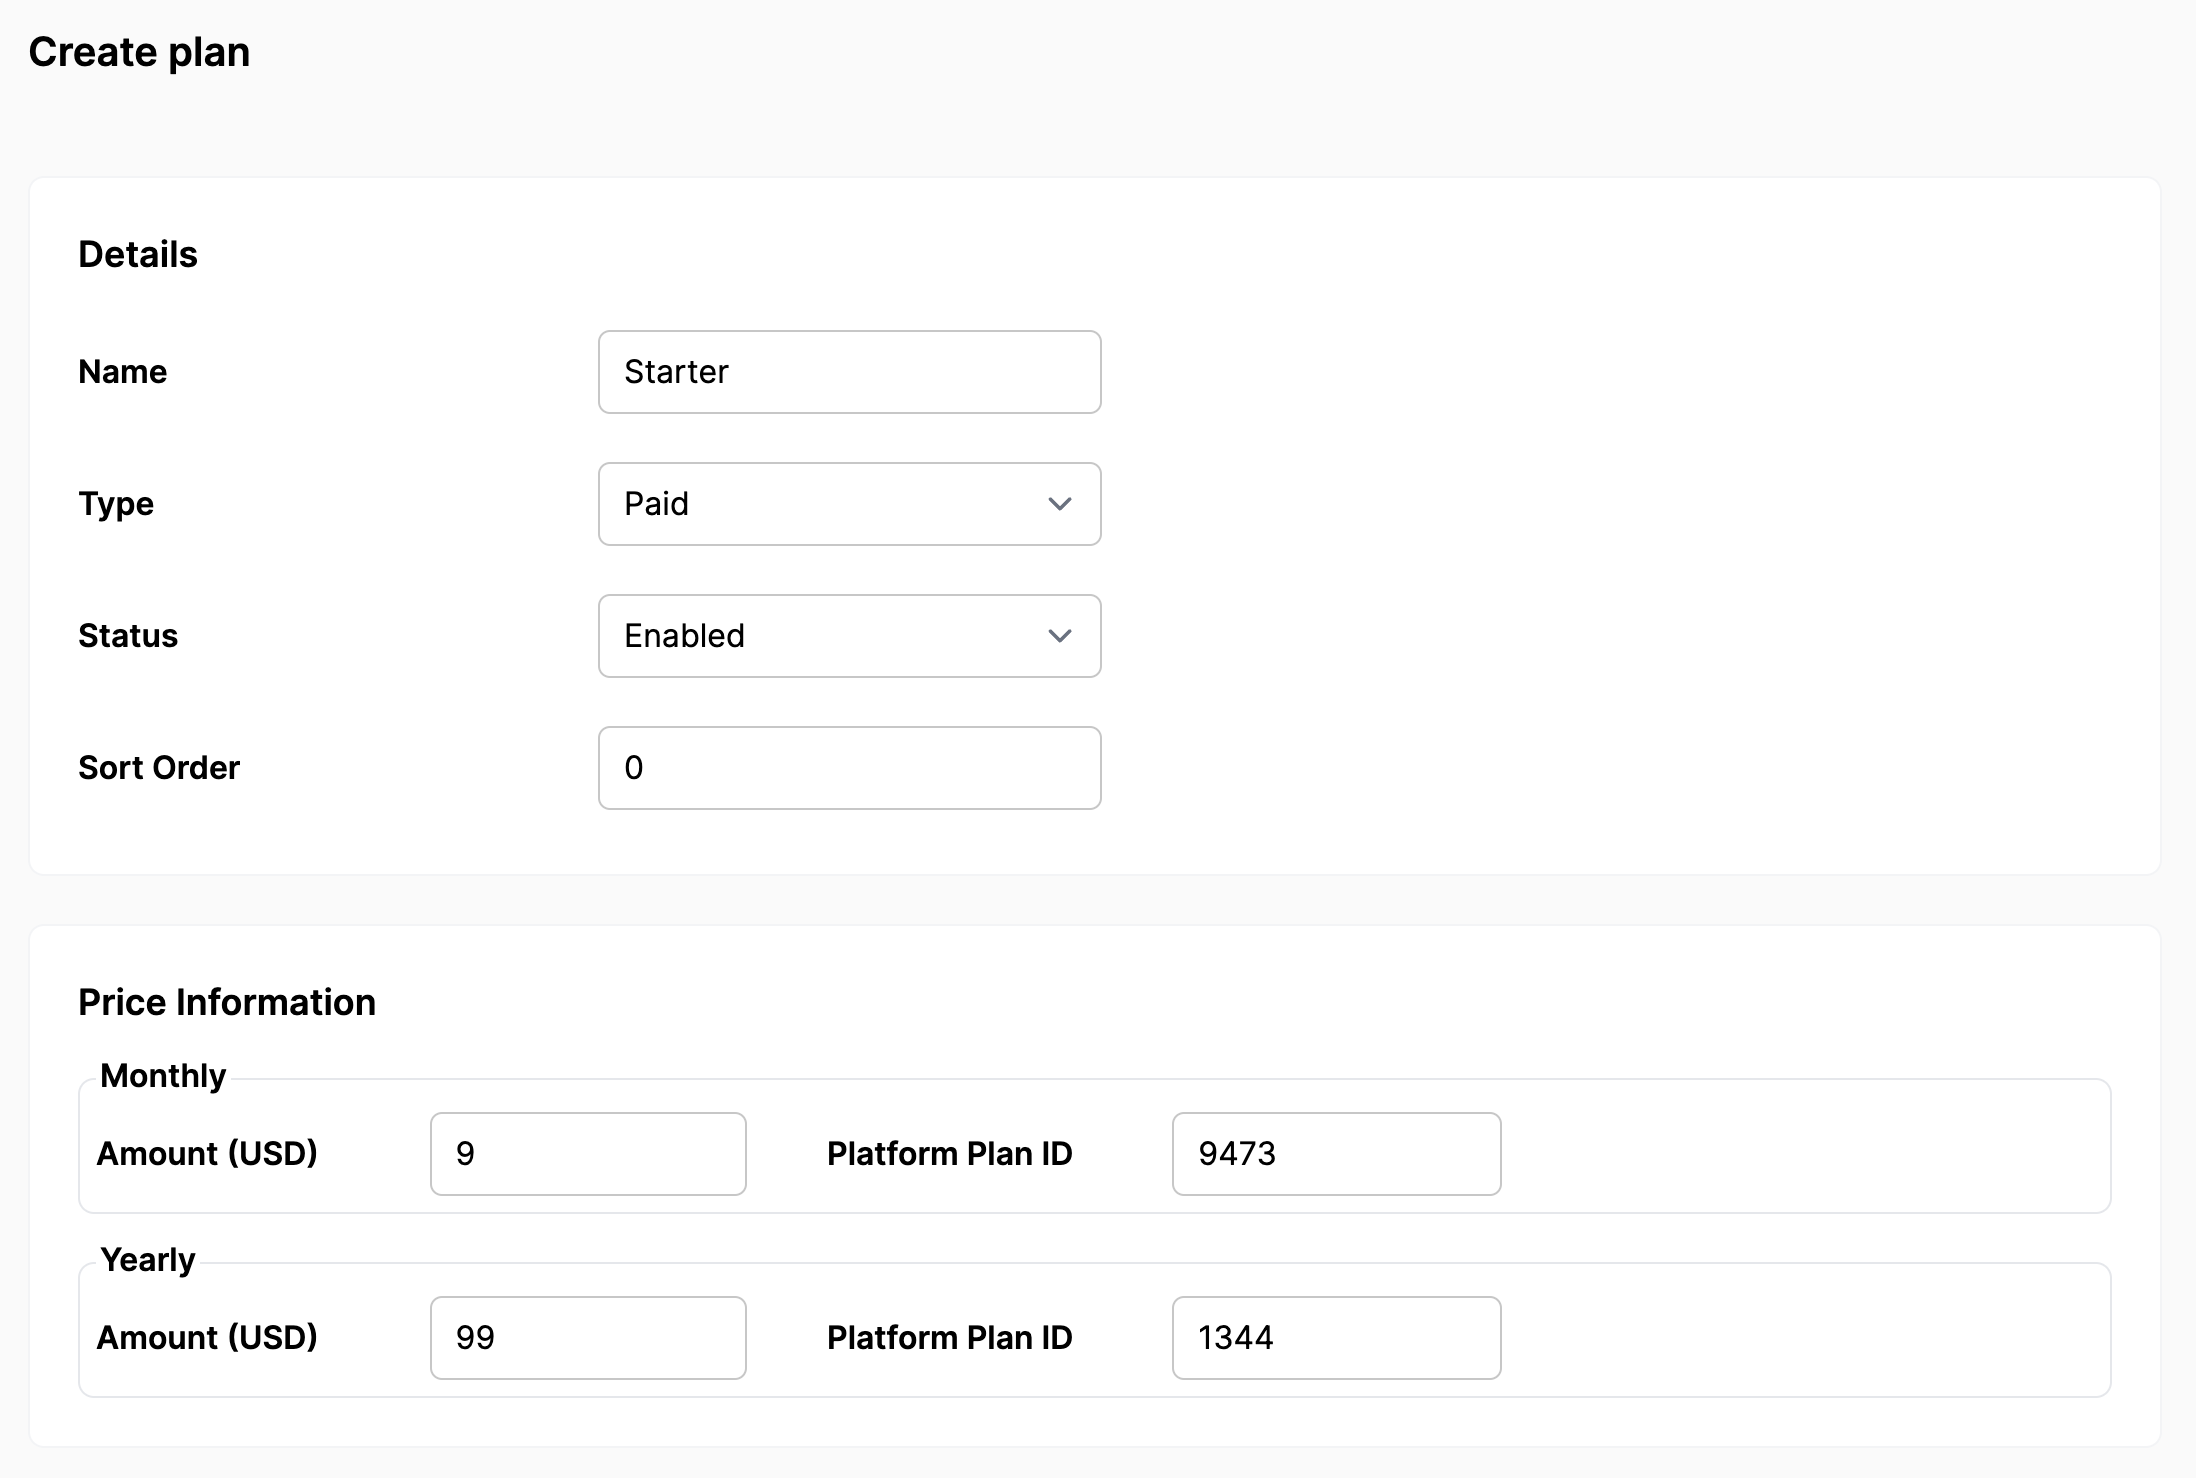
- Give a plan name, for example: "Starter"
- Select "Type" of the plan:
- Free - That says the plan is free. You can only have one free plan.
- Paid - That says it requires payment processing. Here you need to input the Price information:
- Monthly
- Amount - the price of your monthly plan
- Platform Plan ID - the ID of your monthly plan created in the payment platform.
- Yearly
- Amount - the price of your yearly plan
- Platform Plan ID - the ID of your yearly plan created in the payment platform.
- Monthly
- Select the status "Enabled"
- Input "Sort order". For example: Starter (1), Advanced (2), Business (3), etc.
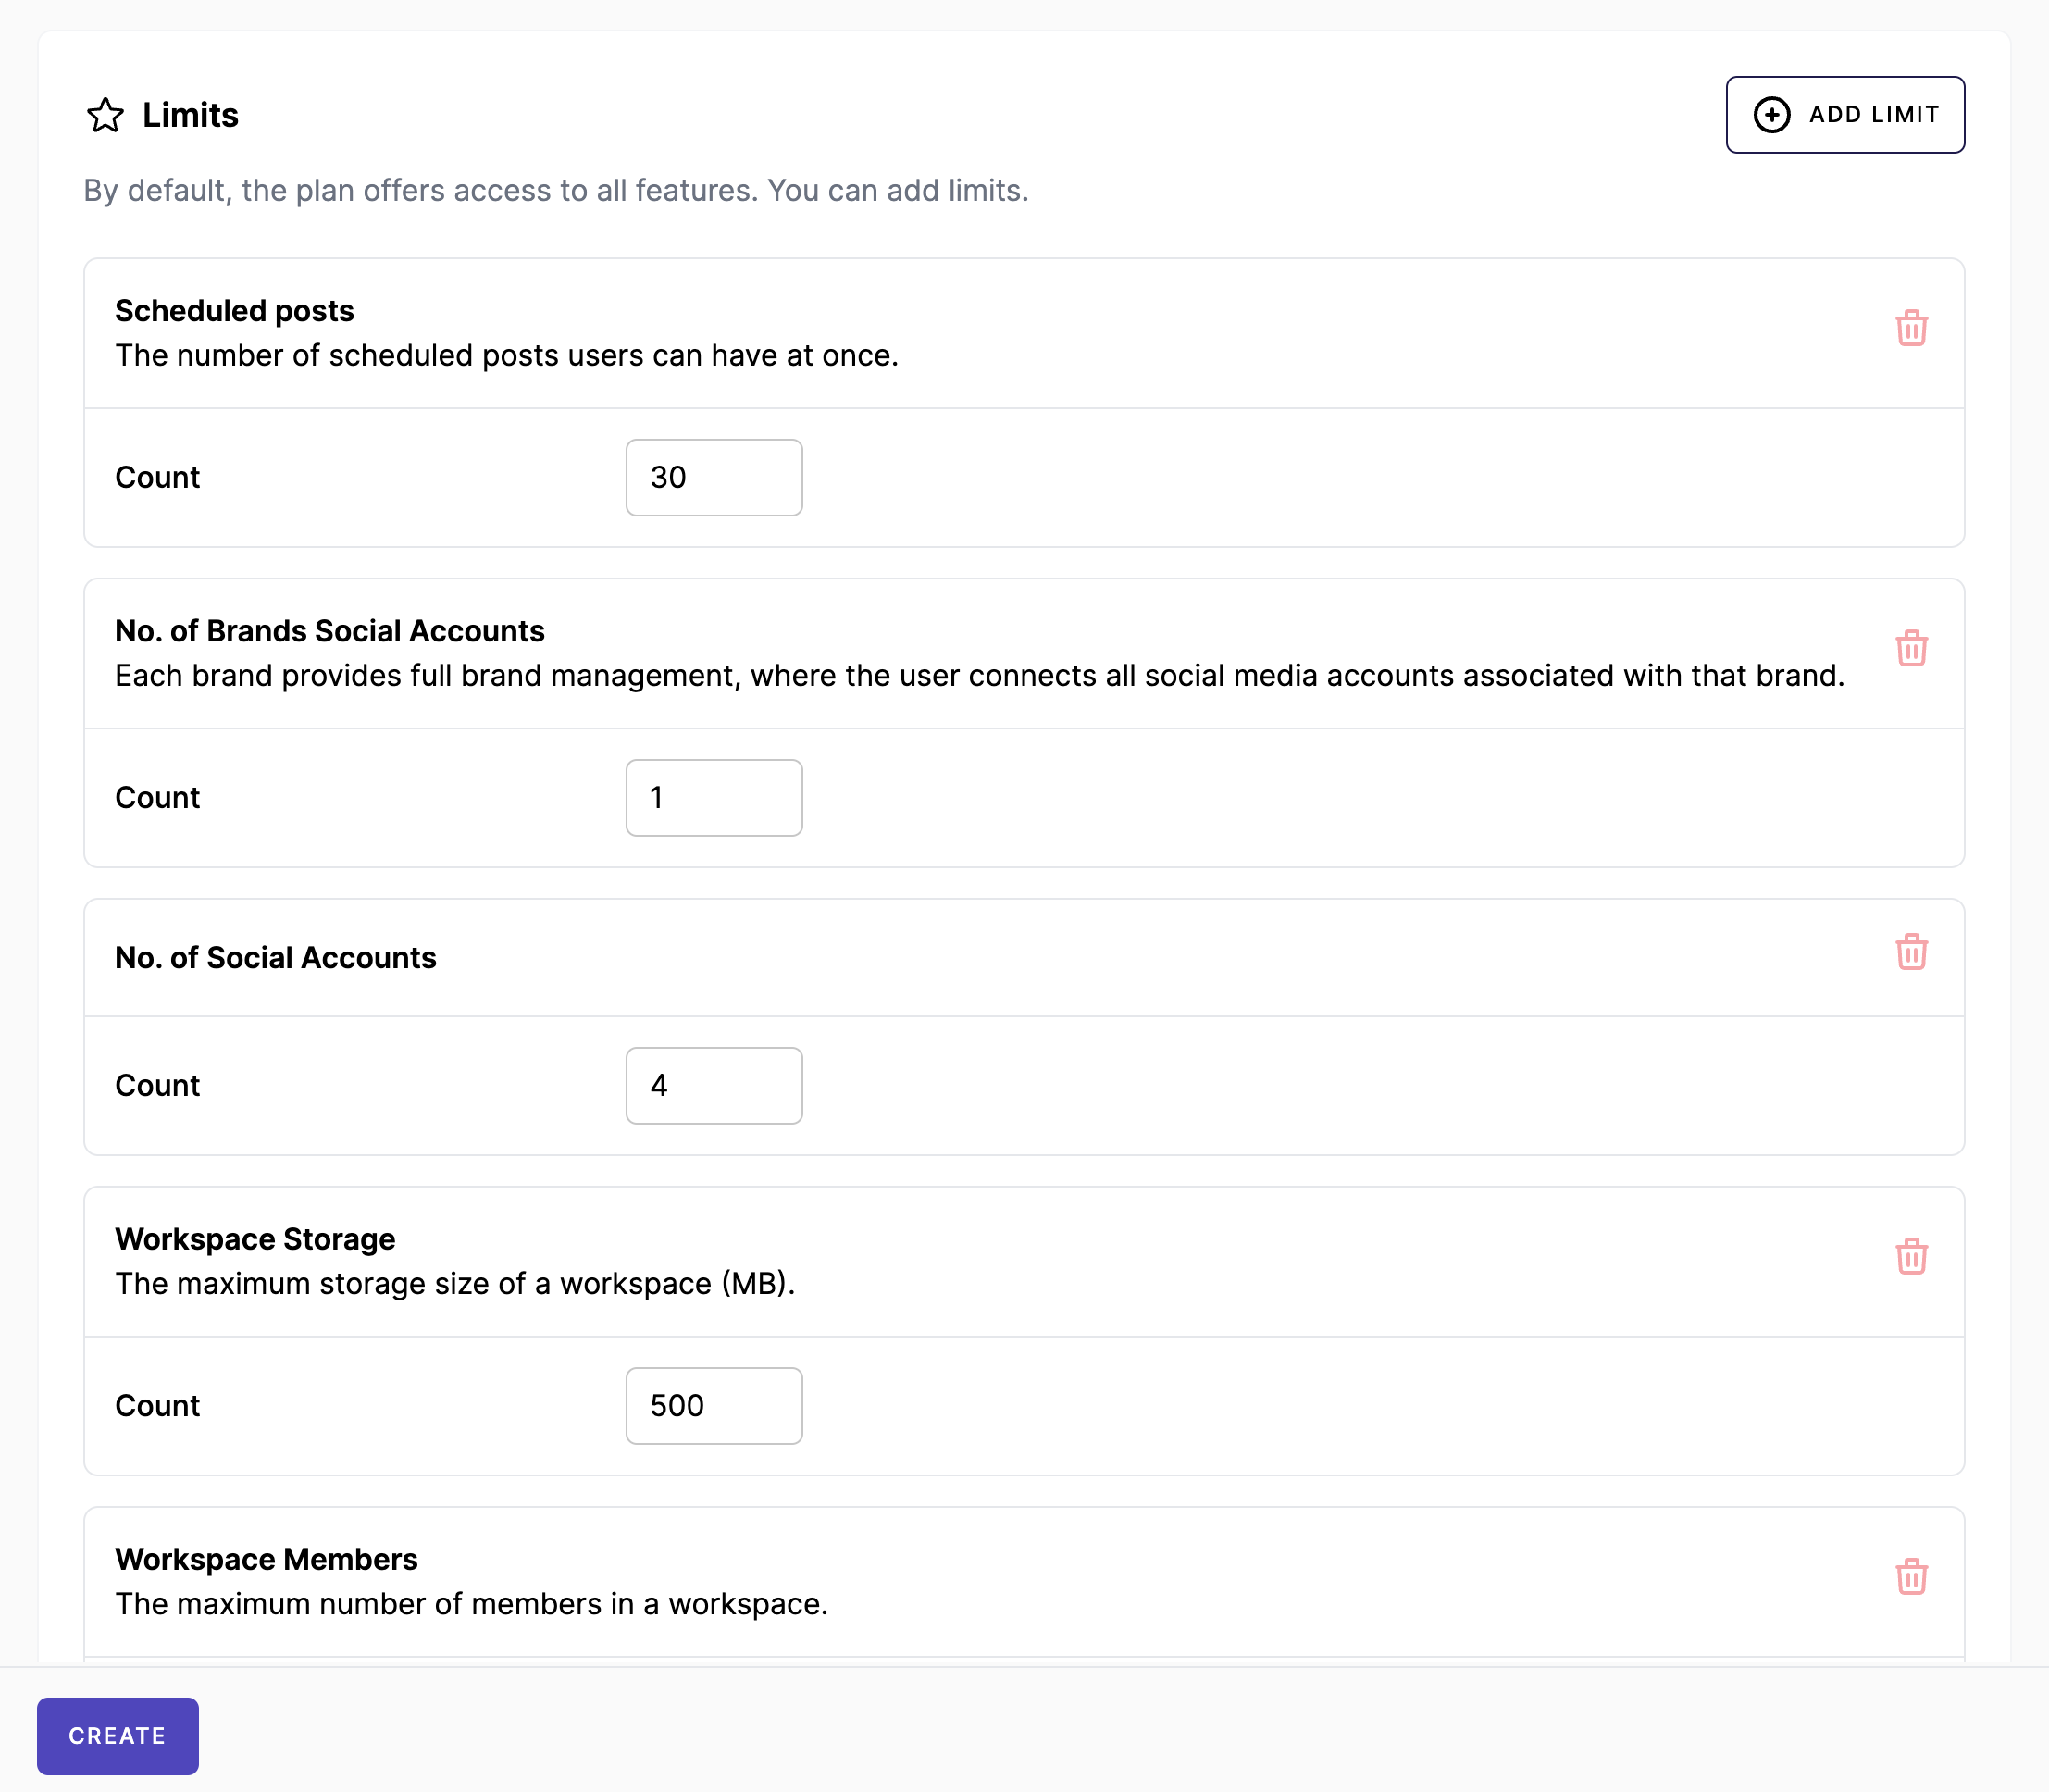
- Add limits - By default, the plan offers access to all features. You can add limits.
- Save the plan by clicking on the "Create" or "Update" button.
Conclusion
If you have successfully completed the integration of the payment platform and created plans in Mixpost Enterprise, you can test by registering a new user and subscribing to a plan.
System Settings
Allow users to create multiple workspaces
A workspace is the primary entity for billing. In other words, all charges, payments, and subscriptions are tied to the workspace, rather than the individual user. By default, the user can own only one workspace.
You may want Mixpost to allow users to own multiple workspaces:
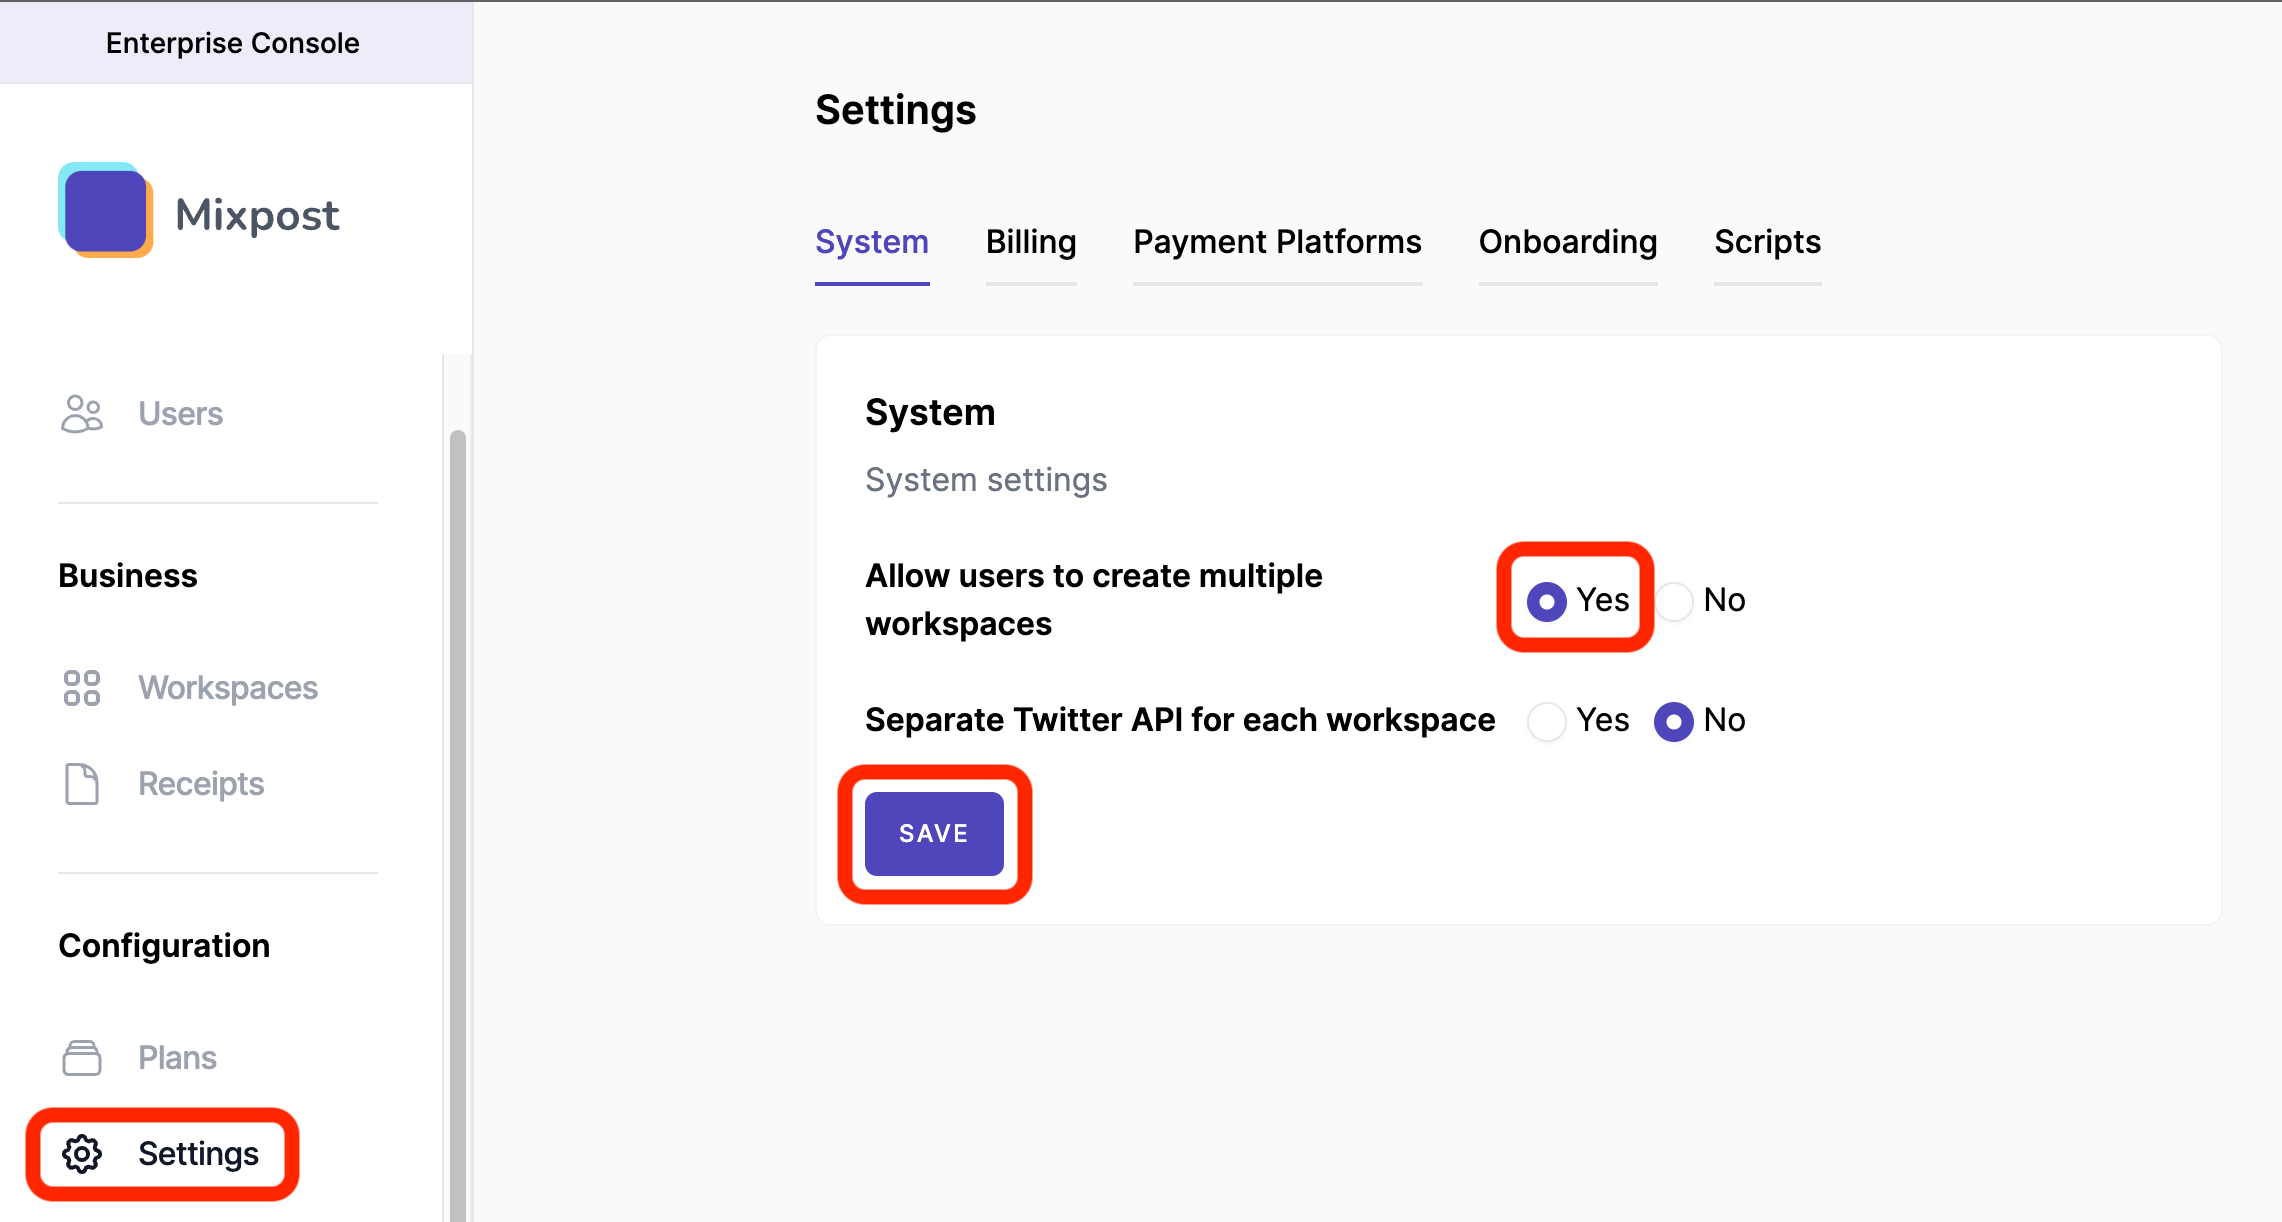
- Go to "Enterprise Console" (left-bottom user menu)
- Click on "Settings" (left sidebar)
- Here you will see "Allow users to create multiple workspaces"
- Select "Yes"
- Save
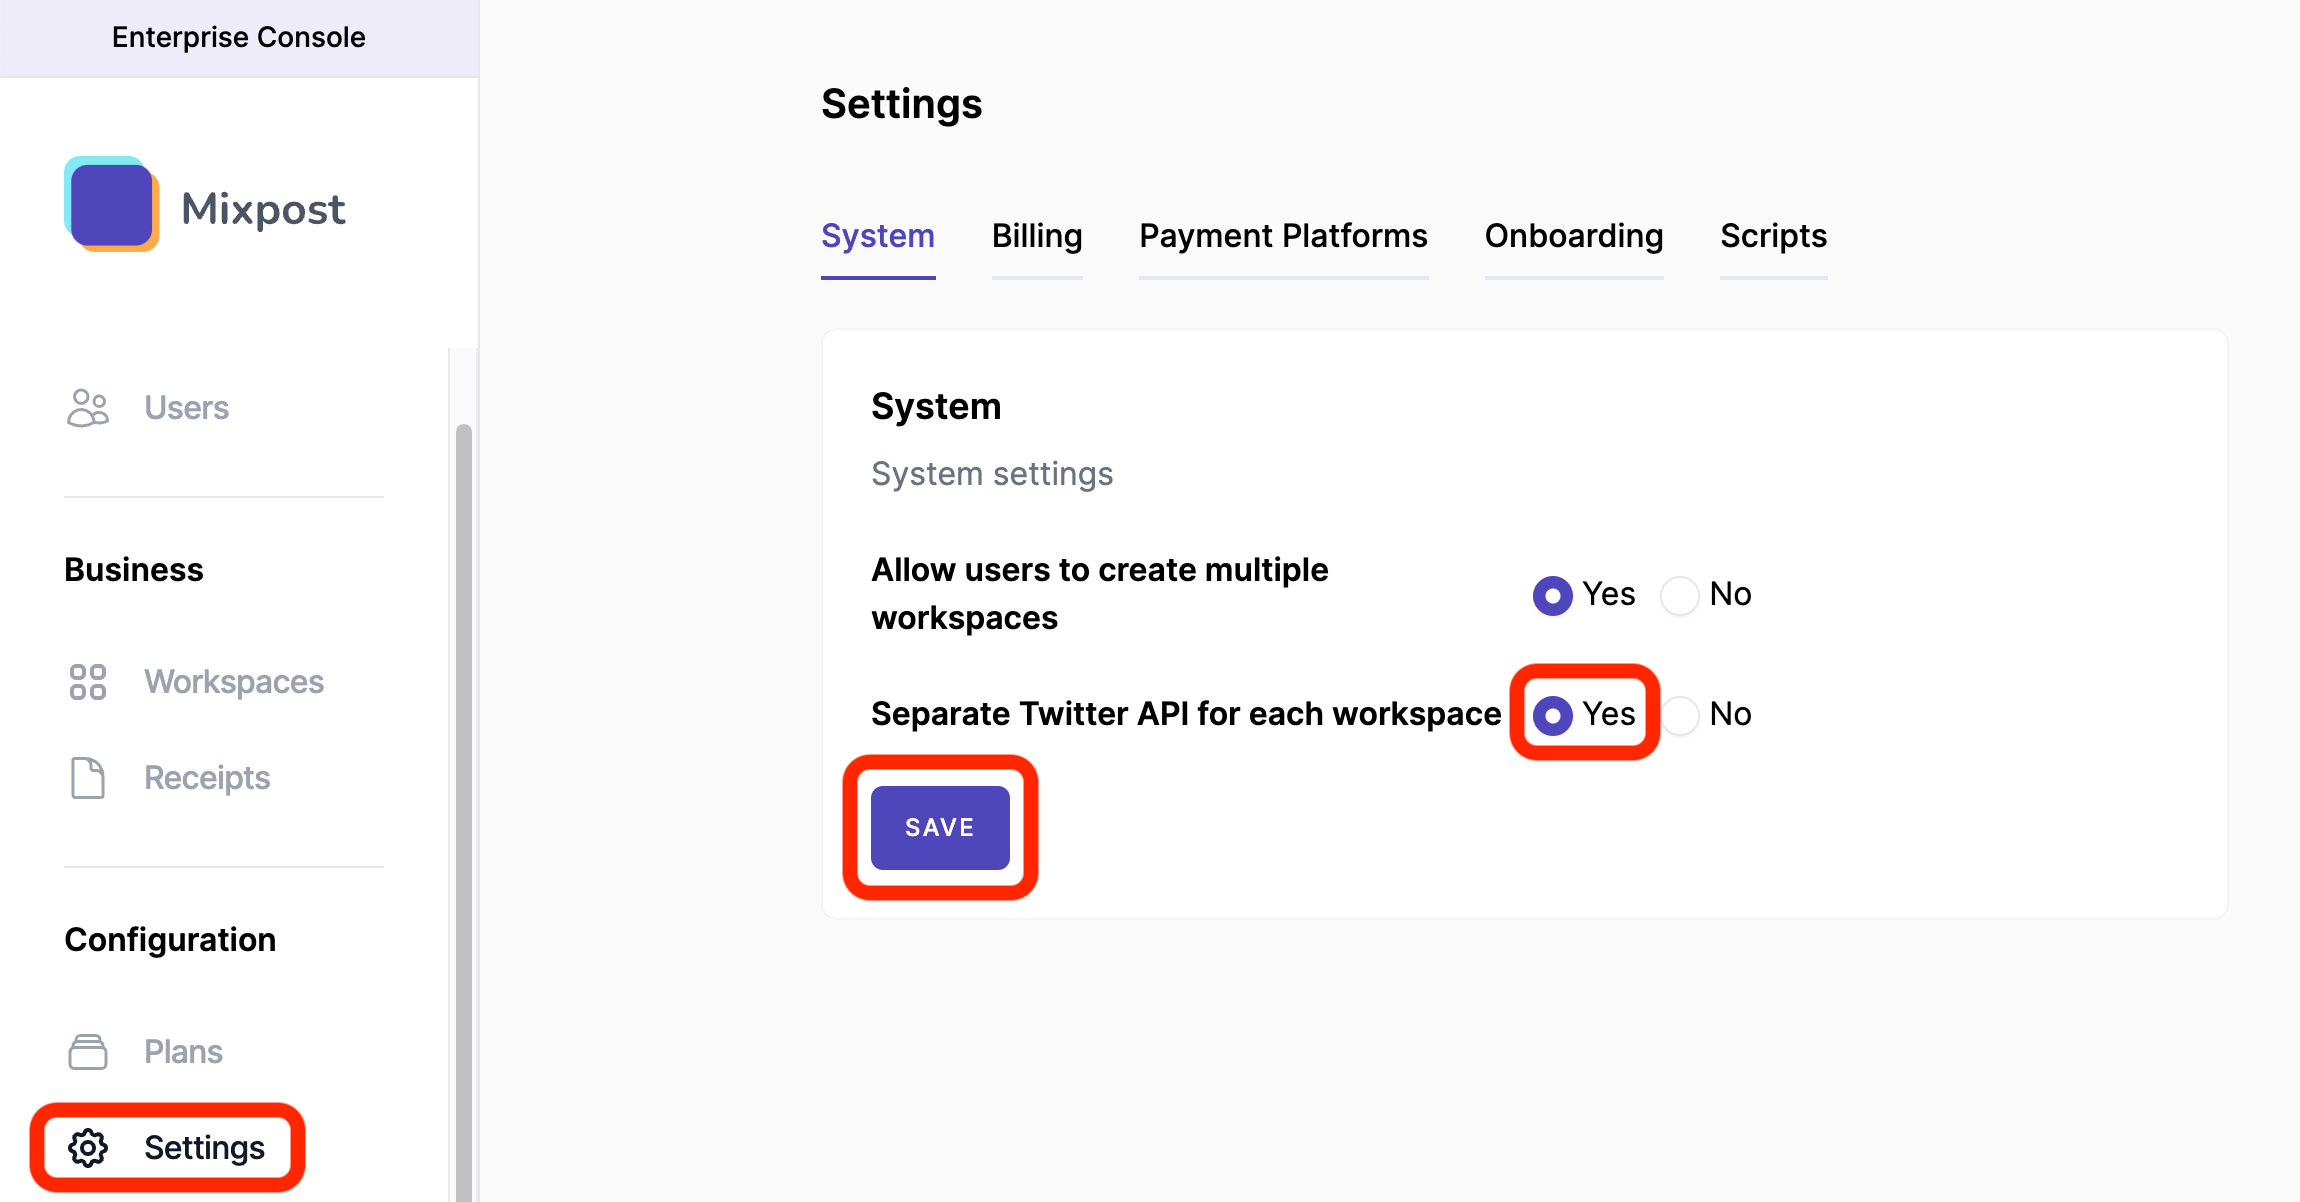
Separate Twitter API for each workspace
In the context that Twitter API has a free limit, but the paid limit may be too high for some businesses at the beginning. However, the solution is to let the workspace administrator insert his Twitter Keys.
Billing Settings
Mixpost Enterprise allows you to configure the system according to the specifics of your business:
- Go to "Enterprise Console" (left-bottom user menu)
- Click on "Settings" (left sidebar)
- Here you will see the "Billing" tab item. Click on it.
- Made the changes.
- Save changes by clicking on the "Save" button.
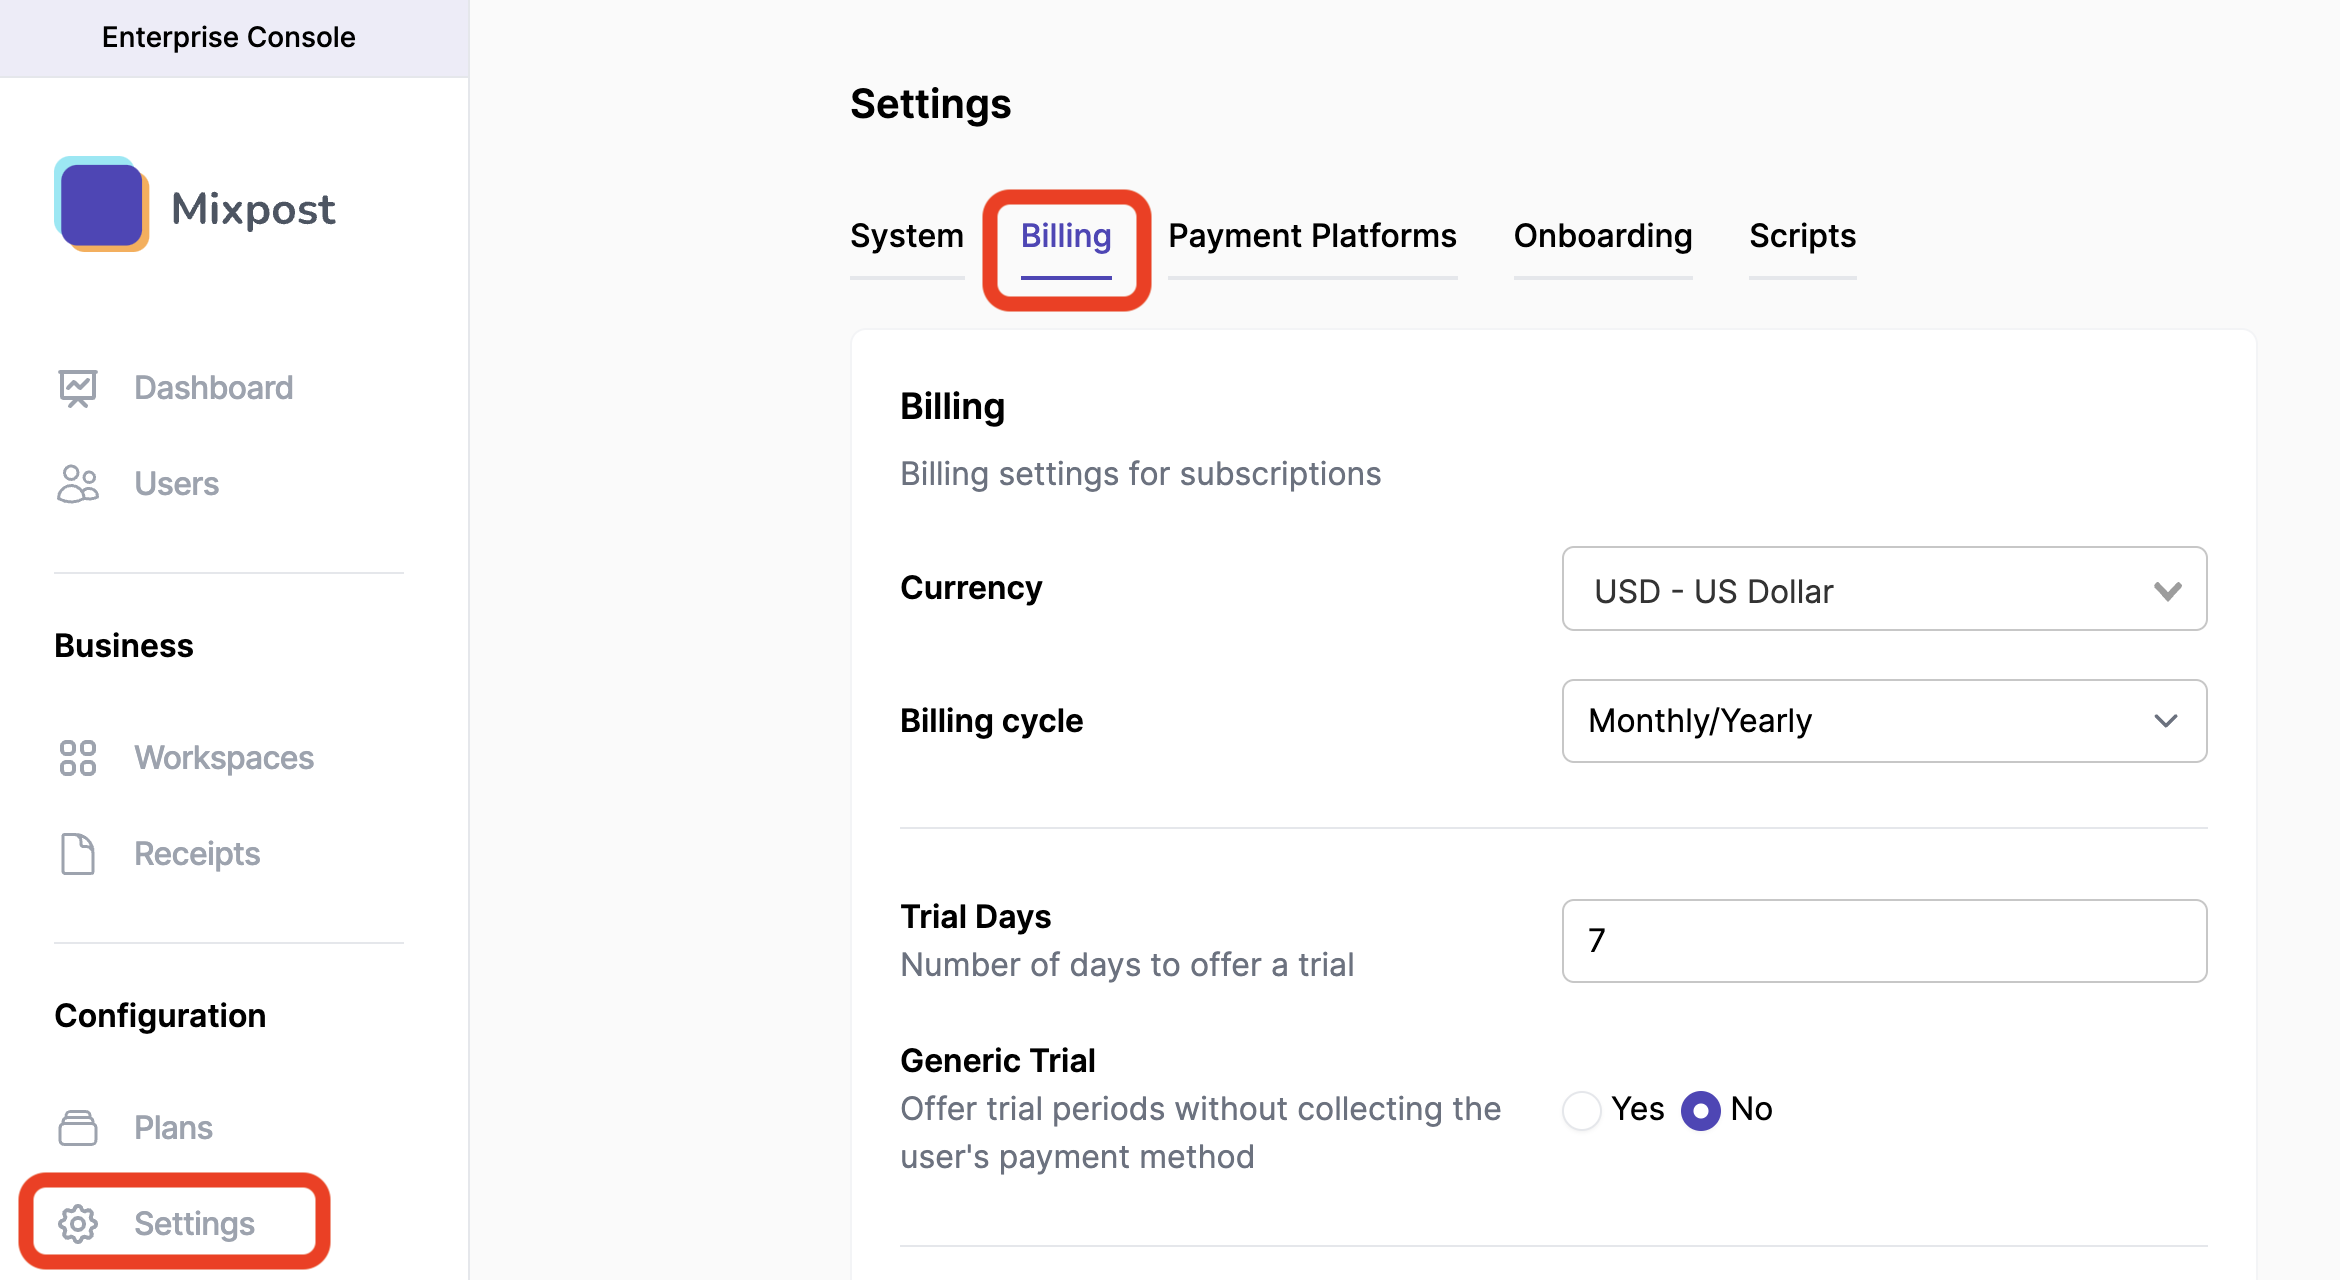
Currency
Default: "USD - US Dollar"
Billing cycle
Default: "Monthly/Yearly"
There are 3 cycles you can select:
- Monthly/Yearly (default) - Will let your customers choose a period of subscription, monthly or yearly.
- Monthly only - Your customer can only subscribe monthly.
- Yerly only - Your customer can only subscribe yearly.
Trial Days
Default: "7"
By default, Mixpost has a 7-day trial period set up to provide trial periods to your customers. You can increase or decrease the number of days. If you want to disable Trials, you should leave it empty or set to 0.
Generic Trial
Default: "No"
If you would like to offer trial periods without collecting the user's payment method up front, you may check "Yes".
Prorations
Default: "Yes"
By default, Mixpost prorates charges when swapping between plans. The "No" checkbox can be checked to allow customers to change subscription plans without prorating costs.
Swap and invoice
Default: "Yes"
Receipt Title
Default: 'Receipt'
This value is used in the receipt that the customer can download after the payment is successful. You can change it to anything you want, like "Invoice" for example.
Company Details
This information will appear on all of your receipts and is a great place to add your full business name, VAT number, or address of record. Do not include any confidential or financial information such as credit card numbers.
Plans Page URL & Title
Put your URL to the pricing or comparison plans on your website.

What your customers see when they try to subscribe to a plan:

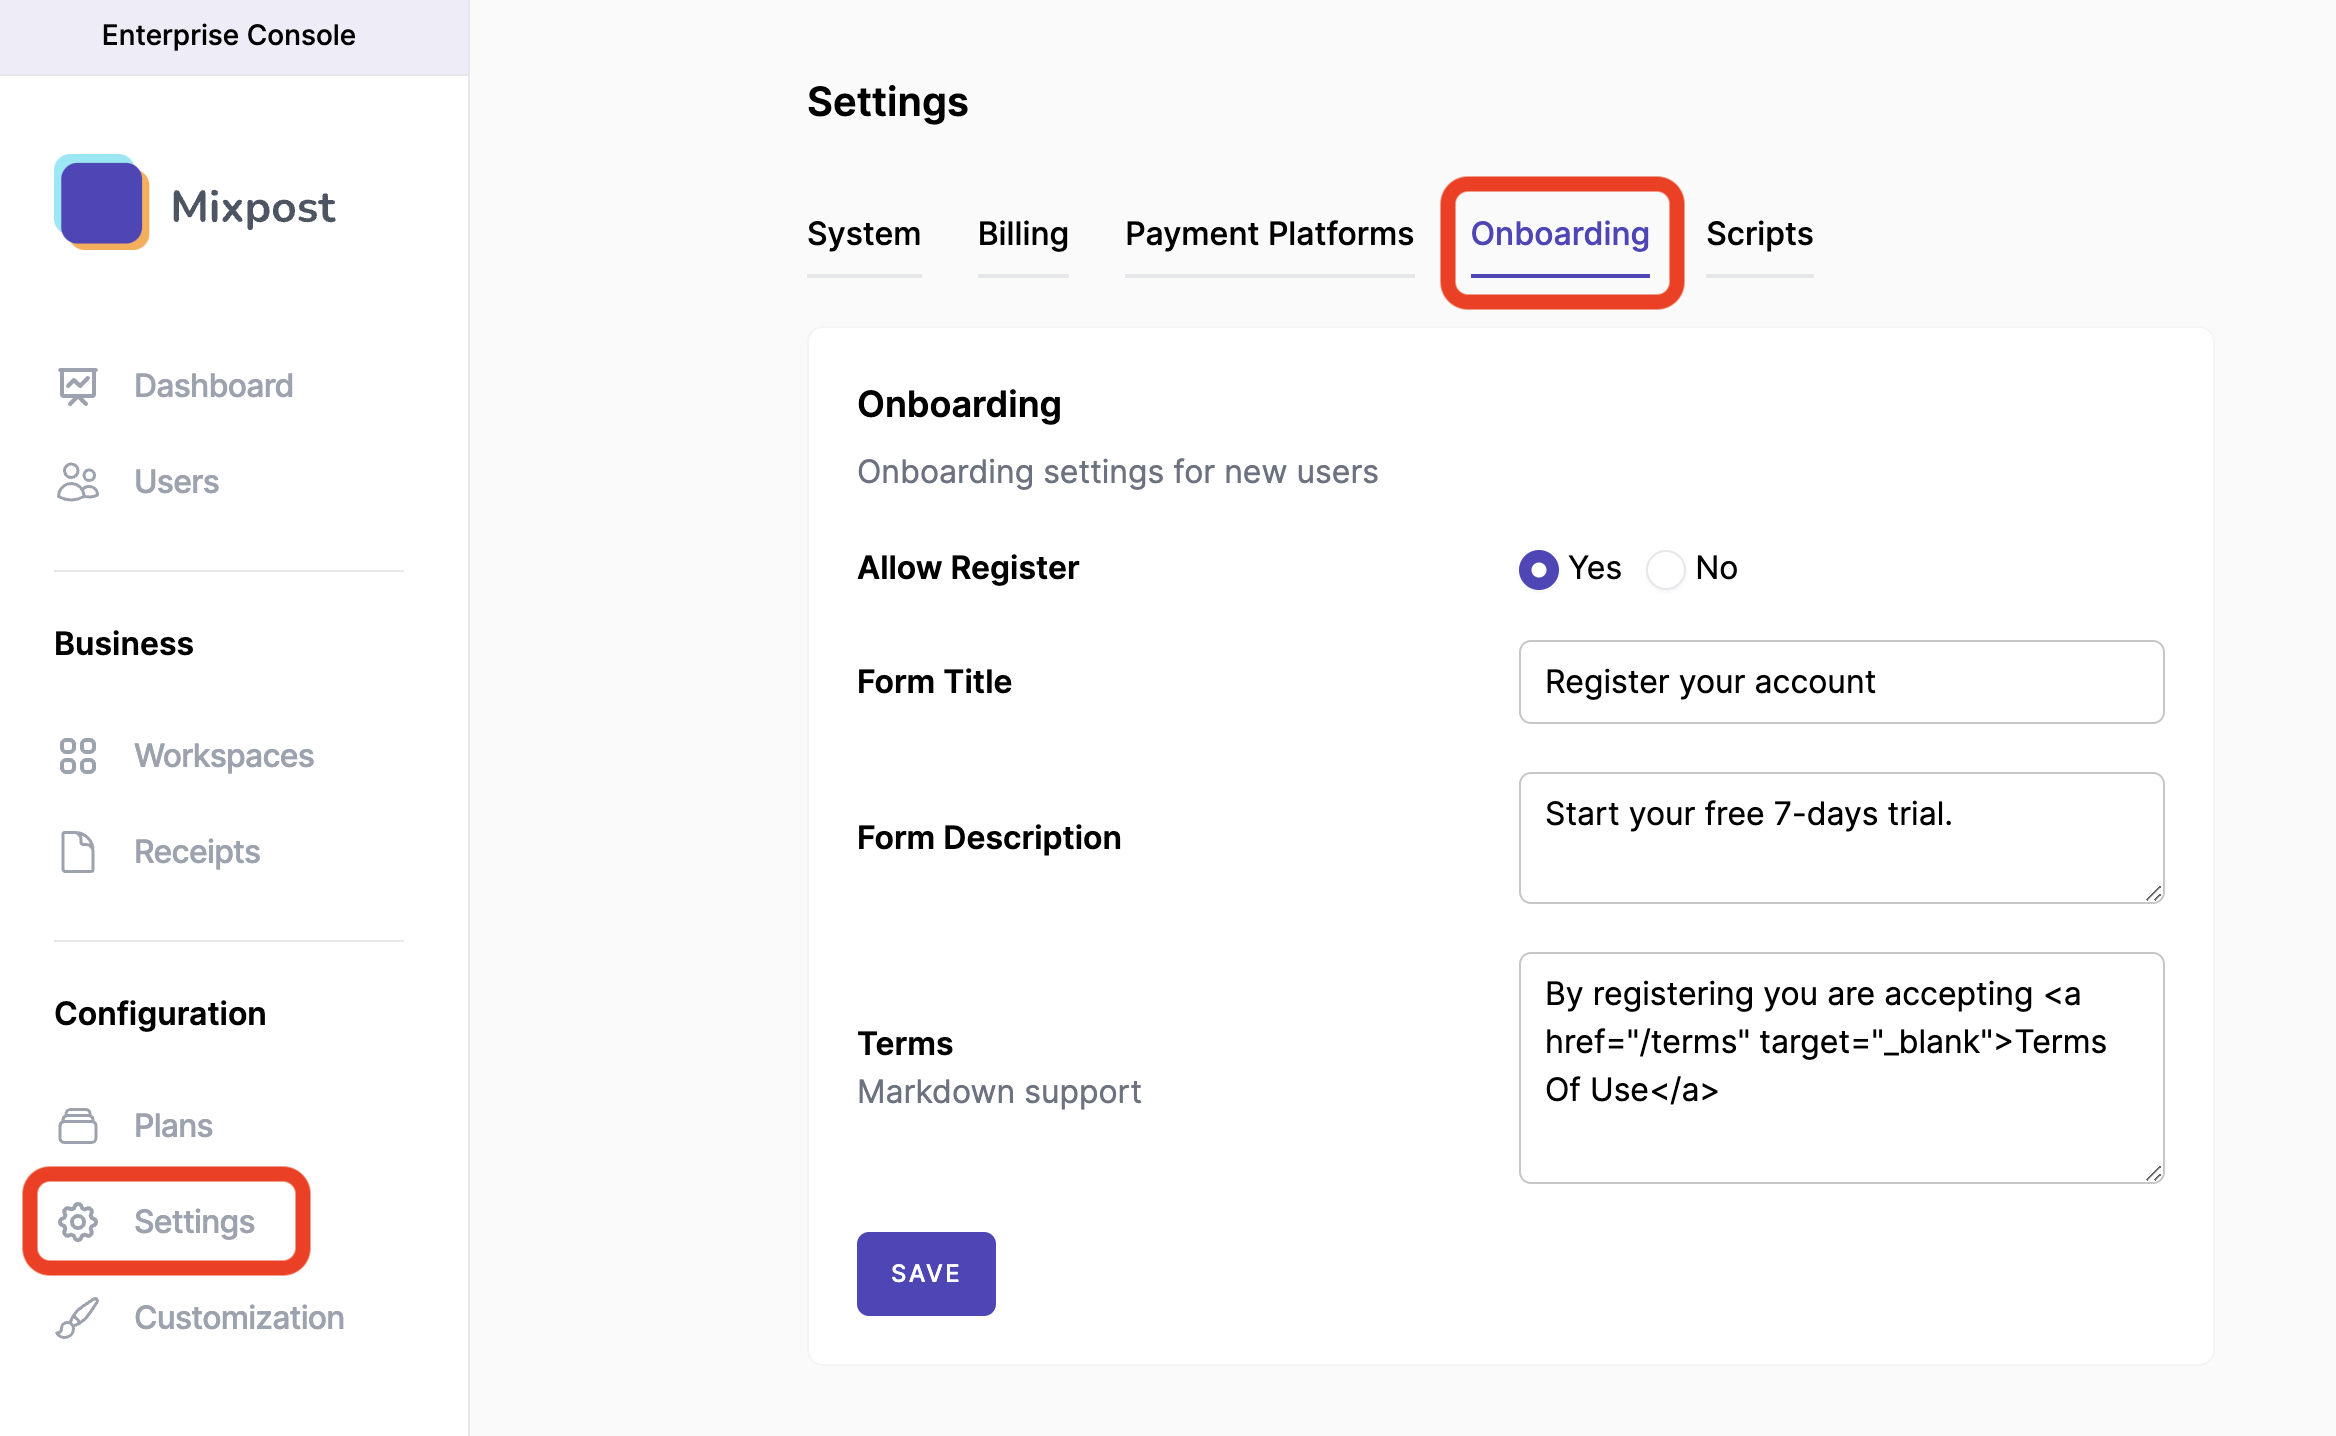
Onboarding Settings
Mixpost Enterprise allows you to configure the register Onboarding process according to the specifics of your business:
- Go to "Enterprise Console" (left-bottom user menu)
- Click on "Settings" (left sidebar)
- Here you will see the "Onboarding" tab item. Click on it.
- Made the changes.
- Save changes by clicking on the "Save" button.
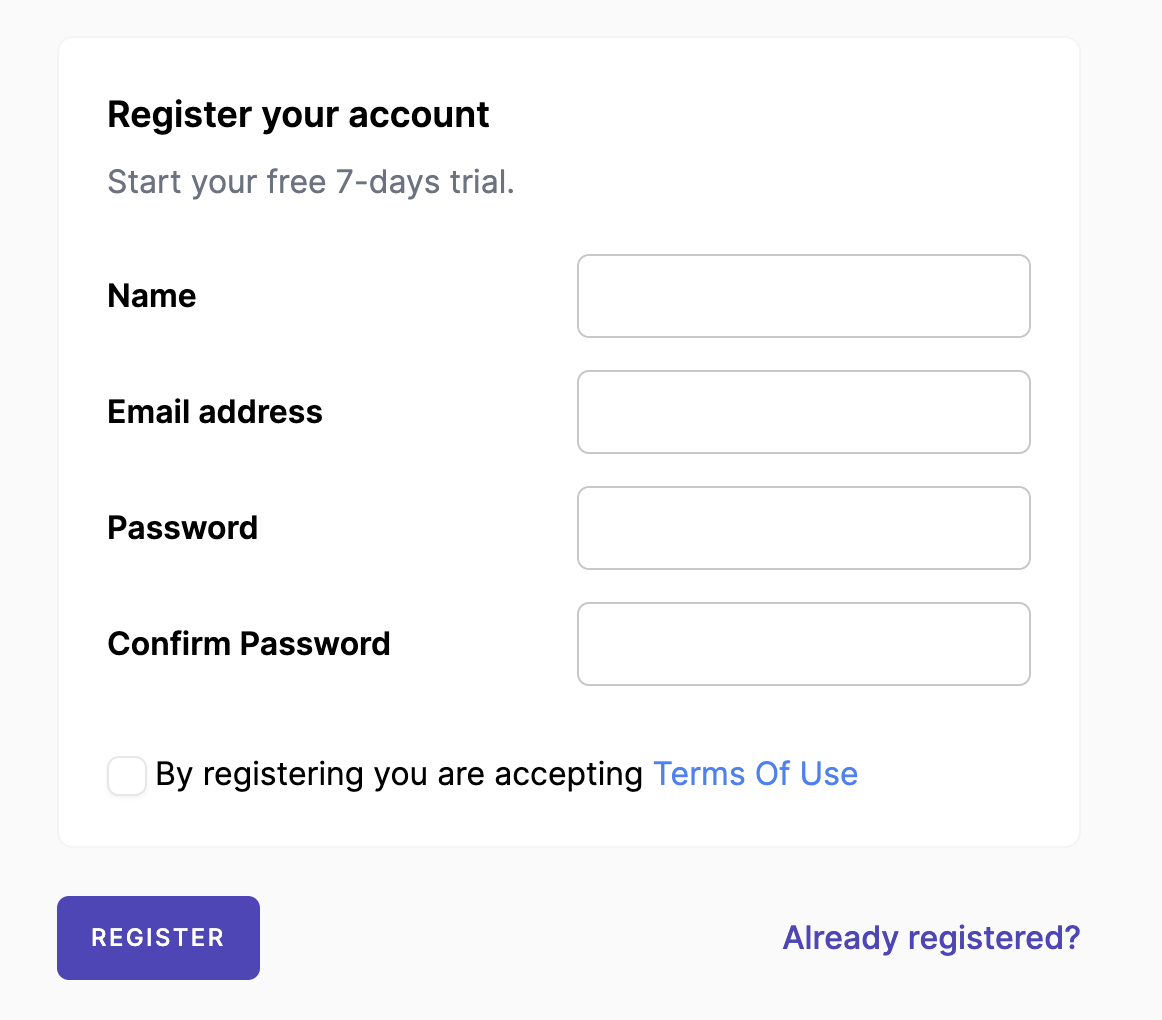
What your customers see when they try to register:
Allow Register
Default: "Yes"
You can disable registration for new users by checking "No". Save changes by clicking on the "Save" button.
Form Title
Default: "Register your account"
Form Description
Default: "Start your free 7-day trial."
Terms
Default: "By registering you are accepting <a href="/terms" target="_blank">Terms Of Use</a>"
Change the Terms of Use page URL from "href=".
Html or Markdown support.
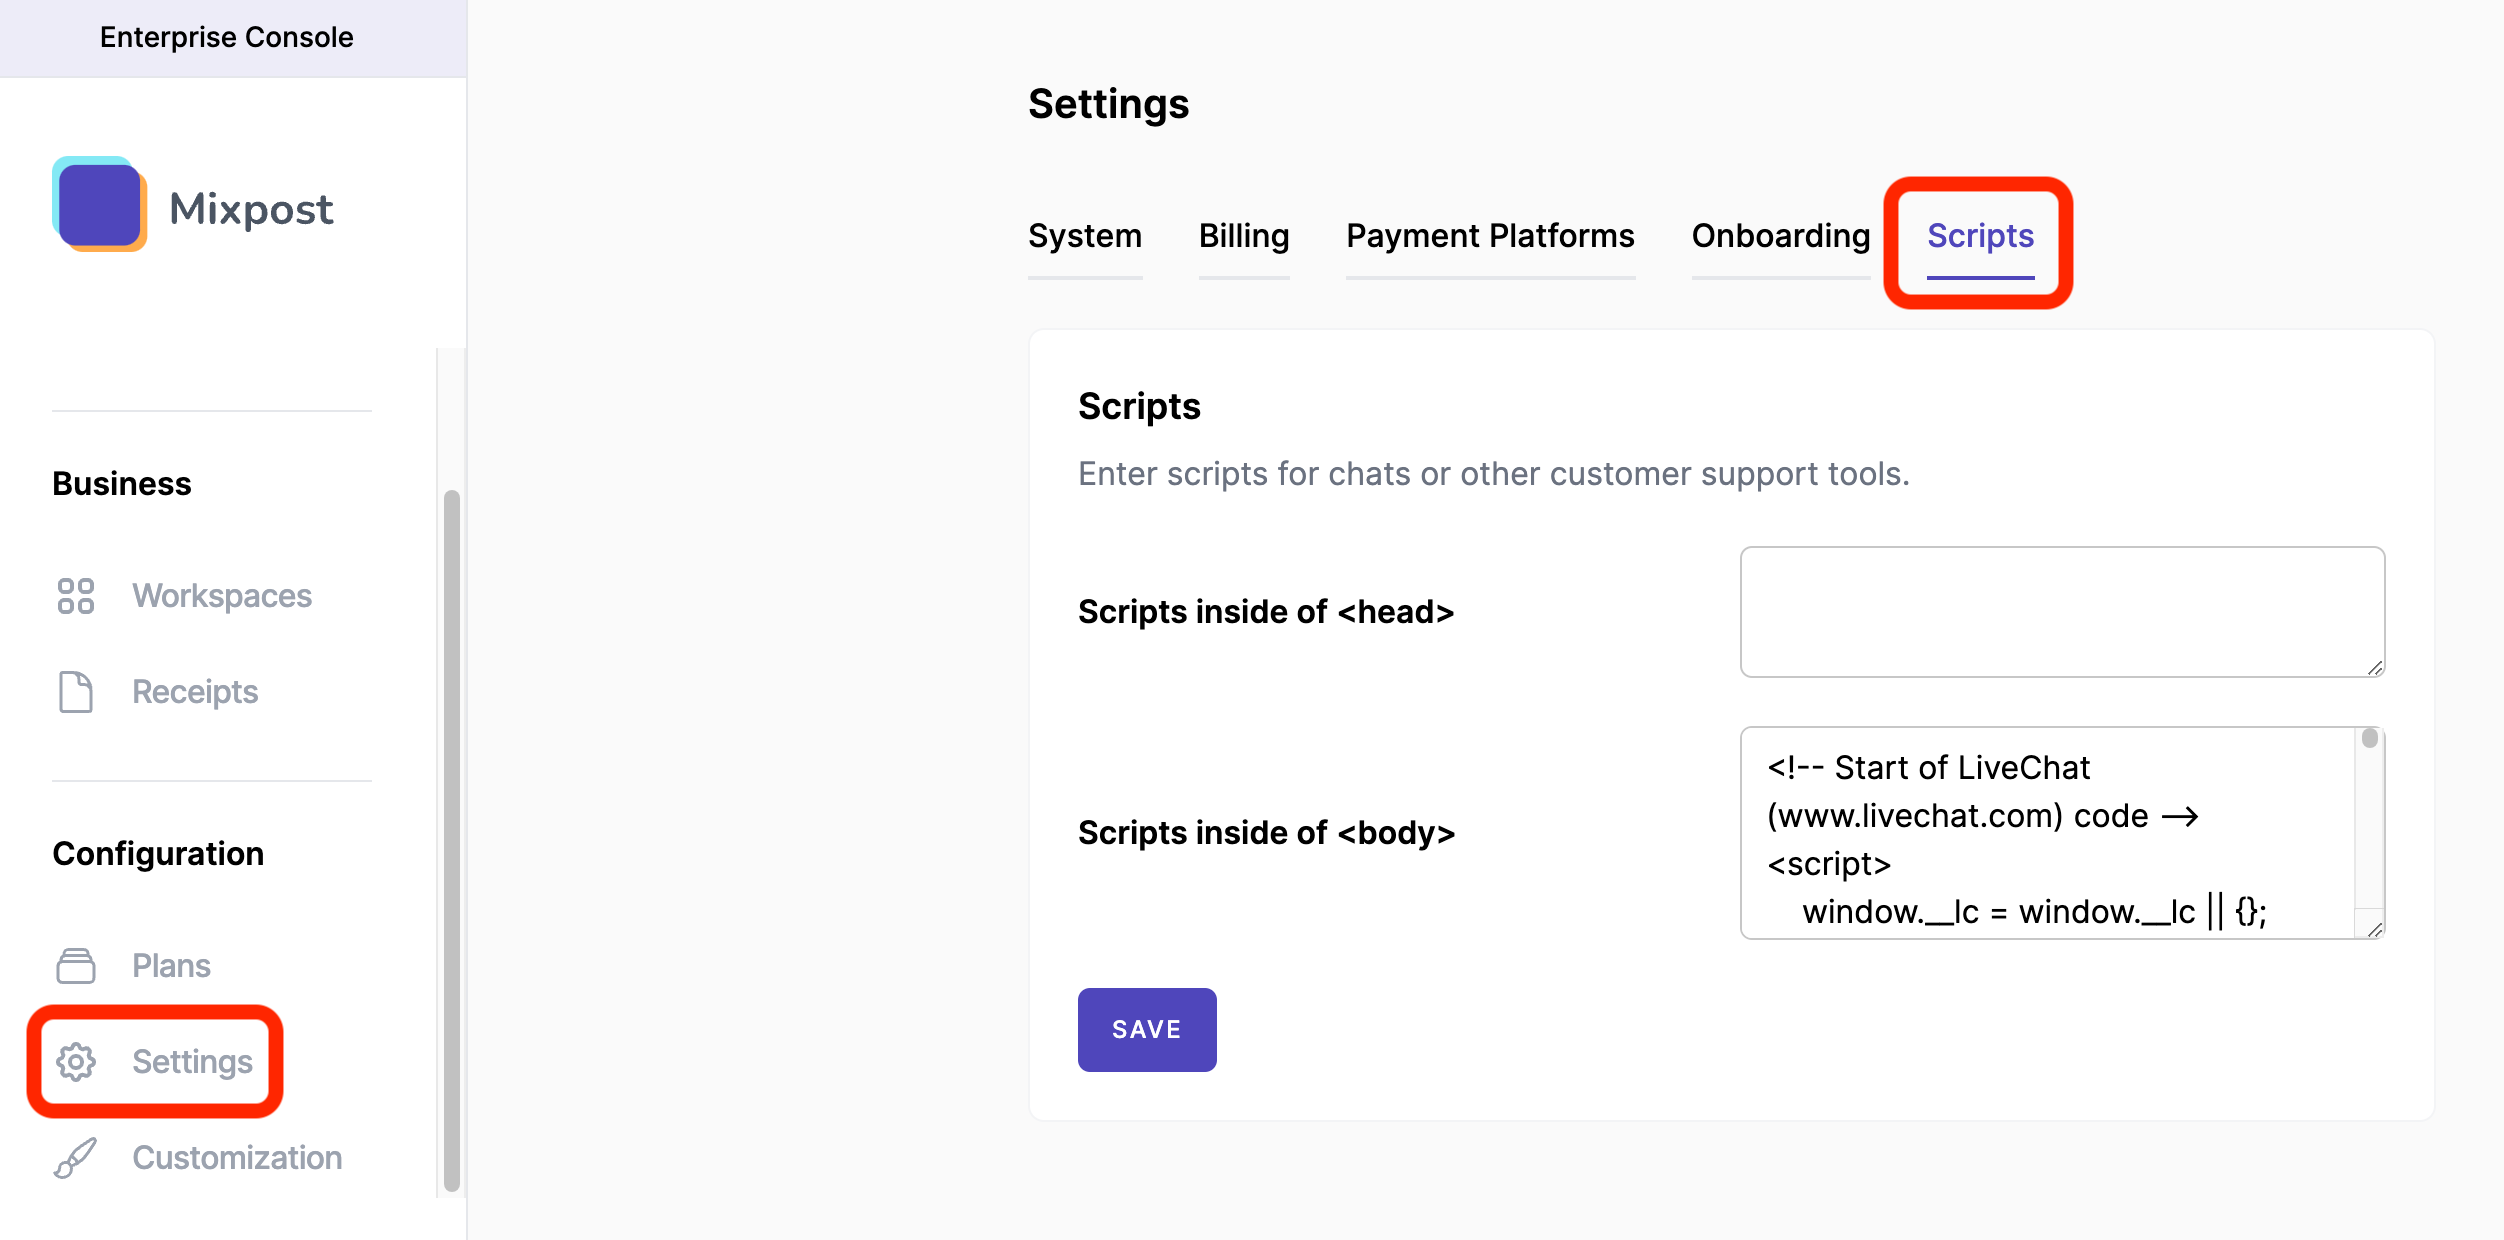
Scripts Settings
In SaaS, it is normal to have a live chat for support, and there are many online solutions like this. The integration is very simple, it is necessary to place the "JS" or "HTML" script offered by these tools.
The live chat tools we recommend:
Mixpost Enterprise allows you to easily insert"JS" or "HTML" scripts.
- Go to "Enterprise Console" (left-bottom user menu)
- Click on "Settings" (left sidebar)
- Here you will see the "Scripts" tab item. Click on it.
- Made the changes.
- Save changes by clicking on the "Save" button.
Integrate with Sentry - Error Reporting
Sentry is a popular error and application performance monitoring platform that can be easily integrated into your Mixpost Enterprise instance to help you identify and fix performance issues quickly. With Sentry, you can capture errors, crashes, and performance problems that occur within your application and receive alerts to take immediate action.
1. Sign up for a Sentry Account
If you haven't already, head to Sentry's website and sign up for an account.
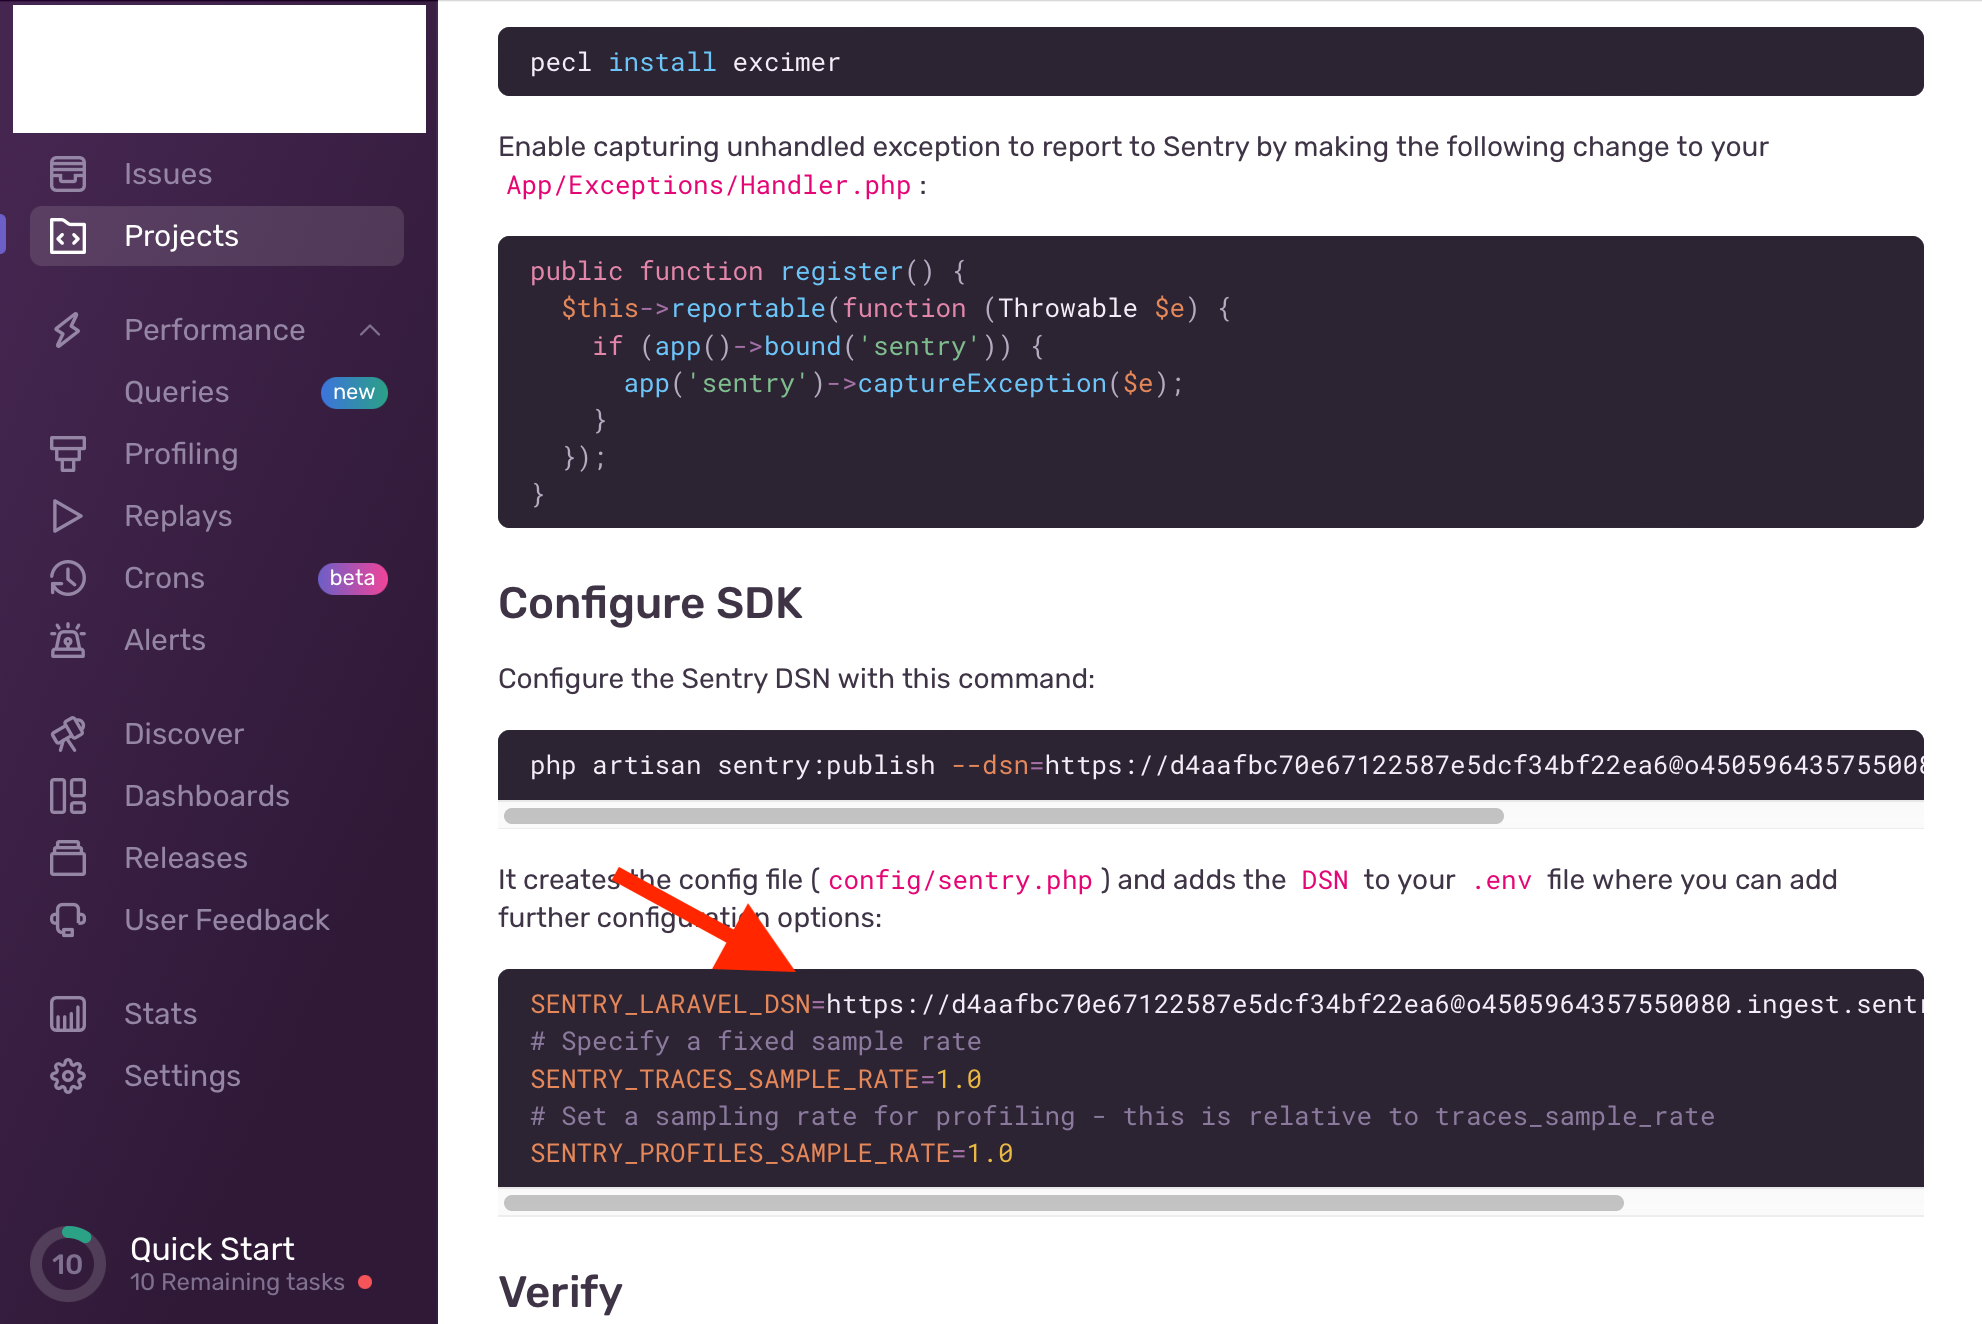
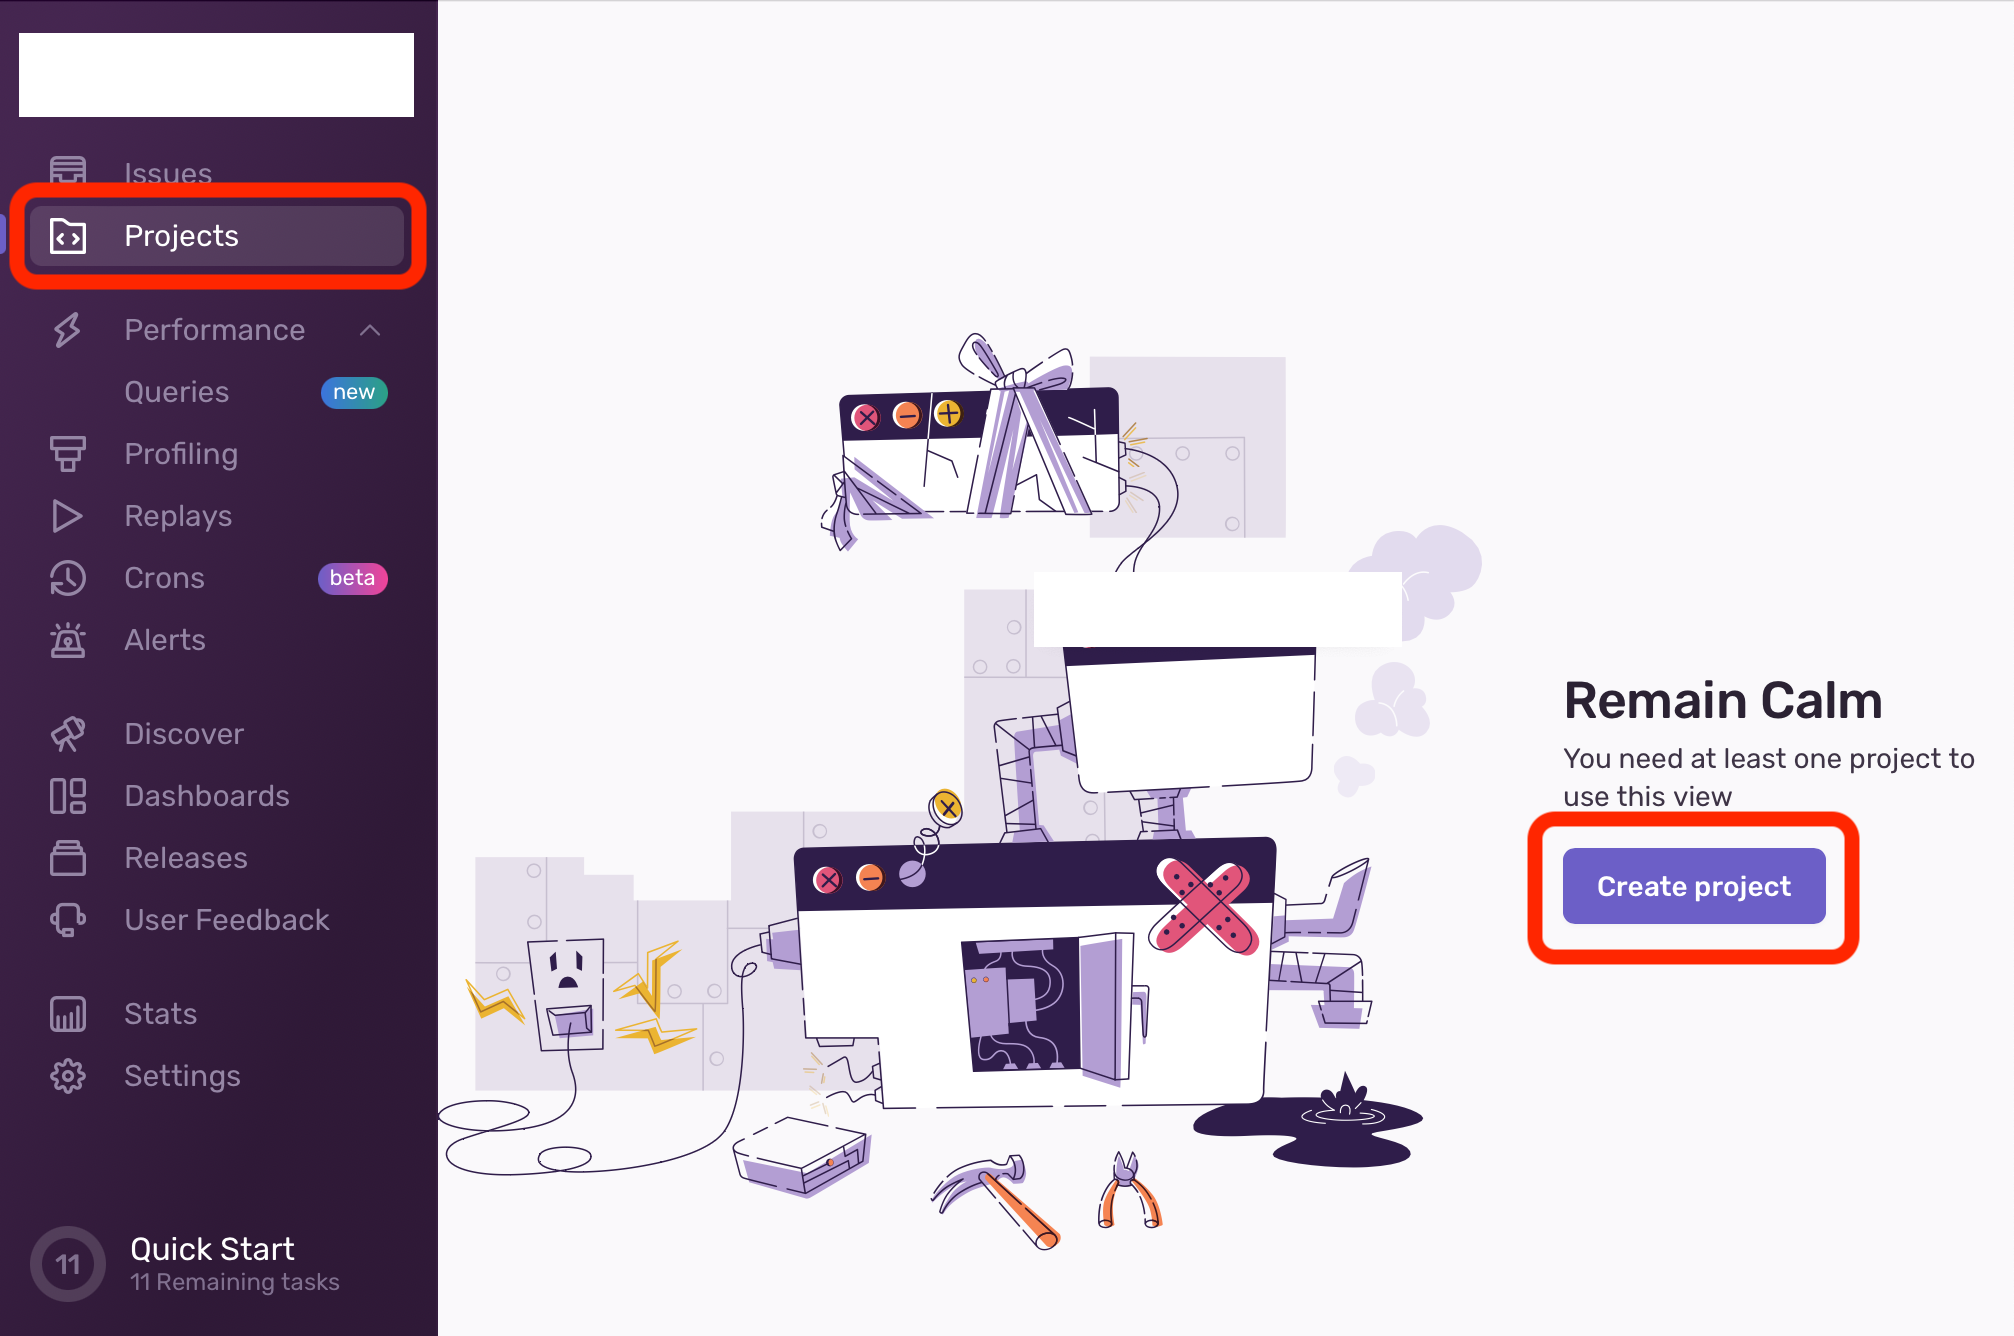
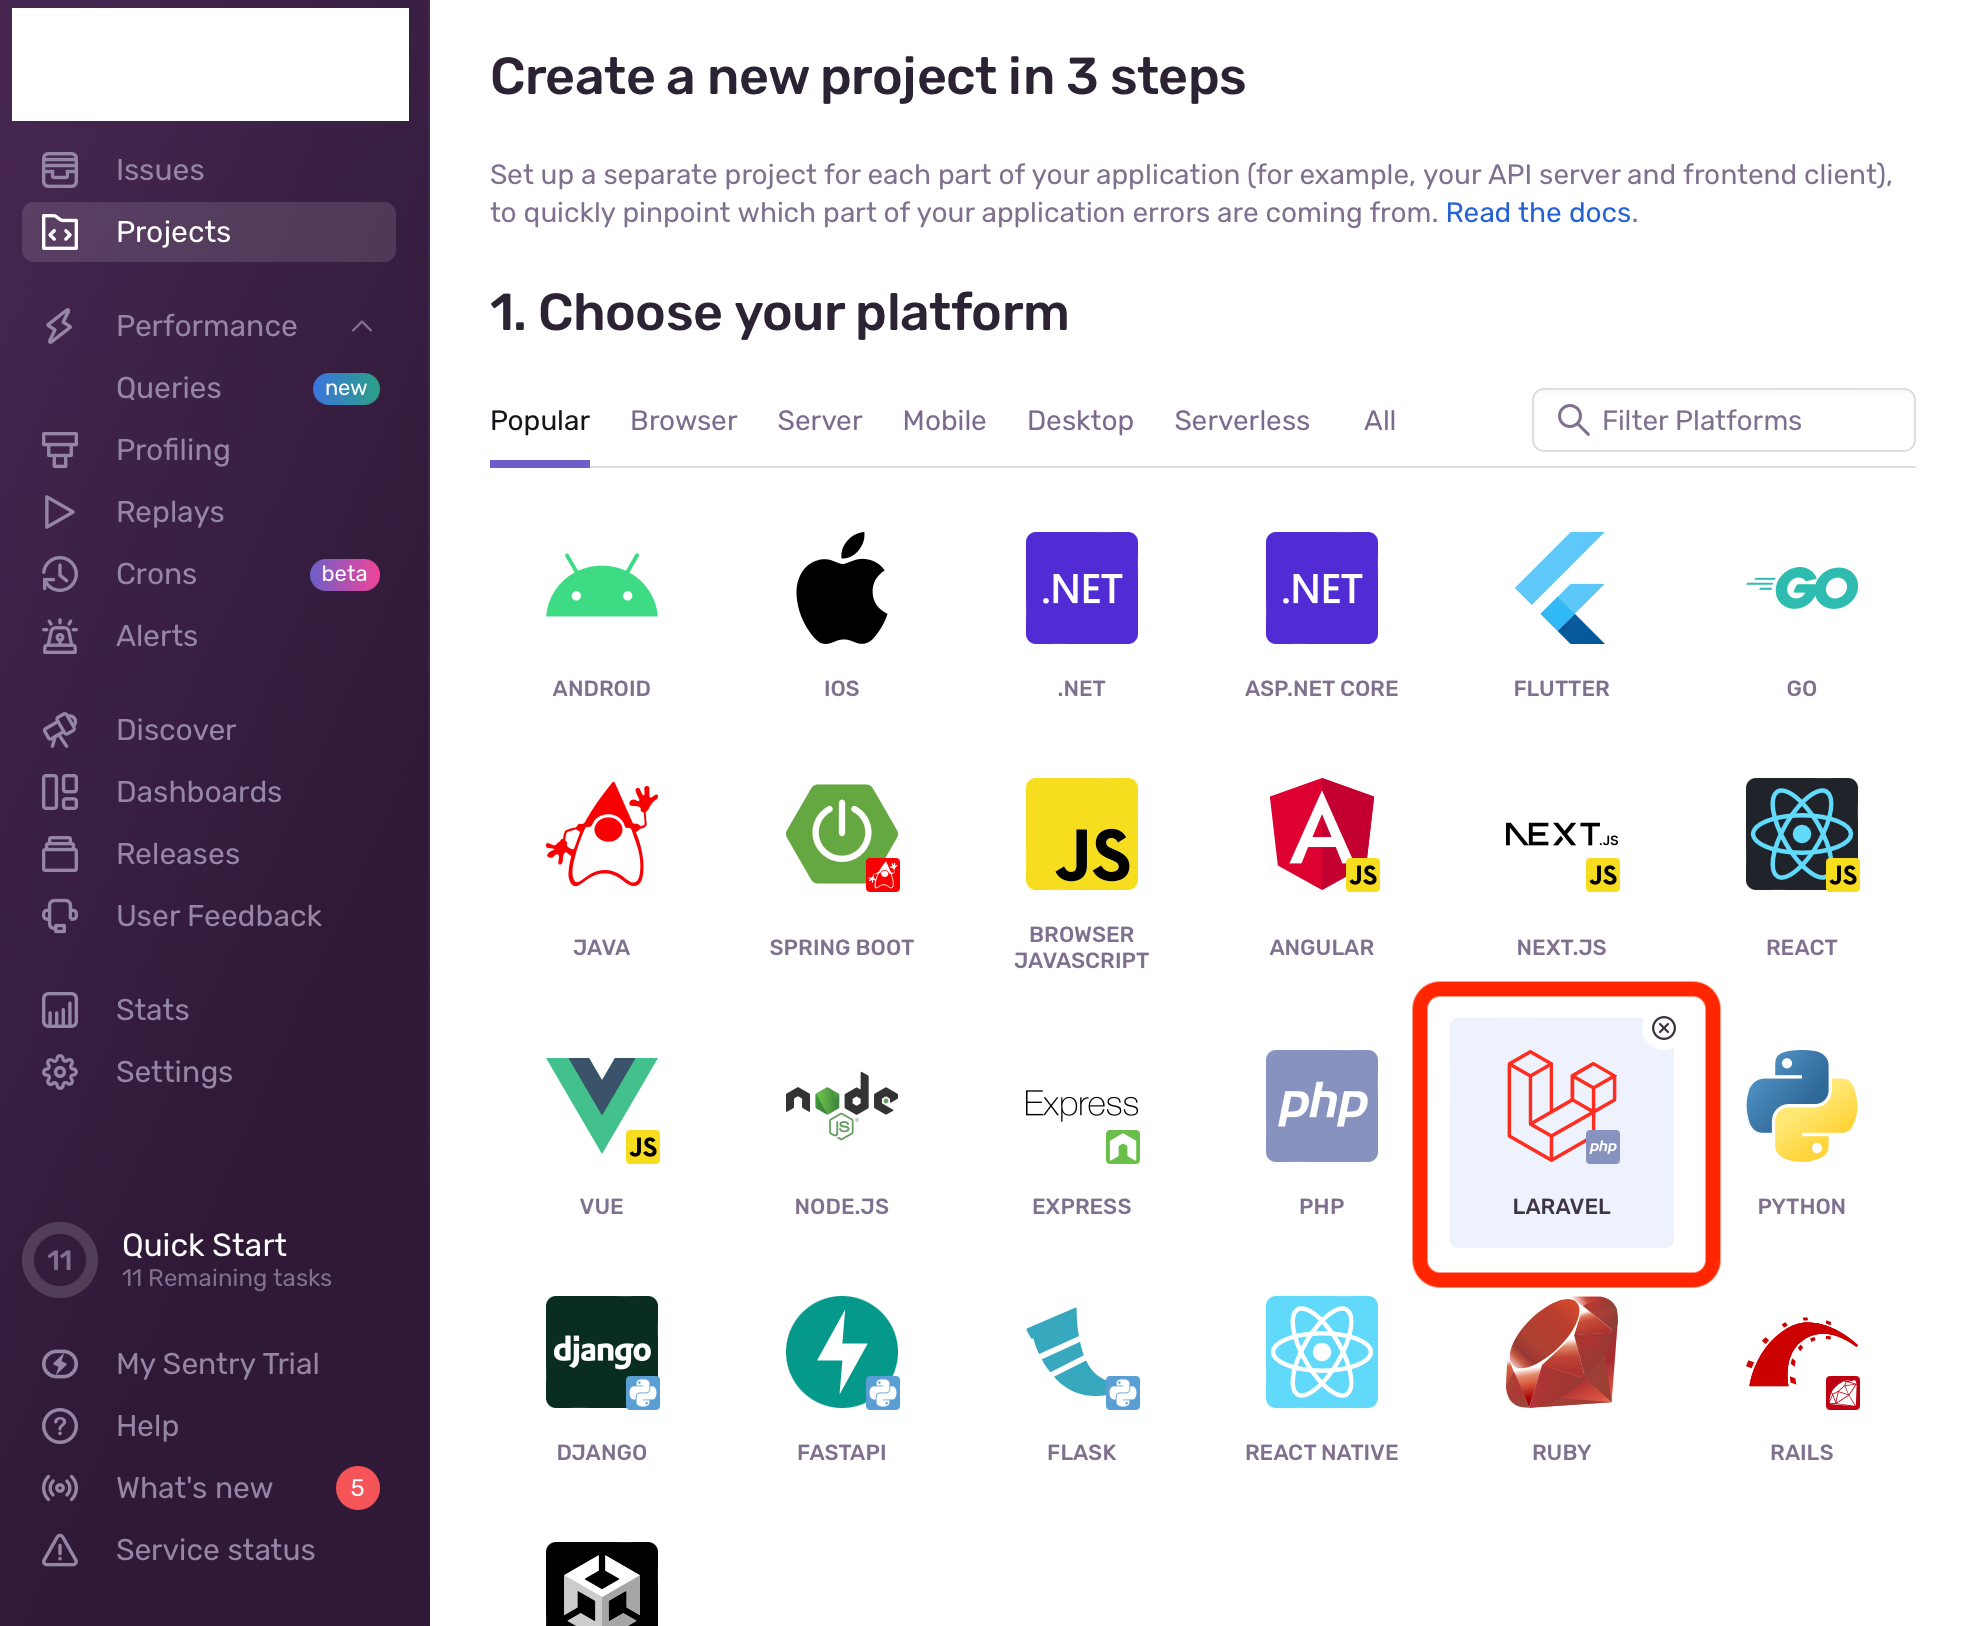
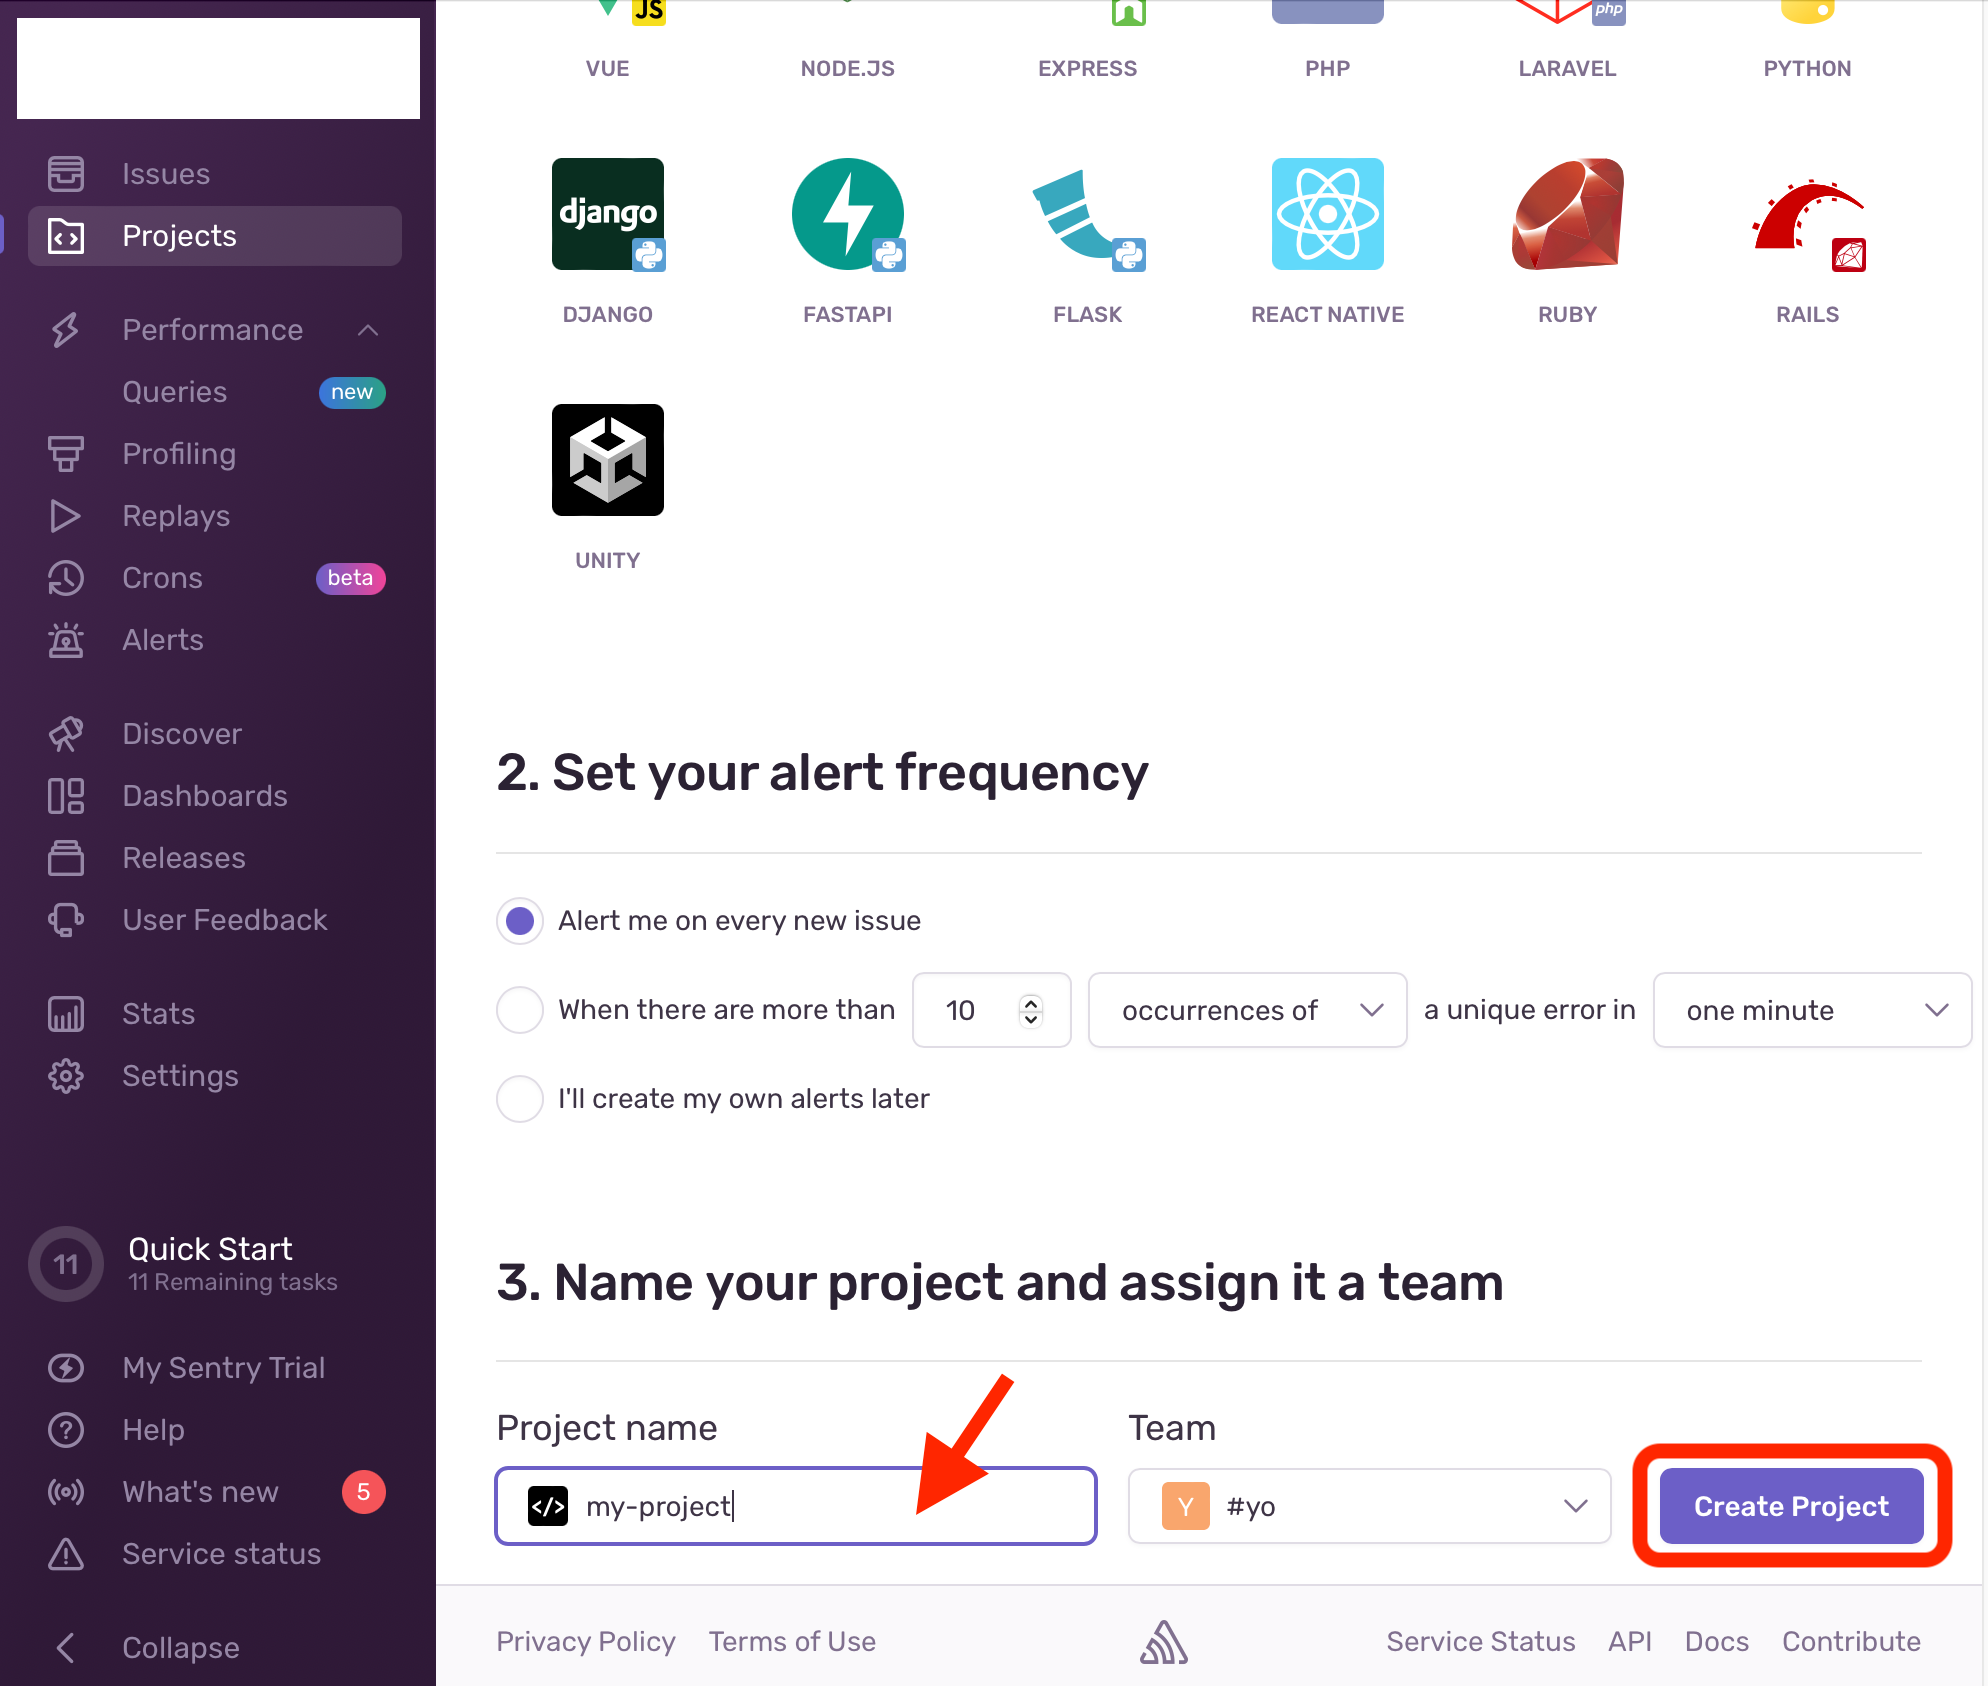
2. Create Project

3. Get Your DSN
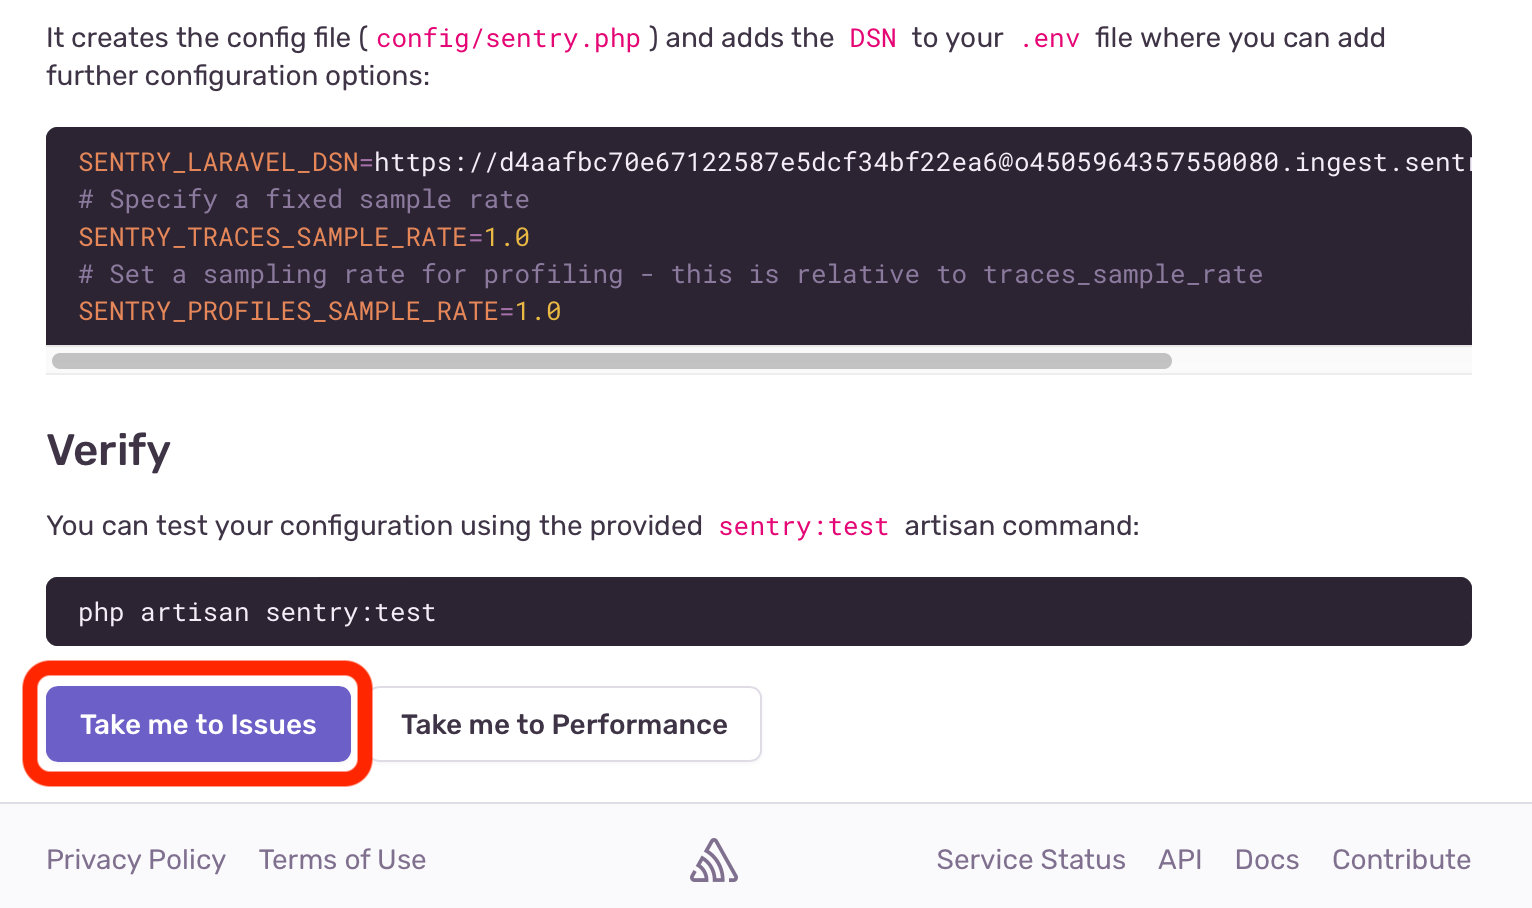
There you can copy the DSN and insert it into your environment list:
- SENTRY_LARAVEL_DSN=your-sentry-dsn